Few things show off a 3D printer’s worth like a well-organised workshop. The best 3D printed storage ideas aren’t trinkets — they’re custom tool holders, cable clips, spool mounts and drawer dividers that fit your space exactly, cost a few dollars in filament, and solve problems no shop-bought product quite nails. Organisation is also one of the smartest first projects for a new printer owner: the parts are forgiving, mostly functional rather than cosmetic, and you use them daily. This guide runs through the most useful printable storage projects by area — workshop, desk, filament, wall systems and drawers — plus honest PLA versus PETG advice and the print settings that make load-bearing parts genuinely strong.
Workshop Storage: Tool Holders, Bit Organisers and Caliper Mounts
The workshop is where 3D printed storage earns its keep fastest. Start with the tools you reach for constantly — hex keys, screwdrivers, pliers — and print dedicated holders that mount to your bench, pegboard or wall. Unlike generic shop-bought racks, a printed holder can be sized to your exact tools: the caliper mount that grips your specific digital caliper, the chuck-key holder shaped for your drill press, the bit organiser with holes spaced for your 50-piece set rather than someone’s imagined “standard” set.
Screw and fastener organisation is the other big win. Small parts bins with printed dividers, stackable component trays, and labelled compartments for M3/M4/M5 bolts turn the classic “jar of mixed screws” chaos into something searchable. Emboss labels into the plastic — embossed text never peels off. For the bench, consider a drill-bit index, a deburring tool holster that clips to the bench edge, and a filament swatch rack so you stop guessing which grey is which.
Workshop parts live a harder life than desk parts: knocks, loads, dust, the odd splash of cutting fluid. This is firmly PETG territory for anything structural — and print tool holders with extra walls rather than extra infill, since walls contribute far more to real-world strength.
Desk Storage: Cable Clips, Headphone Stands and SD Card Holders
Your desk suits smaller, quicker prints. Cable management alone can absorb a weekend: clips routing charger cables along the desk edge, under-desk trays hiding the power-board spaghetti, and clips holding USB ends so they stop sliding behind the furniture. Match the filament to your desk colour and they look factory-made.
Headphone stands are the classic desk print for good reason — they’re simple, they show off a nice filament, and a wobbly shop-bought stand costs more than the filament for a printed one. Look for designs with a wide, weighted-feeling base (or a base you can fill with printed infill at 100% — heavy is good here). SD and microSD card holders are another small gem for anyone with cameras, drones or a Raspberry Pi habit: tiny printed cases with labelled slots beat a loose pile of cards in a drawer, and they’re a great first “tolerance” print since the slots need to grip without crushing.
Desk accessories are also where finish quality matters most, because you look at them all day. PLA is ideal here — it prints crisply, comes in every colour imaginable, and desk items rarely face heat or heavy loads. If you want a display-worthy finish on a stand or organiser, our guide to smoothing PLA prints walks through sanding, filler primer and painting for a professional look.
Honeycomb wall panels are among the most popular 3D printed storage ideas for workshops right now.
Filament Storage: Dry Boxes, Spool Holders and Desiccant Holders
Here’s storage with a direct payoff in print quality. Most filaments — especially PETG, nylon and carbon fibre blends — absorb moisture, and wet filament prints with stringing, blobs and weak layers. A good storage setup is among the highest-value 3D printed storage ideas you can tackle: the printer literally prints the thing that improves its future prints.
Sealed dry boxes
The gold standard is a sealed dry box: an airtight container fitted with printed extras — a spool axle or rollers so the spool spins freely, a PTFE tube coupler in the lid so filament feeds straight to the printer without opening the box, and a hygrometer mount. Countless proven designs on Printables and Thingiverse fit common tub sizes. Print rollers and couplers in PETG; the box does the sealing, the printed parts do the mechanics.
Spool holders and desiccant holders
Even without a dry box, printed spool holders beat the stock arm on most budget printers — wider rollers, smoother bearings, less extruder drag. Desiccant holders are the unsung heroes: vented canisters holding rechargeable silica gel inside your tubs. Add a cheap digital hygrometer and you’ve got proper filament management for under twenty dollars.
Wall-Mounted 3D Printed Storage Ideas: Honeycomb Walls, Pegboards and French Cleats
When bench space runs out, the walls are next — and this is where 3D printing genuinely outshines anything you can buy. The honeycomb storage wall (popularised by the open-source HSW system) is a tiled hexagonal grid you print in sections; every holder, shelf and bin clips in with a twist-lock. Rearrange the whole wall in minutes without new holes, and print new attachments as your tool collection grows. Start with a small panel over your bench — a full wall eats a lot of filament.
For a lighter touch, printed pegboard hooks upgrade a standard pegboard far beyond its wire hooks: custom cradles, secure bins, shelf brackets sized to your boards. The classic alternative is the French cleat system — angled wall strips mating with matching strips on holders, so everything lifts off and rehangs in seconds. Strong, endlessly reconfigurable, cheap.
Mount wall systems properly: printed holders are only as strong as what they’re attached to, so use wall anchors or screw into studs for heavy tools. Print wall-mounted parts in PETG with plenty of walls — a drill falling off at 2am is a lesson best learned theoretically.
Drawer Organisers: Gridfinity and Custom Dividers
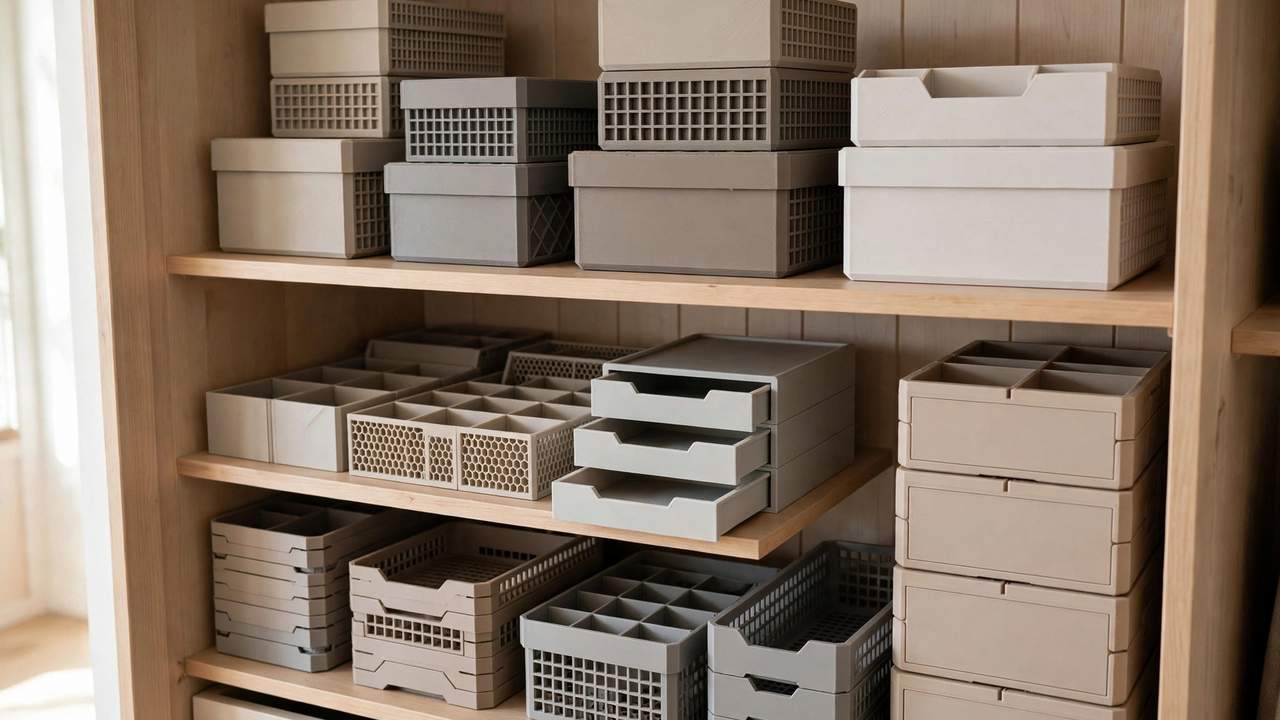
Drawers are where small items go to disappear, and printed organisers are the fix. The standout system here is Gridfinity — an open-source modular bin system where every bin is a multiple of a 42mm grid unit, so bins tile perfectly into any drawer and can be rearranged at will. Print a baseplate grid for the drawer, then print bins in whatever sizes your contents need: tiny 1×1 bins for nozzle packs and grub screws, long 1×4 bins for hex keys, deep bins for multimeters. Add printed labels and suddenly your “junk drawer” becomes a parts library.
Beyond Gridfinity, custom dividers are worth the CAD effort for odd-shaped drawers — measure once in Tinkercad or Fusion, print interlocking dividers, and everything gets a home. For the electronics bench, compartmentalised bins keep resistors, capacitors and JST connectors sorted and visible. Drawer organisers are also the perfect use for that half-spool in a colour you’d never pick for a display piece.
Garage organisation counts too
If your workshop spills into the garage, the same thinking applies at larger scale — printed brackets, hose hooks, and labelled bins for automotive bits. We’ve covered the automotive side in more depth in our guide to 3D printed car parts, which includes garage organisation ideas alongside functional vehicle components.
Material Choice for 3D Printed Storage Ideas: PLA vs PETG
Material choice makes or breaks functional storage prints. Here’s the practical rule most experienced makers land on:
- PLA — for desk organisers, drawer bins, cable clips, display pieces and anything decorative. It’s the easiest filament to print, holds crisp details and sharp corners, comes in endless colours, and is plenty strong for light-duty use. Its weaknesses: it softens around 55–60°C (so keep PLA parts out of hot cars and away from heaters) and it’s more brittle than PETG — it tends to snap rather than bend under overload.
- PETG — for workshop tool holders, wall-mounted parts, dry-box components, spool rollers and anything that bears weight or lives in a warm environment. Prusa’s own documentation recommends PETG as the starting point for functional engineering parts, noting its toughness, heat resistance and ease of printing. It’s more flexible and impact-resistant than PLA, survives higher temperatures, and handles outdoor or garage use far better. The trade-offs: it’s stringier, needs slightly higher temperatures (around 230–250°C nozzle, 70–90°C bed), and doesn’t bridge or overhang quite as cleanly as PLA.
For a deeper dive into what each material can and can’t do, Prusa’s 3D printing materials overview is a solid manufacturer reference — including their guidance that PETG is the right first choice when a part needs to be genuinely functional rather than just look good.
ASA or ABS? Tougher and more heat-resistant, but they need an enclosure and ventilation away from living spaces — overkill for most storage. Save exotics for parts that truly need them.
Print Settings That Make Storage Parts Stronger
Functional storage parts fail in predictable ways — layer separation under load, cracked mounting holes, sagging shelves — and a few slicer tweaks prevent most of it:
- Walls before infill. For strength, increase perimeters (4–6 walls) rather than cranking infill to 80%. Most of a part’s real-world strength lives in its outer walls; infill beyond 30–40% adds weight and time for diminishing returns. For a heavy tool holder, 5 walls and 30% infill beats 2 walls and 80% infill every time.
- Orient for the load. Parts are weakest between layers, so orient the print so that the main forces pull along the layers, not across them. A wall hook should be printed lying flat so the layers run along the hook’s length — print it upright and it’ll snap at the layer lines the first time you hang something heavy.
- Use enough top and bottom layers. Six top and bottom layers give mounting surfaces and shelves real solidity. Skimp here and screws pull through.
- Slow down for PETG. PETG rewards patience: moderate speeds, good cooling on small features, and a slightly higher temperature for strong layer bonds. Stringing can be tamed with tuned retraction rather than low temperatures that weaken the part.
- Design in fillets and gussets. Sharp internal corners concentrate stress. Even a small fillet where a hook meets its backplate dramatically improves strength — many good storage models already include these.
Where to Find Models: Printables and Thingiverse
You don’t need to design everything from scratch. Printables and Thingiverse host millions of free storage models, and community curation — makes, remixes, comments — is genuinely useful. Search for the specific thing you own (“caliper holder”, “SD card case”) rather than browsing; someone has almost certainly modelled your exact problem. Favour models with real-print photos and fit confirmations, and check the licence before selling prints. When nothing fits, learn basic CAD — a weekend of Tinkercad or Fusion tutorials pays for itself the first time you design a holder for your tool and your wall.
Frequently Asked Questions
Is PLA or PETG better for 3D printed storage?
It depends on the job. PLA is better for desk organisers, drawer bins and decorative pieces — it prints beautifully and holds detail. PETG is better for workshop tool holders, wall-mounted parts and anything load-bearing or exposed to warmth, because it’s tougher, more flexible and more heat-resistant. When in doubt for a functional part, choose PETG.
How strong are 3D printed tool holders really?
Strong enough for real workshop use, provided they’re printed sensibly: 4–6 walls, 30–40% infill, correct orientation so loads run along the layers, and PETG for anything structural. A well-printed PETG holder will comfortably carry hand tools, drills and battery packs. What they won’t do is replace steel for genuinely heavy or safety-critical loads — use common sense.
What is a honeycomb storage wall?
It’s a modular wall storage system made of interlocking hexagonal tiles you 3D print yourself. Tool holders, shelves, bins and spool mounts clip into the hexagons with a twist-lock fitting, so you can rearrange your whole wall without tools or new holes. The open-source HSW (Honeycomb Storage Wall) system is the most popular version, with thousands of compatible attachments on Printables.
How do I keep my filament dry with printed storage?
Print the accessories for a sealed dry box: spool rollers or an axle for an airtight tub, a PTFE coupler for the lid so filament feeds directly to the printer, vented desiccant holders filled with rechargeable silica gel, and a hygrometer mount. Keep the box sealed and the humidity below about 20%, and recharge the desiccant when the indicator changes colour.
Where can I find free 3D printed storage models?
Printables and Thingiverse are the two biggest free repositories, with millions of models including entire storage ecosystems like Gridfinity drawer bins and the Honeycomb Storage Wall. Search for your specific item rather than browsing, favour models with real-print photos and positive comments, and check the licence before selling any prints.
What infill should I use for functional storage prints?
For most storage parts, 20–40% infill is plenty — strength comes primarily from wall count, so use 4–6 perimeters instead of cranking infill higher. Use 6+ top and bottom layers for shelves and mounting surfaces. Only go above 50% infill for small parts under concentrated load, like hooks and cleat brackets.