
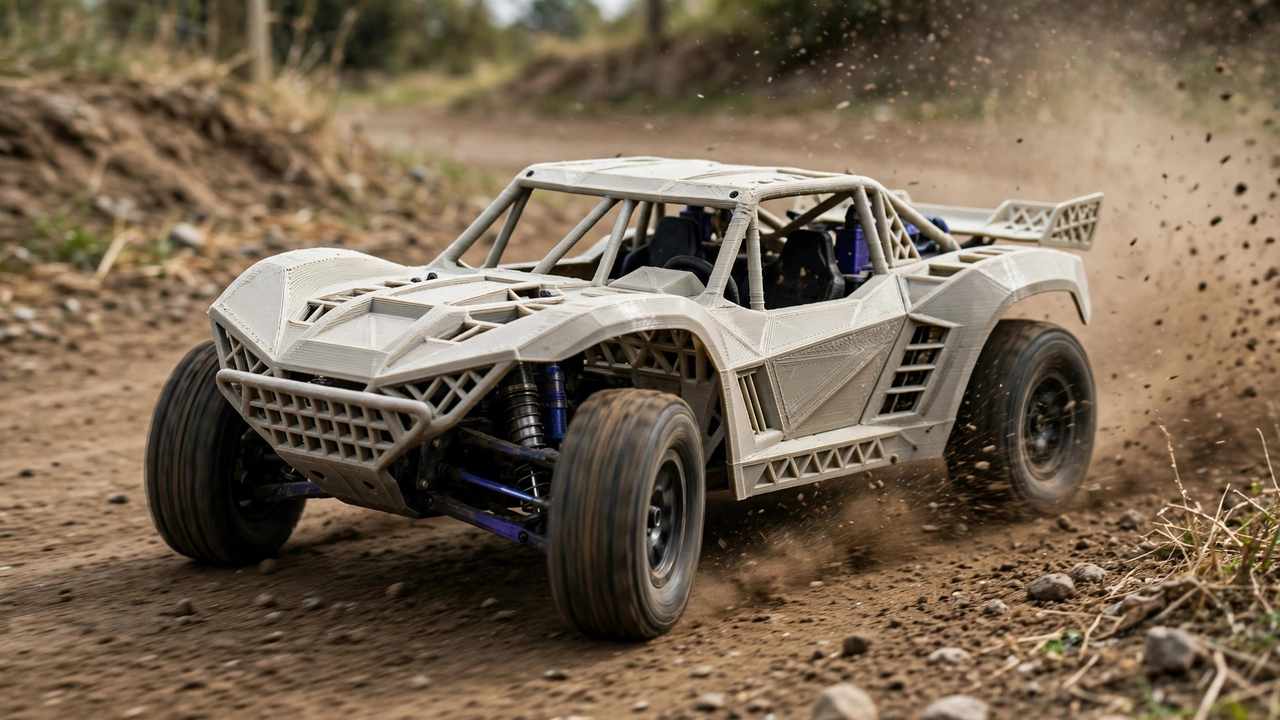
Every RC driver knows the sound: a bad landing, a sharp crack, and your bash session is over because a $15 suspension arm snapped and the spare is a week away by post. 3D printing RC car parts flips that equation — with the right filament, you can print a replacement arm, body mount or custom bumper in a few hours, often for less than a dollar in plastic, and be back at the track the same day.
This guide covers the whole picture for Australian RC hobbyists: why 3D printing and RC are such a natural fit, which parts print well (and which ones don’t), the filaments that actually survive a crash, what your printer needs to handle them, where to find models, and a real workflow for going from a broken part to a printed replacement.
Why RC and 3D Printing Fit Together So Well
RC cars are, almost by accident, the perfect application for a home 3D printer. What breaks? Suspension arms, shock towers, body mounts, bumpers, servo mounts, gear covers, wing mounts — small, geometrically simple plastic parts, exactly what an FDM printer does best. They’re also the parts manufacturers charge a premium for and that take longest to ship, especially to Australia, where a niche Traxxas or Arrma part can spend two weeks in transit from overseas.
There’s a second, subtler fit. RC is a tinkering hobby — drivers already shim diffs, tune shock oil and gear motors for different tracks. Printing your own parts is the same instinct extended one step further: instead of waiting for the aftermarket to sell you a stiffer wing mount, you design one yourself, print it in the evening, and test it on Saturday. The iteration loop that used to take weeks now takes hours.
And the economics are genuinely good. A 1 kg spool of quality PETG costs around $30–40 AUD from Australian suppliers — and a suspension arm might use 15–25 grams. Even allowing for the occasional failed print, your per-part cost is measured in cents, and that’s before counting the sessions saved by same-day spares.
Which Parts You Can Print (and Which You Shouldn’t)
Not everything on an RC car belongs on a print bed. Here’s an honest breakdown:
- Suspension arms — the classic. A-arms print well in PETG or nylon, and they’re the part most likely to break. Print a few spares for your pit box.
- Body mounts, shock towers and wing mounts — flat-ish, chunky parts that suit 3D printing perfectly. Easy wins.
- Bumpers and skid plates — TPU bumpers are a genuine upgrade in many cases; they flex and absorb hits instead of cracking.
- Gear covers, servo mounts, ESC trays and fan shrouds — low-stress parts where print orientation barely matters.
- Custom bodies and scale accessories — light bars, roof racks, driver figures, mirrors. This is where printing shines creatively.
- Spur gears — printable in nylon with care, but advanced territory. Layer lines and gears are natural enemies; expect to iterate.
And the don’ts: tyres (TPU “tyres” exist as novelties, but they don’t grip or wear like real rubber — buy tyres), metal drivetrain parts like pinions and dogbones, bearings, and springs (printed springs fatigue fast). Also be cautious with anything near a hot motor or ESC — PLA softens around 55°C, and an Australian summer will turn a PLA motor mount into modern art. For context on where printed components are already used at full scale, our look at 3D printed car parts in real vehicles shows where the technology is heading.
Best Filaments for 3D Printing RC Car Parts
Filament choice is where most beginners go wrong, because the obvious pick — PLA, the stuff that came with the printer — is the worst option for parts that crash. PLA is stiff and prints beautifully, but it’s brittle (elongation at break of just 3–6%) and softens at around 55°C. An RC part needs to bend, not snap. Here’s what actually works:
- PETG — the default. Tensile strength around 45–55 MPa, elongation at break of 15–25%, and roughly 3–4× the impact resistance of PLA. It bends and absorbs a knock instead of shattering, handles heat to about 70°C, and resists UV and chemicals reasonably well. Prints at 230–250°C with a 70–80°C bed, no enclosure needed. If you’re printing your first RC part, start here.
- ASA — the outdoor upgrade. Similar toughness to ABS but with genuine UV resistance, which matters for parts living in Australian sun. Heat deflection around 95°C. The catch: it needs an enclosure, a 240–260°C nozzle and a 90–110°C bed, and it warps if the chamber isn’t warm and stable.
- Nylon (PA6/PA12) — the tough stuff. The best fatigue resistance of any common filament: it flexes repeatedly without cracking, exactly what suspension arms do. Tensile strength from 45–85 MPa depending on grade. The price is hassle — nylon drinks moisture from the air, so dry it (60–80°C for 8–12 hours) and print from a dry box at 250–280°C with an enclosure.
- TPU (95A) — the flexible specialist. Rubber-like prints that bend, grip and absorb impacts. Perfect for bumpers, skid plates, antenna tubes and protective boots. Print slowly with a direct-drive extruder (Bowden tubes and flexible filament are a recipe for jams), at 220–240°C.
A practical note on brands: the numbers above are typical ranges, and real results vary between manufacturers and even between colours. Buy from reputable suppliers, dry your engineering filaments, and check current pricing — the cheapest spool on the marketplace is rarely the cheapest per successful print. For a refresher on the underlying process, Wikipedia’s overview of fused filament fabrication covers how these thermoplastics behave layer by layer.
3D Printing RC Car Parts: What Your Printer Needs
The good news: you don’t need an exotic machine to start 3D printing RC car parts. The most common RC parts print in PETG, which any decent modern printer handles with zero modifications. A 220 × 220 mm bed covers nearly every RC part short of a full body shell.
The requirements climb with the filament:
- PETG and PLA: any working FDM printer. No enclosure, stock hotend fine.
- TPU: a direct-drive extruder is strongly preferred. Many budget Bowden printers can be converted, but out of the box, direct drive saves you hours of jam-clearing.
- ASA and ABS: an enclosure is effectively mandatory — without one, warping and layer splitting will ruin large parts. A 240–260°C-capable hotend and a bed that holds 90–110°C. This is where enclosed machines earn their keep.
- Nylon and polycarbonate: enclosure, 250–280°C+ hotend, dry-box feeding, and ideally a hardened steel nozzle (especially for carbon-fibre-filled blends, which chew through brass nozzles in a single print).
If you’re still choosing a machine, an enclosed printer is the smart buy for an RC hobbyist — it covers PETG today and ASA/nylon tomorrow without upgrades. Our budget 3D printer guide runs through the current options in Australia. And whatever you print, orientation matters enormously: layer lines are the weak axis, so orient suspension arms flat on the bed so the layers run along the part’s length. Four or more perimeters and 40–60% infill (gyroid or cubic) is a solid starting recipe for bash-proof parts.
Where to Find Models (and When to Design Your Own)
Before you model anything, search — the RC community has been uploading parts for a decade. Printables (Prusa’s model site) and Thingiverse both have deep RC sections: search your model name plus the part (“Arrma Granite bumper”, “Traxxas Slash body mount”) and you’ll often find several options with maker comments about which version actually survives. Pay attention to the comments and makes — a part with forty successful prints and notes about infill settings is worth more than a pretty render with none.
When the part doesn’t exist, you have three paths. The simplest is measuring and remodelling: digital calipers ($20–30 AUD) plus a free CAD tool like Tinkercad (simple brackets) or Fusion (free for hobbyists; steeper curve, far more capable).
The second path is 3D scanning the broken part. Phone-based photogrammetry and affordable scanners have made this genuinely practical for organic shapes like body shells — see our 3D scanning for 3D print guide. Scans need cleanup, but for complex curves, scanning beats measuring every contour by hand.
The third path is the community itself — Australian RC Facebook groups and forums are full of people who’ve already modelled the part you need, so ask before spending a weekend in CAD.
The Real Workflow: Broken Part to Printed Replacement
Here’s how a typical repair actually goes, start to finish:
1. Assess and measure. Pull the broken part — and its mirror-image twin from the other side of the car if you have one, the perfect reference. Measure critical dimensions (hole spacing, thicknesses) with calipers; eyeballing is how you print three wrong versions.
2. Find or make the model. Search Printables and Thingiverse first. If nothing fits, model it — and improve the design while you’re at it. Stock arms break at known weak points; adding material at the stress riser is an upgrade no manufacturer will sell you.
3. Slice with intent. This is where RC parts differ from decorative prints. Use 4–6 perimeters (walls carry the load), 40–60% infill, and orient the part so forces run along the layers. For a suspension arm, that means flat on the bed. Print a touch hotter than usual for maximum layer adhesion — strength lives in the bond between layers.
4. Test fit, then test hard. Check every hole and mounting point before the car goes near dirt. Then actually bash it — a part that survives three battery packs of your normal driving is proven. If it breaks, look at how: delamination means hotter printing or a different orientation; a clean snap across a thin section means the design needs more material there.
5. Iterate and stock up. Once a design is proven, print three or four and keep them in your pit box. The whole point of this exercise is never missing a session over a $15 part again — a printed spares kit is the RC equivalent of carrying a spare tyre.
The Aussie RC Angle
A few things are specific to doing this in Australia. First, the tyranny of distance is real: OEM spares for less common brands can take weeks to arrive, and postage on a $12 part often costs more than the part. Printing your own spares isn’t just convenient here — it’s the difference between driving this weekend or next month.
Second, our sun is brutal on plastics. Parts that live outdoors — bodies, wings, chassis components — should be ASA or UV-stable PETG at minimum, never PLA. A PLA wing mount left on a car in a Queensland summer will creep and deform even without a crash.
Third, the community is strong and local. RC clubs run in every capital city and most large regional centres, and club Facebook groups are goldmines for model files tuned to the exact cars people race locally. Filament is easy to source domestically too — several Australian suppliers stock PETG, ASA and nylon with local shipping.
Finally, check your club’s rules before race day. Most bashing is unrestricted, but some racing classes limit modifications or require stock parts in certain categories. A printed wing mount is fine at the local bash spot; it might not be legal in a sanctioned stock class. When in doubt, ask the race director.
Frequently Asked Questions
What is the best filament for 3D printing RC car parts?
PETG is the best starting point — roughly 3–4× the impact resistance of PLA, heat tolerance to about 70°C, and easy printing without an enclosure. Use ASA for sun-exposed parts, nylon for maximum toughness, and TPU 95A for bumpers and flexible components.
Can I 3D print a replacement suspension arm?
Yes — suspension arms are among the most commonly printed RC parts. Print them flat on the bed in PETG or nylon with 4–6 perimeters and 40–60% infill, oriented so loads run along the layer lines.
Do I need an enclosed printer for RC parts?
Not to start. PETG and TPU — which cover most RC parts — print fine on an open printer. You only need an enclosure for ASA, ABS or nylon, which need stable chamber heat to avoid warping.
Where can I find 3D models of RC car parts?
Printables and Thingiverse both have large RC sections — search your car model plus the part name, favouring designs with successful makes and comments. Otherwise remodel with calipers and free CAD, or 3D scan the broken part.
Are 3D printed RC parts as strong as stock parts?
They can be close, and sometimes better — a well-oriented PETG or nylon part with thick walls rivals injection-moulded stock, and you can reinforce weak points the manufacturer didn’t. But layer lines are always the weak axis, so orientation and settings matter enormously. For tyres, metal drivetrain components and bearings, always buy the real thing.