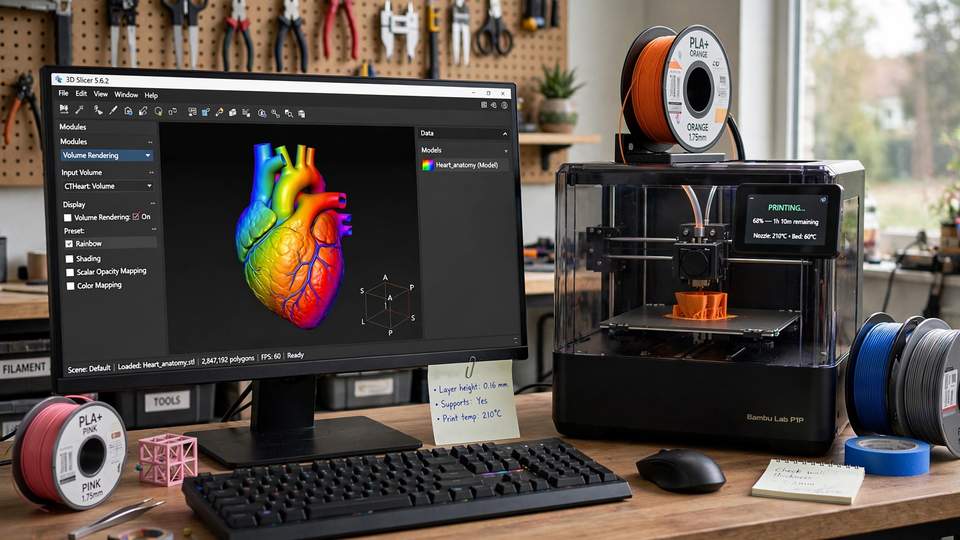
Your printer is only half the equation. The best 3d slicer software for your setup determines how good your prints look, how often they fail, and how much time you spend fiddling with settings versus actually making things. A slicer takes your 3D model (usually an STL or 3MF file) and converts it into the layer-by-layer instructions — G-code — that your printer follows. Same model, same printer, different slicer: noticeably different results.
The good news: the three leading slicers are all free and open source. There’s no paid tier, no subscription, no regional pricing — it’s purely a question of fit. This guide compares UltiMaker Cura, PrusaSlicer, and OrcaSlicer honestly: what each one does well, where each falls short, and which one you should install first depending on your printer and experience level. We’ll also cover Bambu Studio, explain the key settings you’ll actually touch, and point you to the official download pages so you don’t end up with a dodgy repackaged installer.
Best 3D Slicer Software: Quick Comparison
If you just want the answer, here it is in table form. The detail follows below.
| UltiMaker Cura | PrusaSlicer | OrcaSlicer | |
|---|---|---|---|
| Developer | UltiMaker | Prusa Research | Community (SoftFever fork lineage) |
| Current stable (Oct 2026) | 5.13.0 (5.14 in beta) | 2.9.6 | 2.4.2 |
| Cost | Free, open source | Free, open source | Free, open source |
| Beginner friendliness | Excellent — Recommended mode hides complexity | Good — Simple/Advanced/Expert tiers | Moderate — assumes some knowledge |
| Printer support | Huge — hundreds of built-in profiles | Broad — strong on Prusa, good third-party | Broad — excellent for Bambu + Klipper machines |
| Standout strength | Easiest start; massive profile library | Best organic supports; paint-on tools | Built-in calibration; granular control |
| Weakness | Slower slicing on complex models; heavier app | Interface less polished; fewer Bambu-specific features | Steeper learning curve; community-driven docs |
| Best for | Beginners, any printer brand | Prusa owners, detail-focused makers | Tinkerers, Klipper users, Bambu owners wanting more control |
UltiMaker Cura: The Beginner’s Default
Cura is the slicer most beginners meet first, and for good reason. Developed by UltiMaker (the company behind the Ultimaker printers), it’s the most widely used slicer in the hobby, which means the largest library of built-in printer profiles, the most YouTube tutorials, and the best chance that someone online has already solved whatever problem you’re hitting.
What Cura does well
- Recommended mode: pick your printer, pick a quality preset (Draft, Normal, Fine), hit slice. A complete beginner can produce a decent print within minutes of installing it. Custom mode is there when you’re ready for the other 300+ settings.
- Printer profile library: hundreds of machines ship with tuned profiles, including Creality, Elegoo, Anycubic and most other budget brands. If you bought a mainstream printer, Cura almost certainly has a profile for it.
- Marketplace plugins: community and professional plugins add features like improved calibration shapes, custom supports, and CAD file import (STEP/STP and IGES work offline in recent versions).
- Active development: the current stable release is 5.13.0 (June 2026), with 5.14 in beta as of October 2026 bringing features like paint-on seam placement, faster boot times, and native Windows-on-ARM builds.
Where Cura frustrates
Cura is a heavyweight application — startup is slow, and slicing very complex models can take noticeably longer than its rivals. The interface, while friendly in Recommended mode, becomes a sprawling wall of settings in Custom mode with minimal guidance on what actually matters. And while it supports Bambu Lab printers via community profiles, it’s clearly not the native choice for them.
Download it from: ultimaker.com — grab the latest stable release (5.13.0 at time of writing), not the beta, unless you enjoy living dangerously. Always download slicers from the developer’s own site; third-party download portals sometimes bundle junk with the installer.
PrusaSlicer: The Precision Instrument
PrusaSlicer comes from Prusa Research, the Czech company behind the legendary Prusa i3 printers. It started life as a rebuild of the open-source Slic3r project and has grown into one of the most capable slicers available — and it works with far more than just Prusa machines.
What PrusaSlicer does well
- Organic (tree) supports: PrusaSlicer’s organic supports branch out like a tree to hold up overhangs, using far less material than traditional supports and leaving cleaner surfaces. For models with complex overhangs, this alone is worth switching for.
- Paint-on tools: paint seam placement, support blockers/enforcers, and multi-material regions directly onto your model with a brush. Intuitive and genuinely useful once you try it.
- Variable layer height: use fine layers on curved detailed areas and thick layers on straight sections, all in one print — the best quality-to-time trade-off of any slicer feature.
- Simple/Advanced/Expert modes: the interface grows with you instead of drowning you on day one.
- Resin support: unlike Cura, PrusaSlicer handles MSLA resin printers too, so it’s a one-stop shop if you run both technologies.
The current stable is 2.9.6 (June 2026), with PrusaSlicer 3.0 in public preview bringing proper multi-bed project management. Version 2.9 added multiple beds and scarf seams, and the whole 2.9 line has been a steady refinement of an already mature tool.
Where PrusaSlicer frustrates
The interface is functional rather than beautiful, and some workflows feel clunky compared to Cura’s polish. Printer profile coverage for non-Prusa machines is good but not Cura-level — you may need to import or tweak a community profile for less common printers. Bambu Lab owners should note that Bambu Studio (below) is the more natural fit for their machines.
Download it from: prusa3d.com/prusaslicer — free, with Windows, Mac and Linux builds. Prusa warns explicitly against sites that charge for it or ask for a licence key; the real thing is always free.
OrcaSlicer: The Tinkerer’s Power Tool
OrcaSlicer is the community-driven slicer that grew out of the Bambu Studio codebase (which itself forked PrusaSlicer), blended with ideas from SuperSlicer. It’s the choice of makers who want deep control without giving up modern conveniences — and it’s become the default recommendation for Klipper-based printers.
What OrcaSlicer does well
- Built-in calibration tools: flow rate, pressure advance, retraction, temperature towers and input shaping tests are integrated directly into the slicer. No more hunting down calibration models on Printables — dial in each new filament spool in minutes.
- Granular control: per-feature speeds, accelerations, fan curves for overhang thresholds, and precise wall generation that handles thin features better than most rivals.
- Klipper integration: first-class support — upload directly to Mainsail/Fluidd/Moonraker, with native thumbnails and object exclusion so you can cancel one failed part of a multi-part print mid-job.
- Multi-plate projects: manage complex assemblies across multiple build plates in a single project file.
- Active releases: stable 2.4.2 landed in July 2026 with UI refinements, improved gyroid infill, and Z-contouring for complex surfaces.
Where OrcaSlicer frustrates
OrcaSlicer assumes you know what you’re doing. The settings are powerful but sparsely explained, documentation is community-maintained and uneven, and a beginner opening it for the first time will face a steeper climb than with Cura. It’s also had a faster-moving release cadence, which occasionally means trading stability for features — stick to stable releases, not nightlies, for real prints.
Download it from: orca-slicer.com — free and open source, with Windows, macOS and Linux builds. Check the official site for the current stable version rather than trusting random download mirrors.
What About Bambu Studio?
If you bought a Bambu Lab printer — which our first 3D printer buyer’s guide recommends for most beginners — start with Bambu Studio. It’s Bambu’s own fork of PrusaSlicer, tuned specifically for their machines: one-click network printing, camera monitoring, AMS filament management, and profiles that Just Work with Bambu hardware.
Bambu Studio is genuinely good software, not a locked-down toy. But it’s optimised for the Bambu ecosystem — the moment you add a second printer from another brand, OrcaSlicer becomes the natural graduation path, and your Bambu Studio knowledge transfers almost directly since they share DNA.
The practical rule: Bambu printer → Bambu Studio first, OrcaSlicer when you’re curious. Anything else → Cura first, PrusaSlicer or OrcaSlicer when you outgrow it.
The Key Slicer Settings You’ll Actually Touch
Every slicer exposes hundreds of settings. You’ll regularly touch about six. Here’s what they do, in plain language:
Layer height: the detail dial
Layer height is the thickness of each printed layer, and it’s the single biggest lever on print quality versus print time. Standard 0.2mm layers are the everyday default — good balance for functional parts. Drop to 0.12mm for display pieces with smooth curves; raise to 0.28–0.32mm for fast draft prints where surface finish doesn’t matter. A rough rule: halving layer height roughly doubles print time.
Infill: how solid the inside is
Infill is the internal structure of your print, expressed as a percentage. Here’s the honest truth most guides bury: 15–20% infill is plenty for almost everything. Going to 100% makes parts heavier and slower, not proportionally stronger — strength comes more from wall count than infill percentage. Use 10–15% for decorative items, 20–30% for functional parts, and bump up wall/perimeter counts (3–4 walls) before you touch infill density. Gyroid infill is the modern default worth using: strong in all directions and fast to print.
Supports: scaffolding for overhangs
Printers can’t print in mid-air. Any part of your model hanging at more than about 45–60° needs support structures that you snap or cut off afterwards. This is where slicer choice shows: PrusaSlicer’s organic supports and OrcaSlicer’s tree supports use less material and leave cleaner surfaces than Cura’s traditional grid supports. Whatever slicer you use, learn to orient your model to minimise supports first — five minutes rotating the model beats an hour of support removal.
Three more settings worth knowing
- Print temperature: start with the filament manufacturer’s recommendation (usually printed on the spool). Too cold = weak layer adhesion; too hot = stringing and blobs. When in doubt, print a temperature tower — OrcaSlicer builds these in.
- Retraction: pulls filament back slightly during travel moves to prevent stringy wisps between parts. Direct-drive printers need less retraction (0.5–1mm) than Bowden setups (4–6mm). If your prints look hairy, this is the setting to tune.
- First layer settings: slower first-layer speed and a slightly squished first layer are the foundation of print adhesion. Most failed prints are first-layer failures — get this right and half your problems disappear. Our first layer adhesion fixes guide covers the full troubleshooting process.
Best 3D Slicer Software for Your Setup: Which Should You Install First?
Here’s the decision, stripped of fanboy arguments:
- Complete beginner, any non-Bambu printer: UltiMaker Cura. Recommended mode gets you printing today; the tutorial ecosystem is unmatched.
- Bambu Lab owner: Bambu Studio. It’s made for your machine — use the native tool.
- Prusa owner or detail obsessive: PrusaSlicer. Organic supports and paint-on tools earn their keep fast.
- Klipper printer, or you like tuning: OrcaSlicer. The calibration suite alone justifies it.
- Running a print farm or multiple brands: OrcaSlicer or PrusaSlicer — better multi-printer project management than Cura.
And the secret nobody mentions: you can install all three. They’re free, they coexist peacefully, and many experienced makers keep two or three installed for different jobs. Start with one, add the others when curiosity strikes.
Frequently Asked Questions
Is there a best 3D slicer software for beginners?
UltiMaker Cura, for most beginners. Its Recommended mode hides the complexity and its printer profile library covers nearly every mainstream machine, so you can go from install to first print in minutes. If you own a Bambu Lab printer, use Bambu Studio instead — it’s tailored to your hardware.
Are Cura, PrusaSlicer and OrcaSlicer really free?
Yes — all three are free and open source with no paid tier, subscription or feature paywall. Download them only from the official sites (ultimaker.com, prusa3d.com, orca-slicer.com). Any site charging money, asking for a licence key, or bundling the installer with other software is not legitimate.
Can I use the same slicer for different printer brands?
Absolutely. Cura, PrusaSlicer and OrcaSlicer all support hundreds of printer models across brands. Many makers run one slicer for a Creality machine and a Bambu printer side by side. You can also install multiple slicers and use whichever suits the job — they don’t conflict with each other.
What’s the difference between OrcaSlicer and Bambu Studio?
Bambu Studio is Bambu Lab’s official slicer, forked from PrusaSlicer and optimised for Bambu printers. OrcaSlicer grew from the same codebase but is community-driven, with deeper calibration tools, stronger Klipper integration, and broader third-party printer support. Bambu owners often start with Bambu Studio and graduate to OrcaSlicer for advanced tuning.
Do slicers work on Mac and Linux?
Yes. All three major slicers ship native builds for Windows, macOS and Linux. Cura offers an AppImage and a community Flatpak for Linux; PrusaSlicer’s installers are fully offline-capable; OrcaSlicer covers all three platforms from its official site.
How often should I update my slicer?
Update to new stable releases when they arrive — they bring better profiles, bug fixes and genuinely useful features. Skip beta and nightly builds for everyday printing; they’re for testing, not for the part you need by tomorrow morning. Back up your custom profiles before any major version jump.