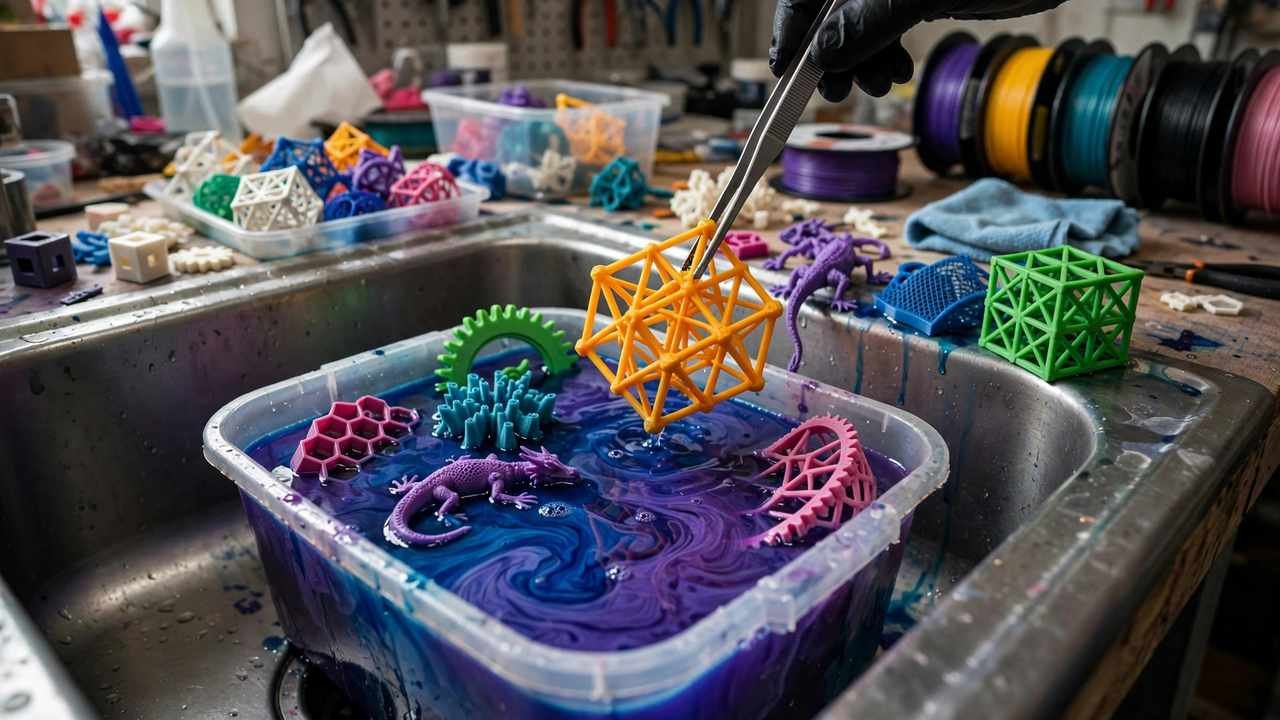
If you’re wondering dye 3D prints so the colour soaks into the plastic instead of sitting on top of it, Rit Dye is the answer most experienced makers reach for. Paint adds thickness, hides fine detail, and chips when the part gets knocked around. Dyeing works the opposite way: the colour penetrates the plastic itself, leaving layer lines, embossed text and fine textures untouched.
For colour charts, see the official Rit Dye website.
This method is particularly popular for nylon prints, which take dye beautifully, but it also works on light-coloured PLA and PETG with the right dye. Below: why dyeing beats paint, which filaments take dye, exact temperatures and times, colour mixing, and the safety steps you shouldn’t skip.
Why Learning dye 3D prints Beats Painting Them
Dyeing and painting solve different problems. Paint sits on the surface of a print, which means it fills in fine details, adds a measurable layer of thickness, and eventually scratches or chips — especially on parts that move, snap together, or get handled a lot. A dyed part has none of those issues because the colour is inside the plastic, not on it.
Dyeing colours the whole part evenly, including inside holes, threads and undercuts that a brush or spray can never reach. Dimensional accuracy is preserved — important for mechanical parts where a tenth of a millimetre of paint would ruin the fit. The colour can’t chip, flake or rub off because there is no coating to fail.
Dyeing also has a trick paint can’t match: it can tint translucent filaments. A clear or natural PETG or nylon part dyed a deep red or blue looks like tinted glass — a finish that would take a professional spray booth to fake with paint.
That said, dyeing has limits. You can only go darker, never lighter — you can’t dye a black part yellow. For multi-colour designs, paint still wins. But for solid, durable, professional-looking colour on functional parts, dyeing is the better technique.
Which Filaments Take Dye (and Which Don’t)
Not all plastics absorb dye equally. The rule of thumb: the more the plastic behaves like a fabric fibre, the better it dyes.
| Filament | Dye uptake | Notes |
|---|---|---|
| Nylon (PA6, PA12) | Excellent | Takes deep, rich colour in minutes; the gold standard for dyeing |
| White/natural PLA | Good | Absorbs dye reasonably well, especially lighter shades; start with white filament |
| Natural/clear PETG | Good | Gives a lovely tinted-glass effect; works best on uncoloured filament |
| ASA | Fair | Takes some colour but resists deep saturation; better painted |
| ABS | Fair to poor | Resists dye; acetone smoothing plus paint usually gives better results |
| TPU/TPE | Fair | Absorbs dye slowly; flexible parts can take patchy colour |
| Dark or black filament | None visible | Dye only darkens — starting dark leaves nowhere to go |
Nylon is the standout. Nylon is chemically similar to the fibres Rit Dye was designed for, so it absorbs colour fast and evenly — a nylon part can go from white to deep black in under ten minutes in a hot bath.
PLA and PETG are the practical middle ground. Print in white or natural (uncoloured) filament for the best results — the dye shows truest on a blank canvas. Clear PETG dyed in a bath comes out looking like coloured glass, which is genuinely beautiful for light pipes, covers and decorative pieces.
Temperature-sensitive filaments need care. PLA softens around 60 °C, which is below the temperature dye baths like to run at. You can still dye PLA, but keep the bath at the lower end of the effective range and don’t leave parts in longer than needed — a warped print is worse than an undyed one. PETG and nylon handle near-boiling water without complaint.
What You’ll Need Before You Start
Gather everything before the water goes on the stove — you don’t want to be hunting for tongs with a part sitting in the bath.
- Rit DyeMore for Synthetics — the liquid bottle, in your chosen colour. DyeMore is formulated for synthetic fibres like nylon and polyester, which makes it the right product for most 3D printing plastics. The standard Rit All-Purpose Dye works on nylon too (with a splash of vinegar, covered below), but DyeMore gives deeper colour on synthetics. A bottle typically costs under $20 from Australian craft stores and online sellers — check current prices before you buy.
- A dedicated stainless steel pot — big enough for your parts to move freely. This pot must never be used for cooking again. Dye is a chemical product, not food-safe, and residues linger. Op shops are the perfect source for a cheap dye pot.
- An instant-read or candy thermometer — temperature control is the single biggest factor in getting even colour, so don’t guess.
- Rubber gloves — dye stains skin for days. This is not optional.
- Stainless steel tongs and a long spoon — for moving parts and constant stirring.
- Dish soap — a drop acts as a surfactant, helping the dye wet the plastic surface evenly.
- White vinegar — needed if you’re dyeing nylon with standard Rit All-Purpose Dye (about a cup per 3 gallons of water); less critical with DyeMore.
- Old towels and newspaper — dye splashes stain permanently. Protect your bench, your floor and your clothes.
dye 3D prints with Rit Dye: The Step-by-Step Method
Step 1: Clean the parts thoroughly
Wash your prints in warm water with dish soap and a soft brush, or wipe them down with isopropyl alcohol. Finger oils, dust and residue from the build plate block dye absorption and leave pale patches. Let the parts dry, then pre-wet them in plain warm water just before dyeing — a pre-wetted part takes dye more evenly.
Step 2: Mix the dye bath
Fill your dedicated pot with enough water to fully submerge the parts with room to move — crowding is the number one cause of streaky, uneven colour. Shake the Rit bottle well and add it to the water. A good starting ratio is about half a bottle of liquid dye per 4 litres of water; more dye for darker colours, less for light tints. Add a drop or two of dish soap and stir well. If you’re using standard Rit All-Purpose Dye on nylon, add your vinegar now.
Step 3: Heat to the right temperature
Put the pot on the stove and bring it up to temperature slowly. Heat is what opens up the polymer so the dye molecules can get in — without enough heat, the dye just sits on the surface and rinses straight off.
- Nylon: 80–85 °C works well; nylon dyes fast and doesn’t need a rolling boil.
- PLA: keep it at 60–70 °C — hot enough to dye, cool enough to avoid softening the part. This is the trickiest filament to dye because the window is narrow.
- PETG: 85–95 °C; PETG handles heat well and takes colour nicely in this range.
Use your thermometer and hold the temperature steady. A gentle simmer is fine; a violent rolling boil knocks parts around and risks warping PLA.
Step 4: Dye the parts
Lower the pre-wetted parts into the bath with tongs, making sure they’re fully submerged and not touching each other or the bottom of the pot. Stir slowly and constantly for the first ten minutes — this is when most unevenness happens, as still spots in the bath dye darker. Nylon can reach full colour in 5–15 minutes; PLA and PETG typically need 20–40 minutes for good saturation.
Check the colour by lifting a part out with tongs. Remember that wet plastic looks darker than it will when dry, so pull parts when they look slightly darker than your target shade — you can always put a part back in, but you can’t undye it.
Step 5: Rinse and set the colour
Once you’re happy with the colour, lift the parts out and rinse under warm running water, then gradually cooler water, until it runs clear. The gradual cool-down helps set the dye. Finish with a wash in cool water with a drop of mild detergent, rinse clean, and air-dry away from direct sunlight (UV fades fresh dye fast).
Step 6: Dispose of the bath safely
Let the dye bath cool completely, then pour it down the drain with plenty of running water — small household quantities are fine for the sewer system, but don’t dump large volumes into stormwater drains or garden beds. Wipe the pot out; it’s now permanently your dye pot.
Mixing Custom Colours
Rit DyeMore comes in a solid range of colours, but the real fun starts when you mix them. The same colour-mixing logic you learned with paint applies: blue plus yellow makes green, red plus blue makes purple. Start with small amounts — you can always add more dye to deepen a shade, but lightening a bath means diluting with hot water, which wastes dye.
The reliable approach is to test on a sacrificial piece first. Print a few small test coupons in the same filament as your real parts and dye them in your mixed bath, pulling one out every few minutes. Half an hour of testing beats dyeing a 20-hour print the wrong shade of teal.
For repeatable results, write down your recipe: dye colours and quantities, water volume, bath temperature, and time in the bath. Makers who sell dyed parts keep a notebook of recipes the same way a baker keeps recipes — it’s the difference between “that nice blue from last month” and actually being able to reproduce it.
Safety: Don’t Skip This Part
Dyeing is safe when you respect the chemicals, and unpleasant when you don’t. The rules are simple but non-negotiable.
- Never use dye equipment for food. The dye pot, tongs, spoons and thermometer are permanently workshop tools. Mark the pot clearly so nobody mistakes it for a cooking pot.
- Ventilate. A simmering dye bath puts warm, dye-laden steam into the air. Work near an open window or under a rangehood with the fan on.
- Wear gloves and old clothes. Rit Dye stains skin, nails, benches and clothing. Nitrile gloves are better than latex here because they resist the hot water longer.
- Keep the bath below boiling. A rolling boil doesn’t dye better; it just increases steam, splash risk and the chance of warping your parts.
- Store dye securely. Keep bottles sealed, upright and out of reach of kids and pets. Wipe up spills immediately — dried dye stains are essentially permanent on porous surfaces.
Common Mistakes (and How to Avoid Them)
Dyeing coloured filament and expecting a pure colour. Dye adds to whatever colour is already there. White or natural filament is the only reliable starting point for predictable results. White or natural stock is step zero for dye 3D prints — start with coloured filament and you’re fighting chemistry.
Crowding the bath. Parts that touch each other or the pot get pale contact marks. Use a bigger pot than you think you need, dye in batches, and keep everything moving. Spacing matters more than most guides admit for dye 3D prints: contact marks are the single most common reason a dye job looks amateur.
Guessing the temperature. Too cool and the dye won’t take; too hot and PLA warps. A $10 thermometer is the cheapest insurance in this whole process.
Leaving parts in too long. Nylon in particular goes dark fast. Check early and often — pulling a part out to look at it costs nothing, but an over-dyed part can’t be fixed.
For makers working with nylon specifically, our PLA vs PETG vs ABS filament guide covers the material properties that make nylon behave so differently — and why it prints and dyes like nothing else in the hobby range.
Frequently Asked Questions
Can you dye PLA 3D prints with Rit Dye?
Yes, but with care. White or natural PLA takes Rit DyeMore reasonably well. Keep the bath at 60–70 °C — hot enough for the dye to penetrate, cool enough to avoid softening the PLA. Expect lighter, less saturated colours than nylon gives, and allow 20–40 minutes in the bath.
Which Rit Dye is best for 3D prints?
Rit DyeMore for Synthetics is the best choice for most 3D printing plastics, especially nylon, PETG and PLA. It’s formulated for synthetic materials and gives deeper, more even colour than the standard All-Purpose Dye. Use All-Purpose Dye only if DyeMore isn’t available, and add vinegar when dyeing nylon with it.
Will the dye rub off or wash out of a 3D print?
Properly dyed parts are colourfast — the dye penetrates the plastic surface rather than coating it, so it can’t chip, flake or rub off. Rinse parts thoroughly after dyeing until the water runs clear, and the colour will stay put through normal handling and washing.
Can I dye a 3D print a lighter colour than it already is?
No. Dye only darkens — it adds colour to what’s already there. To get predictable results, always start with white or natural (uncoloured) filament. A coloured filament dyed another colour will produce a blend of the two, which is occasionally useful but rarely what you planned.
Is it safe to use the same pot for dyeing and cooking?
Absolutely not. Once a pot has held dye, it must never be used for food again — dye residues are chemical products, not food-safe. Buy a cheap dedicated stainless steel pot (op shops are ideal) and label it clearly as dye equipment only.