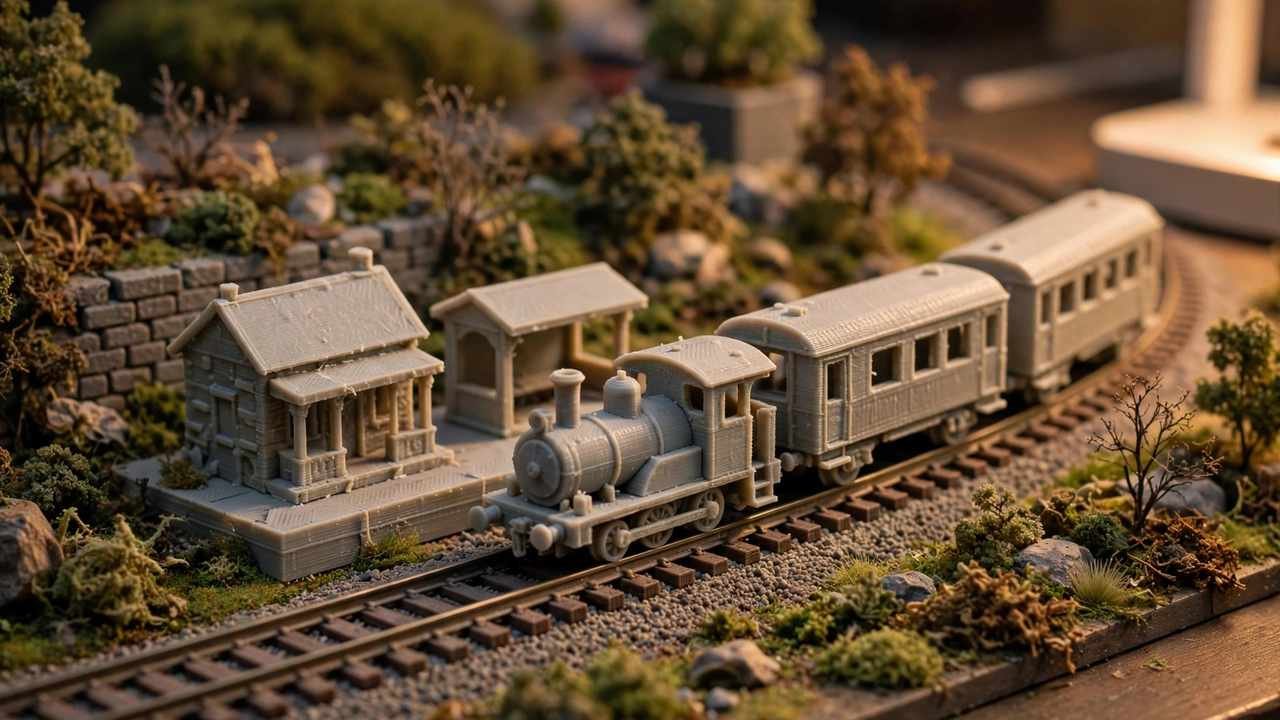
Model railways and 3D printing were made for each other. No other hobby demands so many small, specific, often unobtainable parts — a particular signal box for a particular station, a wagon variant that was only ever made in brass at collector prices, a building that matches the one in your childhood photo. 3D printing model railways turns all of that from “unavailable at any price” into “on the printer overnight”.
This guide covers which scales suit which printing technology, what to print (rolling stock, buildings, scenic details, track jigs), the Australian outline scene, and how to get fine detail that actually looks right at 4 mm to the foot and smaller.
Scales: What You’re Actually Printing
Scale dictates everything in railway modelling — the printer you need, the detail you can achieve, and what’s worth printing versus buying. The common scales:
| Scale | Ratio | Gauge | 3D printing notes |
|---|---|---|---|
| N | 1:160 | 9 mm | Resin territory — FDM struggles with usable detail |
| OO | 1:76 | 16.5 mm | The UK/Australian standard; resin best, fine FDM workable |
| HO | 1:87 | 16.5 mm | Resin best for stock; FDM fine for buildings and scenery |
| O | 1:48 / 1:43.5 | 32 mm | FDM shines — big parts, visible detail, fast prints |
| G / garden | 1:22.5+ | 45 mm | FDM ideal; parts are large and forgiving |
In Australia, OO (4 mm scale) dominates the British-outline scene, and much Australian-outline modelling runs on 16.5 mm gauge too. The practical upshot: resin earns its keep for rolling stock, while FDM handles everything structural.
A useful rule of thumb: if the part has rivets, grilles, or window frames you want to see, print it in resin. If it’s a building, a bridge, a tunnel mouth, or anything scenic, FDM is faster, cheaper, and plenty detailed. Many layouts end up using both — and there’s no shame in a mixed fleet.
FDM vs Resin for 3D Printing Model Railways
This is the decision that shapes your whole approach, so let’s be blunt about the trade-offs:
- Resin (MSLA) — an Anycubic Photon Mono or Elegoo Mars class machine prints layer heights down to 0.02–0.05 mm with XY resolution around 0.03–0.05 mm. Rivets, panel lines, window frames, and fine lettering come out crisp at OO/HO scale. The downsides: smaller build volumes, messy post-processing (wash and cure), resin costs more per part, and you need ventilation. For rolling stock bodies and detailed locomotives, nothing else comes close at this price.
- FDM — any modern filament printer. Bigger build volumes, cheaper material, no chemical post-processing. At 0.12 mm layers with a 0.4 mm nozzle (or 0.08 mm with a 0.25 mm nozzle for the patient), FDM produces excellent buildings, bridges, platforms, and scenic details. It cannot match resin for fine surface detail on small parts — layer lines are visible on a wagon side at OO scale, and no amount of tuning fully fixes physics.
The honest answer: start with whichever you have, add the other when the hobby justifies it. FDM earns its keep on scenery alone; a small resin printer ($300–$450 AUD) added later opens up rolling stock. Many Australian-outline models were designed for resin — check the designer’s notes before committing.
What to Print: Rolling Stock
This is where 3D printing changes the economics of the hobby most dramatically, especially for Australian prototypes.
Wagons and coaches
Freight wagons are the perfect first rolling-stock print: mostly box shapes with detail you can add, tolerant of minor imperfections, and needed in quantity. A rake of ten identical wagons is ten prints of one file — the design effort amortises beautifully. Coaches are harder (window glazing, interiors, longer bodies that test your printer’s dimensional accuracy) but very doable in resin.
Locomotives
Printing a whole locomotive is an advanced project — bodies are printable, but chassis, motors, and running gear usually come from donor mechanisms or commercial chassis kits. The common approach is a printed body on a bought chassis: you get the exact prototype you want riding on proven mechanics. Australian-outline diesel and steam bodies exist in the file libraries, though the selection is thinner than for UK or US prototypes — which is exactly why the printer is valuable.
Wheels, couplings, and details
Don’t print what industry does better. Metal wheelsets, commercial couplings, and etched details are cheap and consistent — print the body, buy the running gear. The exception is detail parts that don’t exist commercially: specific lamp irons, prototype-specific vents, custom number plates (resin prints these beautifully).
What to Print: Buildings and Scenery
If rolling stock is resin’s showcase, scenery is FDM’s. The list of printable scenic items is nearly endless:
- Station buildings, signal boxes, and goods sheds — designed to match real prototypes or generic period styles. Print in sections for large buildings; FDM’s big build volume is an asset here.
- Bridges and viaducts — plate girder bridges, truss bridges, and stone-arch viaduct sections print well and look superb painted. Print piers hollow to save filament.
- Platforms, ramps, and retaining walls — long, repetitive structures where printing beats buying on cost by a wide margin. Stone and brick textures can be printed in or added with embossed styrene overlays.
- Tunnel mouths and cutting walls — one-off scenic pieces shaped to your exact landscape.
- Lineside details — signal gantries, telegraph poles, mileposts, buffer stops, water cranes, fencing, crates, barrels, pallets. The small stuff that makes a layout feel real, printed by the dozen.
- Track ballast tools — ballast spreaders and tampers sized to your gauge, track-laying jigs, and curve templates. Deeply unglamorous, enormously useful.
Track components
Sleepers (ties), fishplates, and point (turnout) components are all printable, and hand-laying track with printed sleepers is a well-established technique. For most modellers, though, commercial flex-track remains the sensible choice for the running rails — print the accessories, buy the track. 3D-printed check rails, crossing vees, and point motors housings are popular middle-ground projects.
The Australian Outline Scene in 3D Printing Model Railways
Australian railway modelling has always fought the tyranny of a small market — the prototypes are beloved locally and ignored by the big manufacturers. 3D printing is quietly fixing this. The file libraries now include NSWGR, Victorian Railways, Queensland, South Australian, and Western Australian prototypes: wagons, coaches, diesel and steam bodies, stations, and lineside structures. The community-driven file sharing happening around 3D printing model railways in Australia is one of the most active in the hobby — it punches well above the country’s size.
Where to look: Printables and MakerWorld both have growing Australian-outline collections — search the railway system abbreviation plus the scale. Cults3D and Thingiverse hold older archives worth digging through. Facebook groups for Australian railway modelling are surprisingly active marketplaces for file sharing and print advice; the community is generous with both. And several small Australian businesses now sell printed Australian-outline models or the files themselves — supporting them keeps the ecosystem growing.
A note on accuracy: prototype fidelity varies. Some designs are drawn from works drawings and are superb; others are “looks about right” approximations. For a background wagon in a goods yard, approximation is fine. For the locomotive at the head of your prized express, check the designer’s sources — the good ones cite them.
Getting Fine Detail That Looks Right
Detail at 4 mm scale is unforgiving. Techniques that matter:
- Orientation is everything. In resin printing, orient bodies at 30–45 degrees with supports on hidden faces — flat-on-the-plate printing gives you suction failures and visible layer stepping on curved roofs. In FDM, orient so visible faces aren’t the top or bottom layer where possible.
- Know your minimum feature size. On a 0.4 mm FDM nozzle, don’t design details below ~0.5 mm — they won’t resolve. In resin, 0.2–0.3 mm features print reliably. Design (or choose designs) to the process.
- Primer hides sins. A coat of automotive filler primer, lightly sanded, erases FDM layer lines on scenic parts remarkably well. On resin prints it gives paint something to grip. Prime everything before painting — it’s the single biggest finish upgrade available.
- Paint makes it real. Printed plastic looks like printed plastic until paint and weathering work their magic. Airbrushing gives the smoothest base coats; washes and dry-brushing bring out rivets and panel lines. A $50 airbrush setup transforms printed stock from “homemade” to “hand-built”.
- Glazing matters. Coach and carriage windows need glazing — thin clear styrene or purpose-made glazing strips fitted behind printed window frames. Design the body with a glazing channel if you’re drawing it yourself.
Best Printers and Filaments for Railway Work
Resin printers
Any current small-format MSLA printer does the job — the Anycubic Photon Mono series and Elegoo Mars series are the usual recommendations in Australia, typically $300–$450 AUD. Prioritise XY resolution and a stable Z-axis over build volume; you’re printing small parts. Standard grey resin shows detail best for inspection; ABS-like resin is worth the small premium for parts that get handled (wagon bodies survive drops better).
Budget for the hidden costs: wash and cure (a wash-and-cure station runs $150–$250 AUD, or DIY it), isopropyl alcohol, gloves, filters, and ventilation. Resin printing needs a ventilated workspace — a garage with the door open, not a bedroom.
FDM printers and filaments
Any reliable modern FDM printer works for scenery — the bigger the bed, the fewer sections large buildings need. For our take on one strong all-rounder, see our Anycubic Kobra 3 review.
Filament choice for railway modelling is simple: PLA for almost everything. It’s dimensionally stable, takes primer and paint well, and is cheap ($25–$40/kg in Australia). Use PETG for parts that live in hot environments (a layout in an uninsulated shed in summer) or need a bit more toughness. ASA is the choice for anything that lives outdoors permanently, like garden railway structures — it resists UV where PLA goes brittle. Our filament comparison guide covers the trade-offs in detail.
One specialty worth knowing: wood-fill and stone-fill PLAs take stain and weathering beautifully for scenic structures — a signal box in wood-fill PLA, lightly sanded and stained, looks remarkably like timber.
Designing Your Own: From Photo to Print
Eventually you’ll want something nobody has modelled — the station building from your hometown, a one-off prototype. The path from reference to print:
- Start from dimensions, not photos. Photos lie about proportions. Works drawings, plans from railway historical societies, and measured sketches beat photo-guessing every time. Australian railway historical societies are goldmines for drawings.
- Learn one CAD tool properly. Fusion (free for hobbyists) or FreeCAD for mechanical parts; Blender for organic scenic shapes. You don’t need mastery — boxes, cylinders, and extrusions build 90% of railway structures.
- Design for the process. Avoid overhangs that need supports on visible faces; split large parts along natural panel lines; build in print orientation from the start rather than fixing it in the slicer.
- Prototype in cheap PLA. Print a draft, check the fit against your layout, then print the final in your best settings. Filament is cheap; reprinting a bad design in resin is not.
For standards — wheel profiles, coupling heights, clearances, DCC wiring — the NMRA standards pages are the authoritative reference the whole hobby builds on. Even if you model Australian prototypes, the mechanical standards keep your stock compatible with everyone else’s.
FAQs
Is FDM or resin better for 3D printing model railways?
Both, for different jobs. Resin (MSLA) wins for rolling stock and fine detail at N, OO, and HO scales — rivets and window frames come out crisp. FDM wins for buildings, bridges, platforms, and scenery — bigger parts, cheaper material, no chemical post-processing. Most serious railway modellers end up with one of each.
What scale is best for 3D printing trains?
O scale and larger are the sweet spot for FDM — parts are big enough that layer lines don’t matter. At OO/HO, resin gives the best rolling stock results while FDM handles scenery. N scale really needs resin for anything detailed. In Australia, OO (4 mm) is the most common scale for British and Australian-outline modelling.
Where can I find Australian prototype 3D print files?
Printables and MakerWorld have growing Australian-outline collections — search the railway system (NSWGR, VR, QR) plus your scale. Older archives on Thingiverse and Cults3D are worth searching, and Australian railway modelling Facebook groups are active hubs for file sharing. Small Australian businesses also sell printed models and files for local prototypes.
Can I 3D print working locomotive chassis?
Printed bodies on commercial chassis is the proven formula. Fully printed chassis with printed gears exist as projects, but commercial mechanisms run better and last longer. Print the body that nobody sells; buy the chassis that everybody trusts. Metal wheelsets and commercial couplings are also worth buying rather than printing.
What filament should I use for model railway buildings?
Plain PLA for almost everything — it’s stable, paints well, and costs $25–$40/kg in Australia. Use PETG for layouts in hot sheds, ASA for outdoor garden railway structures (UV resistance), and wood-fill PLA for timber structures you plan to stain. Prime everything before painting.
How do I get rid of layer lines on printed rolling stock?
Print in resin rather than FDM for small detailed stock — that’s the real fix. For FDM scenic parts, filler primer plus light sanding erases layer lines effectively. Orient parts to hide stepping on visible faces, use the finest layer height you can tolerate, and remember that paint and weathering hide a multitude of sins.