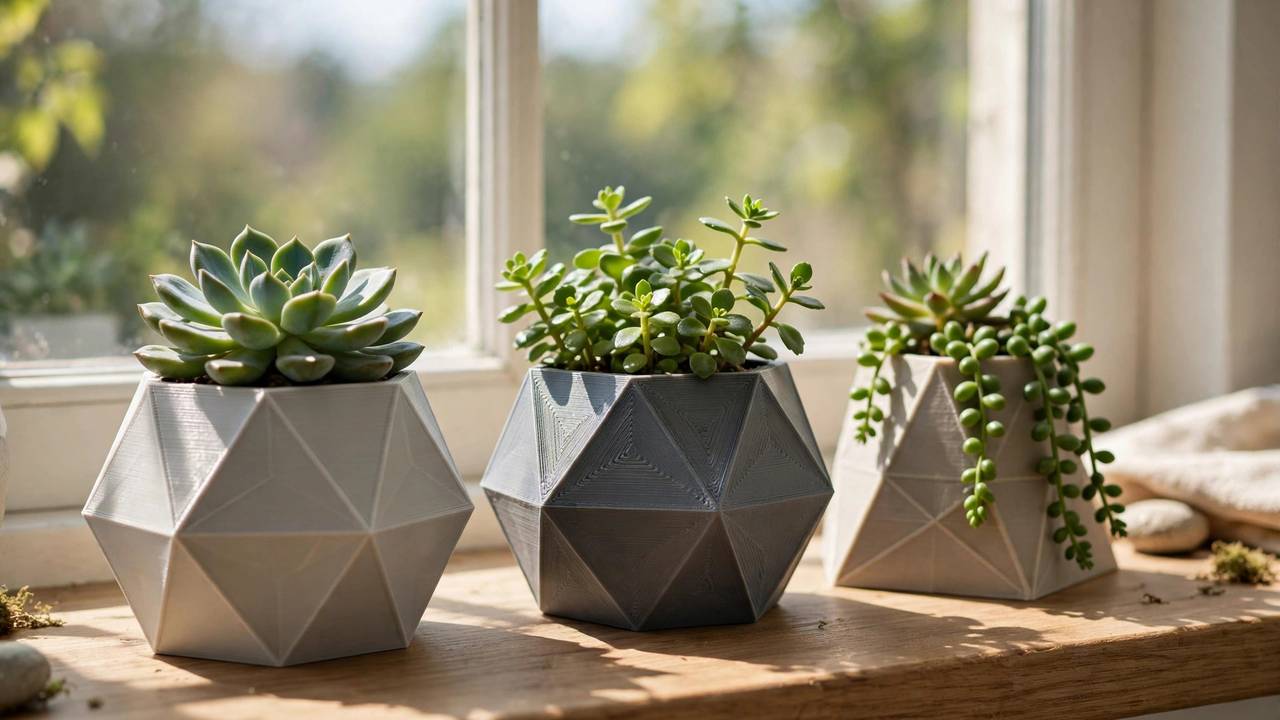
These 3D printed planters garden projects are perfect weekend builds — custom pots, hanging baskets and self-watering designs.
There is something deeply satisfying about growing a plant in a pot you made yourself. 3D printed planters have become one of the most popular maker projects, and it’s not hard to see why. A printer turns a spool of plastic into a custom pot, a hanging basket, or a self-watering herb tower — in whatever size, shape, and colour your garden actually needs. But there’s a catch that catches out nearly every beginner: a planter that looks perfect on your desk can be a warped, brittle mess by the end of an Australian summer. This guide covers the best filaments for outdoor use, smart drainage design, where to find great models, and how to print planters that survive our harsh sun.
3D Printed Planters Garden: Why They’re Worth the Effort
Walk into any garden centre and you’ll find the same dozen pots in the same three colours. Printing your own flips that on its head: size a pot to the exact millimetre for a windowsill, print a matching set for a balcony railing, or design a drainage tray that actually fits. For apartment dwellers and renters, it’s a way to personalise a small space without spending a fortune.
There’s also a practical angle. Broken plastic pots are one of gardening’s little annoyances — they crack, the handles snap, the colour fades to a sad chalky grey. A replacement printed in the right material costs a few dollars in filament and can outlast the original. Many makers use their planters as a testbed for new filaments and settings too: a big, simple pot is an honest stress test of bed adhesion and cooling.
The one thing to respect is that a planter lives a hard life. It sits in direct sun, gets soaked and dried on repeat, holds damp soil against its walls for months, and endures the odd knock from the watering can. Choose the wrong plastic and you’ll watch it fade, crack, or slump. Choose the right one, and it’ll be going strong years later.
ASA is the top pick for 3D printed planters garden builds that live outdoors year-round.
Best Filament for 3D Printed Planters: ASA, PETG, and PLA Compared
Filament choice is the single biggest factor in how long your 3D printed planters survive outside. Here’s the honest breakdown.
ASA: The Outdoor Champion
ASA (acrylonitrile styrene acrylate) is the closest thing to a purpose-built outdoor filament. It was developed as a weather-resistant alternative to ABS, and the chemistry shows: it carries built-in UV stabilisers, so it holds its colour and strength through years of direct sun instead of yellowing and going brittle the way ABS does. Its glass transition temperature sits around 95–100°C, which means it won’t soften on a scorching hot day, and it absorbs very little water.
The trade-off is printability. ASA warps badly on an open-frame printer — it really wants an enclosed machine, a bed at 90–110°C, and a nozzle at 240–260°C. If your printer already handles ABS well, ASA uses essentially the same settings. For permanent garden pieces like large pots or outdoor mounts, it’s worth the effort. Wikipedia’s overview of ASA explains the chemistry behind its UV resistance if you want the technical detail.
PETG: The Practical Middle Ground
PETG is the workhorse of outdoor-adjacent printing. It resists water well (roughly 0.12–0.2% water absorption), shrugs off the mild acids in potting mix and fertiliser, and prints without an enclosure at temperatures most printers handle comfortably. Its glass transition of around 80–85°C means it won’t slump near a sunny window or on a warm patio.
The honest caveat: PETG’s UV resistance is only moderate. In full Australian sun it will slowly yellow and lose some strength over a season or two. For planters that sit in partial shade, on a covered balcony, or indoors, it’s genuinely the sweet spot — easy to print, tough, and cheap. In Australia, a kilogram of decent PETG typically runs around AUD $30–$45, so check current pricing at your usual AU filament retailer before ordering.
PLA: Fine Indoors, Risky Outdoors
PLA prints beautifully and it’s what most of us have sitting on the shelf. But it has no business living in direct sun. Its glass transition is only 55–60°C — a dark pot in January sun can hit that on the surface and start to soften and deform. UV breaks it down within months, turning it brittle and faded. It’s also mildly biodegradable, which is lovely in theory and terrible for a pot holding damp soil.
That said, PLA is perfectly fine for indoor planters, seedling trays that live on a windowsill, or short-term garden markers. Just know what you’re signing up for: one summer outside, and you’ll be reprinting.
Beating the Australian Sun: UV and Heat Tips
Australian UV levels are brutal by world standards, and even good filaments last longer with a little help. A coat of UV-resistant clear spray or exterior-grade paint does two jobs at once: it seals the layer lines against water getting in and shields the plastic from UV. Two light coats of an exterior acrylic, sanded lightly between them, can add a season or more to a PETG planter’s life.
Colour matters more than most people expect. Dark colours absorb far more heat — a black planter in full sun will run dramatically hotter than a white or light-coloured one, and that extra heat accelerates both softening and UV damage. If you love dark pots, consider placing them where they get morning sun and afternoon shade, or double-potting: a printed decorative outer pot with a plain nursery pot inside holding the soil and moisture.
Design choices help too: three or four wall perimeters instead of two, 20–30% infill, and ribs or a rolled rim for stiffness without much extra plastic.
Drainage holes make or break 3D printed planters garden projects — design them in, don’t drill them later.
Drainage Design: The Detail That Makes or Breaks a Planter
The number one functional requirement of any planter is drainage, and this is where printed pots have an edge over moulded ones — you control the holes. Most good planter models include drainage holes in the base, but if you’re designing your own, aim for several small holes (4–6 mm) rather than one big one. Small holes drain water while keeping soil in; a big hole just lets your potting mix escape onto the balcony.
Always print with a matching saucer or drip tray for indoor use. A planter without a tray will weep water through microscopic gaps between layer lines — FDM prints are rarely fully watertight straight off the bed. For a genuinely watertight pot, print with more walls, slightly higher extrusion, and seal the inside with a food-safe epoxy or a couple of coats of exterior sealant. Testing with water before you add soil saves a lot of mopping.
One subtle trick: raise the pot slightly on printed feet or a stand. Airflow underneath the base stops the bottom from sitting in its own runoff, which is the fastest way to grow algae on the plastic and rot on a wooden deck. If you’re comfortable with a bit of CAD work, modelling your own planter lets you build the feet, drainage channels, and tray into one clean design.
Self-Watering 3D Printed Planters Garden Designs
Self-watering planters are one of the best projects you can print. The basic idea is a two-chamber design: an upper chamber holds soil and the plant, and a lower reservoir holds water, with a wick or soil column drawing moisture upward. The plant drinks what it needs, and you refill the reservoir every week or two instead of watering daily.
For these, PETG is the practical default — it handles constant water contact well, prints the fine internal channels cleanly, and doesn’t need an enclosure. Print the reservoir with extra walls and seal it, because a slow leak defeats the whole purpose. Many makers add a small fill tube and a water-level window so they can see when a top-up is due.
A word of caution for edible plants: standard filaments aren’t food-safe, and layer lines can harbour bacteria. For herbs and veggies, use the printed pot as an outer decorative shell with a food-safe nursery pot inside, or line it. That keeps the clever self-watering design while sidestepping the food-safety question entirely.
Printing Big: Large Planters and Garden Projects
Once you’ve nailed a small herb pot, the temptation is to scale up — and large-format planters are where 3D printing really earns its keep. A 30 cm feature pot from a garden centre can cost $60 or more; printing one costs a fraction of that in filament, even accounting for the occasional failed print.
Big prints demand respect, though. A large pot is a tall, thin-walled object — exactly the geometry most prone to warping and layer separation. Print slowly, keep the part cooling fan low, and make sure your first layer is dialled in. If you’re using an Anycubic machine, it’s worth revisiting your Cura slicer setup before committing to a 20-hour print: correct temperatures, a brim for adhesion, and a draft-free room make the difference between a keeper and a bin full of spaghetti.
For pots bigger than your build plate, design in sections. Print the pot in two or three stacked rings and bond them with a suitable adhesive or solvent weld. Printed alignment pins or a tongue-and-groove joint make assembly clean and strong. Modular designs also mean a cracked section can be reprinted on its own instead of redoing the whole pot.
Where to Find Great 3D Printed Planter Models
You don’t have to design from scratch. The model libraries are full of excellent planter designs, many of them free:
- Printables — Prusa’s library, strong on well-tested functional designs with honest print settings in the descriptions.
- Thingiverse — the oldest library; huge selection, though quality varies, so check the makes and comments before committing filament.
- MakerWorld — Bambu’s library, growing fast with lots of decorative and multi-part designs.
Decorative pots with geometric or Voronoi patterns look stunning, but intricate designs use more filament and take longer — start simple.
Finishing Touches for a Garden That Looks the Part
A printed planter straight off the bed looks fine; a finished one looks deliberate. A quick sand of the outer walls with 120-grit followed by 220-grit takes the edge off layer lines, and a coat of exterior paint in a colour that matches your pots ties a mismatched collection together. Stone-effect or terracotta spray paints are popular for making plastic pots blend into a traditional garden.
If you have access to a multi-colour 3D printer, decorative planters are a perfect showcase — gradient fades, two-tone rims, or colour-matched sets that look like they came from a designer homewares store. Even a single-colour printer can do a lot with a filament change at a set layer height for a crisp two-tone band.
Beyond pots, the same skills transfer to a whole garden of projects: custom plant markers that don’t fade, hose guides, trellis clips, raised-bed corner brackets, bird feeder parts, and drip-irrigation fittings sized for Australian standard hose connectors. Once the planter bug bites, the garden becomes a never-ending source of print ideas.
Frequently Asked Questions
What is the best filament for 3D printed planters used outdoors?
ASA is the best choice for planters that live in full sun — it has built-in UV stabilisers and a high heat resistance around 95–100°C. PETG is a good middle ground for shaded or semi-shaded spots, and it’s much easier to print without an enclosure. Avoid PLA for permanent outdoor planters, as it softens in heat and degrades in UV within months.
Are 3D printed planters waterproof?
Not automatically. FDM prints have tiny gaps between layer lines that can weep water. For a watertight planter, print with extra walls, and seal the inside with an exterior-grade sealant or epoxy. Always test with water before adding soil, and use a drip tray indoors.
How do I stop my 3D printed planter from warping in the Australian sun?
Use ASA or PETG rather than PLA, choose light colours that absorb less heat, print with three or more wall perimeters, and consider a UV-resistant clear coat. Placing dark pots in afternoon shade and double-potting with a nursery pot inside also help a lot.
Can I print a self-watering planter?
Yes — self-watering planters are one of the best 3D printing projects. They use a two-chamber design with a water reservoir below the soil and a wick drawing moisture up. PETG is ideal for these since it handles constant water contact well. For edible plants, use the printed pot as an outer shell with a food-safe pot inside.
Where can I find free 3D planter models?
Printables, Thingiverse, and MakerWorld all have large free collections. Search for “self-watering planter”, “stackable planter”, or “hanging planter”, and favour models with photos of real prints and helpful comments about settings.
How much does it cost to 3D print a planter?
A small herb pot uses roughly 100–200 grams of filament, costing just a few dollars — PETG in Australia typically runs around AUD $30–$45 per kilogram, so check current pricing at your retailer. A large 30 cm feature pot might use a full kilogram, still far cheaper than buying an equivalent designer pot.