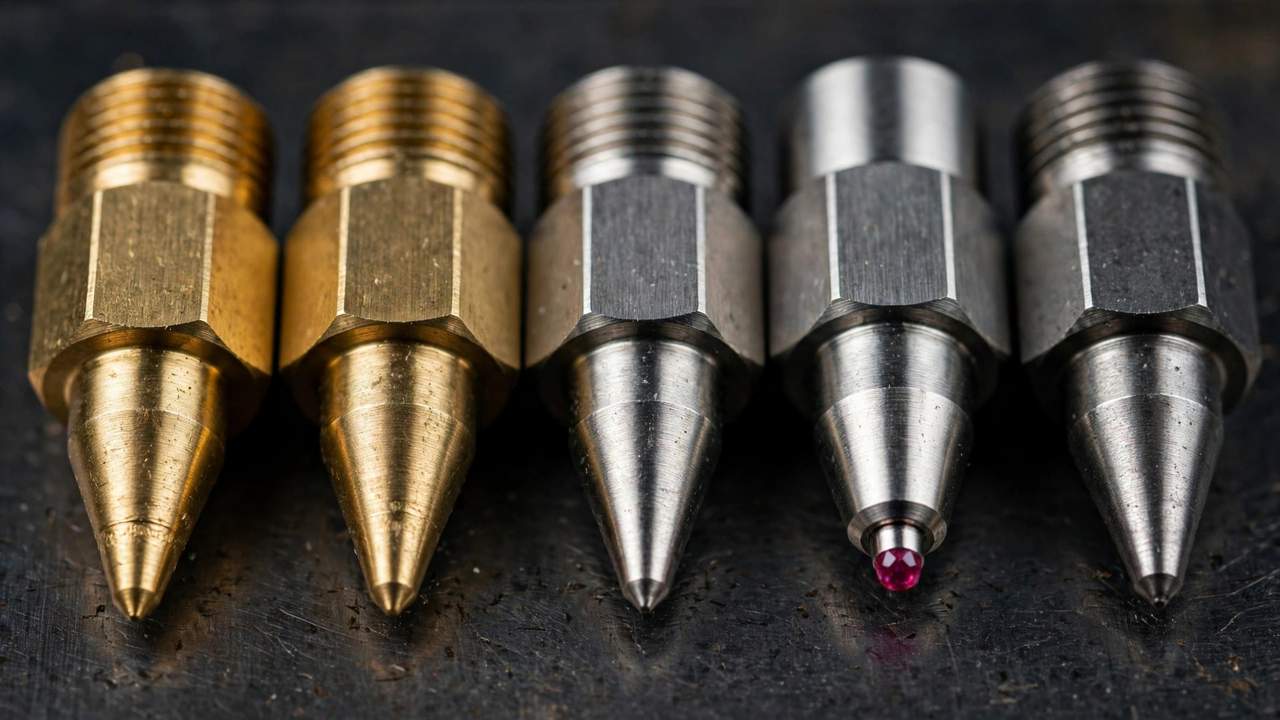
Choosing the best nozzles 3D printing setups need depends on your filament — here’s the breakdown.
The best nozzle for 3D printing depends on what you print. If you stick to PLA, PETG and ABS, a plain brass nozzle is all you will ever need. Start printing abrasive filaments like carbon fibre or glow-in-the-dark, though, and that same brass nozzle will be ruined before the spool is empty. This guide walks through brass, hardened steel and ruby-tipped nozzles — what each one does well, where each one fails, which sizes to keep on hand, and how to buy them in Australia without overpaying.
What a 3D Printer Nozzle Actually Does
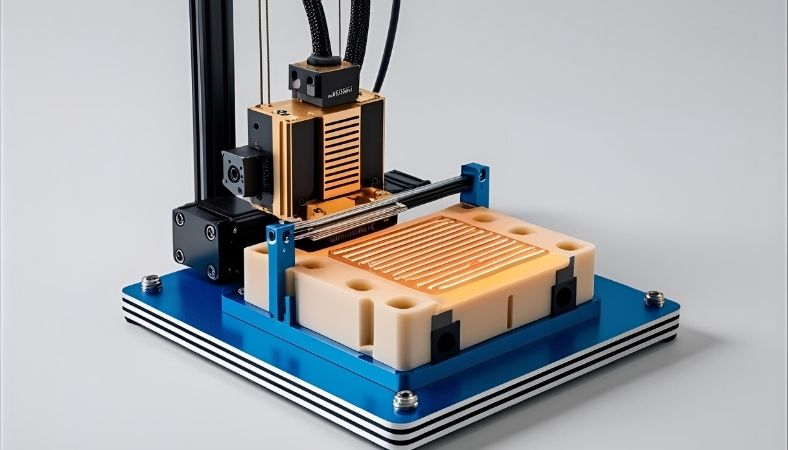
The nozzle is the last thing your filament touches before it becomes a print. Hot plastic squeezes through a tiny hole — usually 0.4mm across — and the nozzle also sets the width of every line your printer lays down. The nozzle material controls two things that genuinely matter: how efficiently heat moves from the heater block into the filament, and how long the nozzle survives the filament you feed it.
Best Nozzles 3D Printing Beginners Should Start With: Brass
Brass is the default nozzle material for a reason. Nearly every printer you can buy ships with a brass 0.4mm nozzle fitted, and most makers never need anything else. Brass has excellent thermal conductivity (around 120 W/m·K), which means it transfers heat from the heater block into the filament efficiently — temperatures stay predictable and extrusion stays consistent.
Brass handles every “soft” filament without complaint: PLA, PETG, ABS, ASA, TPU and nylon all print fine through brass. It is cheap — a pack of five or ten brass nozzles costs a few dollars from any Australian 3D printing supplier — so replacing one is painless. That cheapness is actually a feature: brass nozzles are consumables, and being able to swap in a fresh one for the price of a coffee removes the temptation to keep printing through a worn tip.
Where brass falls apart
Brass is soft, and soft materials lose to hard ones. Filaments with solid particles — carbon fibre, glass fibre, metal-filled, wood-filled, and glow-in-the-dark — sand the inside of a brass nozzle as they pass through. Widely reported tests show a brass nozzle becoming unusable after as little as 300 grams of carbon fibre filament: the bore widens and line widths go inconsistent.
The practical rule is simple: if the filament is abrasive, do not feed it through brass for any serious amount of printing. A one-off small part in glow-in-the-dark PLA is probably fine — then replace the nozzle.
Hardened steel is the workhorse of best nozzles 3D printing enthusiasts recommend for abrasives.
Hardened Steel Nozzles: The Abrasive-Proof Upgrade
When you start printing carbon fibre, glass fibre, metal-filled or wood-filled filaments regularly, the standard answer is a hardened steel nozzle. These nozzles are dramatically more wear-resistant than brass and survive months of abrasive printing that would destroy a brass tip in days. They cost more — typically $5 to $15 AUD each from Australian suppliers — but one hardened steel nozzle outlasts dozens of brass ones on abrasive material.
The thermal conductivity trade-off
Here is the catch: steel conducts heat roughly four times worse than brass (around 20–30 W/m·K versus brass’s 120). The temperature sensor sits in the heater block, not the nozzle, so the printer reads the block temperature and assumes the nozzle matches. With hardened steel, the actual melt-zone temperature runs several degrees lower — a setpoint of 210°C might deliver only around 195°C to the filament.
Bump your print temperatures up by 5–10°C when you switch from brass to hardened steel, and expect slightly worse stringing at those elevated temperatures. Plenty of makers leave a hardened steel nozzle mounted permanently and print everything through it — just do not expect to swap materials without adjusting your profile.
Hardened steel vs stainless steel
You will also see stainless steel nozzles sold. Stainless is harder than brass and handles mild abrasives, but it wears faster than hardened steel and has even worse thermal conductivity. Unless you have a specific niche reason for stainless, hardened steel is the better buy for 3D printing.
For the best nozzles 3D printing value, keep a brass 0.4mm for daily use and a hardened 0.6mm for speed.
Ruby-Tipped Nozzles: The Premium Hybrid
Ruby-tipped nozzles, most famously the Olsson Ruby designed by Uppsala University research engineer Anders Olsson and commercialised by 3DVerkstan, take a different approach: a brass body with a synthetic ruby press-fitted into the tip. The brass keeps excellent thermal conductivity while the ruby tip is essentially immune to abrasion. Tests cited by 3DVerkstan showed a brass nozzle destroyed after 0.3 kg of carbon fibre filament, while an Olsson Ruby showed no visible wear under a microscope after 8 kg of the same material.
That is an impressive result, but the price is equally impressive — genuine ruby nozzles run $60–100 AUD or more, and the ruby itself is brittle. Crash the nozzle into the build plate or drop it on concrete and the tip can shatter or dislodge.
The consensus among experienced makers is that ruby nozzles only pay off at industrial usage levels — several kilograms of abrasive material per week. For a home maker, a hardened steel nozzle costs a fraction of the price and handles the same filaments. Ruby is a premium option for people who genuinely wear out hardened steel, not a first upgrade.
Best Nozzles 3D Printing: Size Guide (0.4mm and Beyond)
Nozzle material gets the attention, but hole size shapes your prints more day to day. Here is what each common size is for:
- 0.2mm: fine detail — miniatures, small text, jewellery-scale parts. Slow, clog-prone, and unforgiving of imperfect filament. Buy one if you print minis; skip it otherwise.
- 0.4mm: the standard. The best balance of detail, speed and reliability for everyday printing. If you own one nozzle, this is it.
- 0.6mm: noticeably faster prints with slightly thicker layer lines. Great for functional parts, brackets and prototypes where surface finish is secondary.
- 0.8mm and 1.0mm: fast, chunky prints — vases, cosplay armour, large functional parts. Layer lines are very visible, and you need a hotend that can keep up with the flow.
As a general guide, your slicer’s line width should be roughly 100–125% of your nozzle diameter, and your layer height should stay below about 75% of the nozzle diameter. If you are tuning these numbers, our Cura slicer setup guide for Anycubic printers walks through the key settings.
Swapping sizes for speed
Going from a 0.4mm to a 0.6mm nozzle is the cheapest speed upgrade in 3D printing. The wider bore pushes more plastic per second, so you can run thicker layers and wider lines — a part that takes eight hours at 0.4mm might take five at 0.6mm, with only a modest loss of surface quality. Keep a 0.4mm brass for detail work and a 0.6mm hardened steel for abrasive or fast prints, and you cover 95% of home printing.
CHT and High-Flow Nozzles: Splitting the Filament
Beyond material and size, there is a third axis: internal geometry. Bondtech’s CHT (Core Heating Technology) nozzles split the filament into three thinner strands inside the melt zone instead of one solid strand. More plastic touches hot metal at once, so it melts faster — Bondtech claims flow rate gains of 25–65%, and independent testing by CNC Kitchen measured a CHT-equipped hotend pushing around 22 mm³/s of PLA versus roughly 14 mm³/s for a standard setup.
CHT nozzles come in several flavours: nickel-coated brass for standard filaments, and a BiMetal version with a copper body and hardened vanadium steel inserts for abrasive materials. They use standard RepRap M6 threading, so they fit a huge range of hotends — but higher flow only helps if your heater cartridge can supply the thermal power.
For most makers, a CHT nozzle is a nice-to-have rather than a need-to-have. It shines on high-speed machines printing large parts with big nozzles.
When to Swap Your Nozzle
Nozzles wear gradually, and the symptoms creep up on you. Replace yours when you notice:
- First-layer lines look inconsistent or wider than the slicer says — a classic sign of a worn, widened bore.
- Stringing and blobbing increase even though temperatures and retraction are unchanged.
- Unexplained under-extrusion or clogs after printing abrasive or particle-filled filament.
- Visible damage: a flattened or chipped tip, or baked-on plastic a brass brush will not remove.
When in doubt, swap it. A fresh brass nozzle costs less than the failed print it will save you.
How to Change a Nozzle Safely
Changing a nozzle is a five-minute job, but doing it wrong can destroy a hotend. Follow this order:
- Heat the hotend to printing temperature (200–240°C for PLA-range filaments). Nozzles must be changed hot — the metal expands, and tightening a cold nozzle guarantees a leak or a snapped thread.
- Unload or retract the filament so the nozzle is as empty as possible.
- Hold the heater block with an adjustable wrench or pliers so it cannot twist. Twisting the block can snap the heat break — the most common expensive mistake here.
- Unscrew the old nozzle with a socket (usually 6mm or 7mm). Be careful: everything is hot. A small socket wrench beats pliers, which can crush the nozzle.
- Screw the new nozzle in by hand first until finger-tight, then give it a final snug turn with the socket while still hot. It needs to seal against the heat break inside the block — snug, not gorilla-tight.
- Run a test extrusion and check for plastic oozing from the top of the nozzle (a sign it is not seated against the heat break). Re-level or re-tram your bed afterwards, since the nozzle tip height may have changed slightly.
Two warnings worth remembering. First, never change a nozzle cold unless you enjoy replacing heat breaks. Second, check your thread type before ordering — most nozzles are M6, but some printers use M7 or proprietary formats. A nozzle that does not match your hotend’s thread is useless to you.
Buying Nozzles in Australia: Practical Guidance
You do not need to import nozzles from overseas. Australian 3D printing suppliers stock brass, hardened steel and CHT nozzles with local shipping. Check current pricing before you buy, but as a rough guide: packs of brass nozzles cost a few dollars each, hardened steel singles run roughly $8–20 AUD, and premium options like Bondtech CHT or ruby-tipped nozzles climb to $40–100+ AUD.
A sensible starter kit for an Australian maker: a 10-pack of brass 0.4mm nozzles (your everyday workhorse), a couple of brass 0.6mm (faster functional prints), one hardened steel 0.4mm (ready for carbon fibre, glow-in-the-dark or wood-filled filament), and optionally one hardened steel 0.6mm for fast abrasive printing.
That kit costs less than a single spool of decent filament and covers nearly everything a home printer will ever need. Skip the ruby nozzle unless you are genuinely burning through hardened steel — for almost everyone reading this, that day will never come.
One more buying tip: nozzle quality varies enormously at the cheap end. Poorly machined nozzles can have off-centre bores or rough threads that cause clogs and leaks. Stick with known brands — E3D, Bondtech, Micro Swiss, or the genuine Olsson Ruby — or buy from a reputable Australian supplier rather than the cheapest random listing. A nozzle is a precision part; a dollar saved on a bad one costs you a failed print.
FAQ: 3D Printer Nozzles
What is the best nozzle for 3D printing overall?
For most people, a brass 0.4mm nozzle. It has the best heat transfer, prints every common filament well, and costs almost nothing to replace. Upgrade to hardened steel only when you start printing abrasive filaments like carbon fibre.
Do I need a hardened steel nozzle for carbon fibre filament?
Yes. Carbon fibre filament will destroy a brass nozzle within a fraction of a spool — tests show brass becoming unusable after as little as 300 grams. A hardened steel nozzle lasts months of the same printing. Remember to raise your print temperature 5–10°C to compensate for steel’s lower thermal conductivity.
Are ruby-tipped nozzles worth it?
For home makers, usually not. A genuine Olsson Ruby costs $60–100+ AUD and only pays off at industrial usage levels of abrasive filament. A hardened steel nozzle handles the same filaments for a fraction of the price.
What nozzle size should a beginner use?
0.4mm. It is the standard for a reason — the best balance of detail, speed and reliability. Add a 0.6mm later when you want faster functional prints.
How often should I replace my 3D printer nozzle?
A brass nozzle printing regular PLA/PETG lasts roughly 6–12 months. Replace it sooner if you see inconsistent extrusion, increased stringing, or a visibly damaged tip — or immediately after printing abrasive filaments through brass.
Can I use a 0.6mm nozzle with the same slicer profile?
No — update your slicer settings. Set the line width to roughly 100–125% of the nozzle diameter and keep layer heights below about 75% of the nozzle diameter. A 0.6mm nozzle wants around 0.66mm line width and 0.2–0.4mm layers.
For the full picture of your hotend and extrusion settings, see our guide to the best budget 3D printers for home use — the machines on that list all ship with standard brass nozzles you can upgrade later.