At some point in every maker’s journey comes the upgrade itch — and the motion system is where it bites hardest. Should you swap your printer’s V-wheels for linear rails? It’s one of the most debated upgrades in 3D printing, with strong opinions on both sides. This linear rails vs v-wheels 3D printer guide gives you the honest engineering comparison: precision, durability, cost, installation difficulty, and — most importantly — whether you will actually see better prints.
How V-Wheels Work
V-wheels are Delrin (or polycarbonate) wheels with a V-shaped groove that ride on the edges of aluminium extrusion. Three wheels per carriage (two fixed, one on an adjustable eccentric nut) grip the extrusion from three sides. It’s the system Creality made famous on the Ender 3, and it works remarkably well for the price.
Strengths:
- Cheap: a full set of wheels costs a few dollars; replacements are trivial
- Forgiving: tolerates dust, minor misalignment, and imperfect extrusion
- Quiet: Delrin on aluminium is naturally damped and quiet
- Easy to maintain: eccentric nut adjustment takes seconds
Weaknesses:
- Wear: wheels develop flat spots and grooves over time, especially with heavy use
- Flex: the system has inherent give — fine at moderate speeds, a limit at high speeds
- Maintenance: needs periodic eccentric-nut adjustment as wheels wear
- Speed ceiling: above ~150–200 mm/s, wheel deformation becomes a print-quality factor
How Linear Rails Work
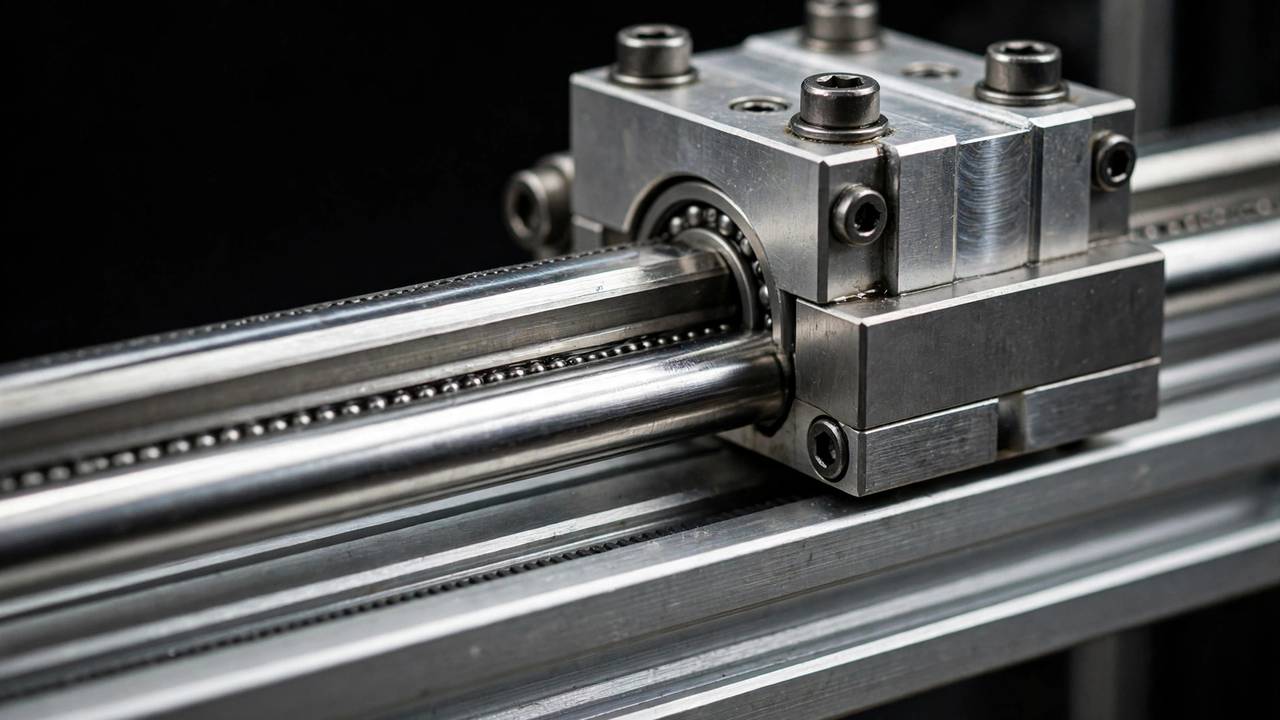
Linear rails (typically MGN12H in our world) are hardened steel rails with recirculating ball bearings in a carriage block. The balls roll in precision-ground grooves, giving extremely rigid, low-friction motion with virtually no play.
Strengths:
- Rigidity: dramatically stiffer than V-wheels — the carriage simply doesn’t deflect
- Precision: manufacturing tolerances in microns, not tenths of millimetres
- Durability: quality rails last tens of thousands of hours with basic lubrication
- Speed: handles high accelerations and speeds without the flex that plagues wheels
- Consistency: no eccentric nuts to drift, no flat spots to develop
Weaknesses:
- Cost: quality rails (Hiwin, genuine) cost $30–$60+ per axis; cheap clones vary wildly in quality
- Noise: steel balls on steel rails are louder than Delrin wheels — noticeably so
- Contamination sensitivity: dust and debris in the ball tracks cause rough spots; rails want covers or clean environments
- Installation precision: rails amplify frame imperfections — a twisted frame with rigid rails binds where flexy wheels would forgive
- Maintenance: need periodic light oiling; running dry destroys them
Linear Rails vs V-Wheels 3D Printer: Head-to-Head Comparison
- Print quality (moderate speeds): Tie — a well-tuned V-wheel printer matches rails below ~120 mm/s
- Print quality (high speeds): Rails win — rigidity matters when accelerations climb
- Durability: Rails win (with maintenance); wheels are consumables
- Noise: V-wheels win — quieter by a clear margin
- Cost: V-wheels win decisively
- Maintenance effort: Roughly tie — different tasks, similar frequency
- Forgiveness: V-wheels win — they tolerate imperfect frames and dusty environments
Linear Rails vs V-Wheels 3D Printer: When Rails Are Worth It
- You’re chasing speed: running input shaping at 300+ mm/s with high accelerations — rails’ rigidity pays off
- Your wheels are worn out anyway: if you’re replacing the whole motion system, the incremental cost of rails shrinks
- You’re doing a full rebuild: new frame, new gantry — build it right with rails from the start
- Precision matters: engineering fits, interchangeable parts, tight tolerances
- You enjoy the project: honestly, this is a valid reason — it’s a satisfying upgrade to install
When to Stick with V-Wheels
- You print below ~150 mm/s: you literally cannot see the difference
- Your prints already look great: don’t fix what isn’t broken — upgrade the limiting factor, which is probably slicer settings or filament
- Budget matters: $100+ in rails buys a lot of filament
- You value quiet: bedroom/office printers stay on wheels
- Dusty environment: workshop printers often do better on forgiving wheels than on contamination-sensitive rails
The Clone Rail Trap
The critical nuance nobody mentions loudly enough: cheap clone rails are often worse than good V-wheels. A $12 MGN12H from a no-name seller may have rough ball tracks, inconsistent preload, and binding spots. Quality hierarchy:
- Genuine Hiwin / THK: the gold standard; expensive but flawless
- Reputable mid-tier (e.g., LDO-spec, well-reviewed sellers): the sweet spot for most upgraders
- Random clones: lottery — some fine, some terrible; buy from sellers with real reviews
If your budget only stretches to the cheapest clones, you’re better off buying quality replacement V-wheels and spending the difference on filament.
Installation: What to Expect
A rail conversion is a weekend project, not an evening one:
- Print/buy adapters: most conversions need printed carriage adapters — print these before disassembly, on the working printer
- Square the frame first: rails punish twisted frames; disassemble, square, and re-tighten the extrusion frame
- Mount rails: use a dial indicator or careful feel to align; tighten progressively
- Lubricate: light machine oil or specific linear rail grease — never run dry
- Re-tune everything: input shaping, pressure advance, belt tension — the motion system changed, so the tune must too
Beginner warning: this mod requires comfort with full printer disassembly. If you’ve never done more than a nozzle swap, build up to it.
The Alternative Upgrades That Matter More
Before spending on rails, check whether these cheaper fixes would help more:
- Input shaping tuning: free, and often a bigger quality jump than any hardware
- Quality wheels + proper eccentric adjustment: $15, often “fixes” what people blame on wheels
- Frame stiffening: brackets and braces, $20 — flex is usually in the frame, not the wheels
- Belt upgrade: genuine Gates belts, $15 — stretchy cheap belts cause more artefacts than wheels do
Verdict
Linear rails are a genuine upgrade — for the right printer and the right goals. If you’re pushing speeds, rebuilding anyway, or chasing ultimate precision, quality rails deliver. But they’re not magic: a well-maintained V-wheel printer at moderate speeds prints just as beautifully, quieter and cheaper. Use this linear rails vs v-wheels 3D printer breakdown as your pre-purchase checklist before spending a cent. Upgrade your tuning before your hardware, your frame before your motion system, and only reach for rails when you’ve identified motion flex as your actual limiting factor.
Planning printer mods? Check our 3D printer upgrade guides for more.
Step-by-Step: X-Axis Rail Conversion (Ender 3 Pattern)
The X-axis is the most common first conversion. Here’s the realistic process on an Ender-style printer:
- Print adapters first: download a proven conversion design (check makes/comments), print the rail mount and carriage adapter in PETG or ABS — before touching the printer
- Document the stock setup: photos of belt routing, wire paths, and endstop positions. You’ll thank yourself at 11pm.
- Remove the X gantry: take the whole X assembly off as one unit; lay it on the bench
- Strip the V-wheels: remove wheels and the old carriage plate
- Mount the rail: bolt the MGN12H rail to the extrusion using T-nuts; check straightness by sliding the carriage — it should glide with zero binding spots
- Attach the carriage adapter: mount your printed adapter to the rail carriage, then the hotend assembly to the adapter
- Re-route the belt: this is the fiddly part — belt must run parallel to the rail with no twist
- Reassemble and square: remount the gantry, verify X is perpendicular to the frame
- Lubricate, then re-tune: oil the rail, then re-run input shaping, pressure advance, and a full calibration print
Time budget: 4–8 hours for a first-timer. Don’t start at 9pm the night before you need the printer.
Rail Lubrication: The Details
- What to use: light machine oil (sewing machine oil works) or dedicated linear rail grease. Avoid WD-40 — it’s a solvent, not a lubricant.
- How often: a drop on each rail every 100–200 print hours, or when motion feels/sounds dry
- How to apply: with the printer off, put a drop on the rail and run the carriage back and forth by hand to distribute
- Signs of neglect: increased noise, rough spots in travel, visible dullness on the rail surface — address immediately; running dry scores the races permanently
- Dust protection: printed rail covers or bellows keep debris out of the ball tracks in workshop environments
Quick Cost-Benefit Calculator
Run your own numbers before buying:
- Total rail cost: rails + adapters + lubricant + (your weekend) ≈ $100–$180 AUD
- Alternative spend: genuine Gates belts ($30) + frame braces ($20) + accelerometer ($20) ≈ $70 — often bigger quality gains
- Break-even question: will rails fix a problem you can name? “My prints show Y-axis ringing at 250mm/s that input shaping can’t fully remove” justifies rails. “I heard rails are better” doesn’t.
- Resale reality: mods don’t increase a used printer’s value — budget printers with $200 in mods still sell as budget printers
Community Resources
- Printer-specific mod communities (Voron, Ender, Prusa) maintain tested rail conversion designs with real user feedback — always check the “makes” before committing
- Klipper’s resonance testing documentation is the definitive guide to measuring before/after results
- When buying rails in Australia, factor shipping — steel rails are heavy, and slow/cheap shipping risks bent rails; buy from suppliers who pack properly
When to Rebuild Instead of Upgrading
Sometimes the honest answer is: don’t upgrade this printer — build or buy the next one. Consider a fresh start when:
- The frame itself is the problem (twisted extrusion, stripped threads, cracked parts) — rails can’t fix a bad foundation
- You’ve already spent more on mods than the printer cost new — the sunk-cost fallacy is real in this hobby
- Your goals changed — if you bought a budget bed-slinger and now want enclosed high-speed CoreXY printing, no mod converts one into the other economically
- The used market: in Australia, well-maintained used printers sell quickly — selling yours funds the upgrade to a machine designed with rails from the factory
There’s no shame in outgrowing a printer. The Ender 3 that taught you the hobby did its job — passing it on (with honest disclosure of its mods) to a new maker continues the cycle.
Rail Sizing: MGN9 vs MGN12 vs MGN15
- MGN9: slim and light — good for direct-drive toolheads where every gram counts, but less rigid; niche choice
- MGN12: the 3D printing standard — the right balance of rigidity, size, and availability; what 95% of conversions use
- MGN15: overkill for most printers — heavier carriages add moving mass that partially offsets the rigidity gain; justified on large-format machines
- Length: match your axis travel plus carriage length plus margin — measure twice; too-short rails are useless, too-long rails just cost more
- Preload: light preload (Z0/Z1) is correct for 3D printers — heavy preload increases friction and wear without print-quality benefit
Y-Axis Rails: Special Considerations
- Dual rails vs single: most bed-slinger Y conversions use a single central MGN12 rail — simpler and sufficient; dual rails add alignment headaches
- Bed weight matters more: the Y-axis moves the entire bed — rail rigidity helps, but reducing bed mass (PEI spring steel over glass) helps equally
- Do X first: the X-axis shows bigger gains per dollar on most printers; convert X, evaluate, then decide on Y
- CoreXY note: on CoreXY machines the “axes” aren’t independent — rail upgrades usually happen as a matched gantry set, not one axis at a time
Bottom line, one more time: rails are excellent hardware that solves a specific problem. Most printers don’t have that problem — they have tuning, frame, or belt problems wearing a rails costume. Diagnose first, spend second, and you’ll never regret an upgrade again.
Whatever you decide, measure before and after — a ringing tower printed on the old system and the new one is the only honest way to know what your money bought.
Should I upgrade to linear rails or tune my V-wheels first?
Tune first: this linear rails vs v-wheels 3D printer guide shows a well-maintained V-wheel machine prints beautifully at moderate speeds, so only buy rails when you’re pushing speeds or rebuilding anyway.
Frequently Asked Questions
Are linear rails better than V-wheels?
More rigid and precise — which matters at high speeds. At moderate speeds, well-tuned V-wheels match them, quieter and cheaper.
How much does a linear rail upgrade cost?
$80–$150 AUD for a full X/Y conversion with quality rails. Skip ultra-cheap clones.
Are linear rails louder than V-wheels?
Yes, noticeably — steel balls on steel rails vs quiet Delrin wheels.
Do linear rails need maintenance?
Yes — regular light oiling and dust protection. Never run them dry.
Will linear rails improve my print quality?
Only if motion flex is your bottleneck (high speeds). Otherwise, tune first — it’s free.
For motion system engineering background, see Prusa’s knowledge base.