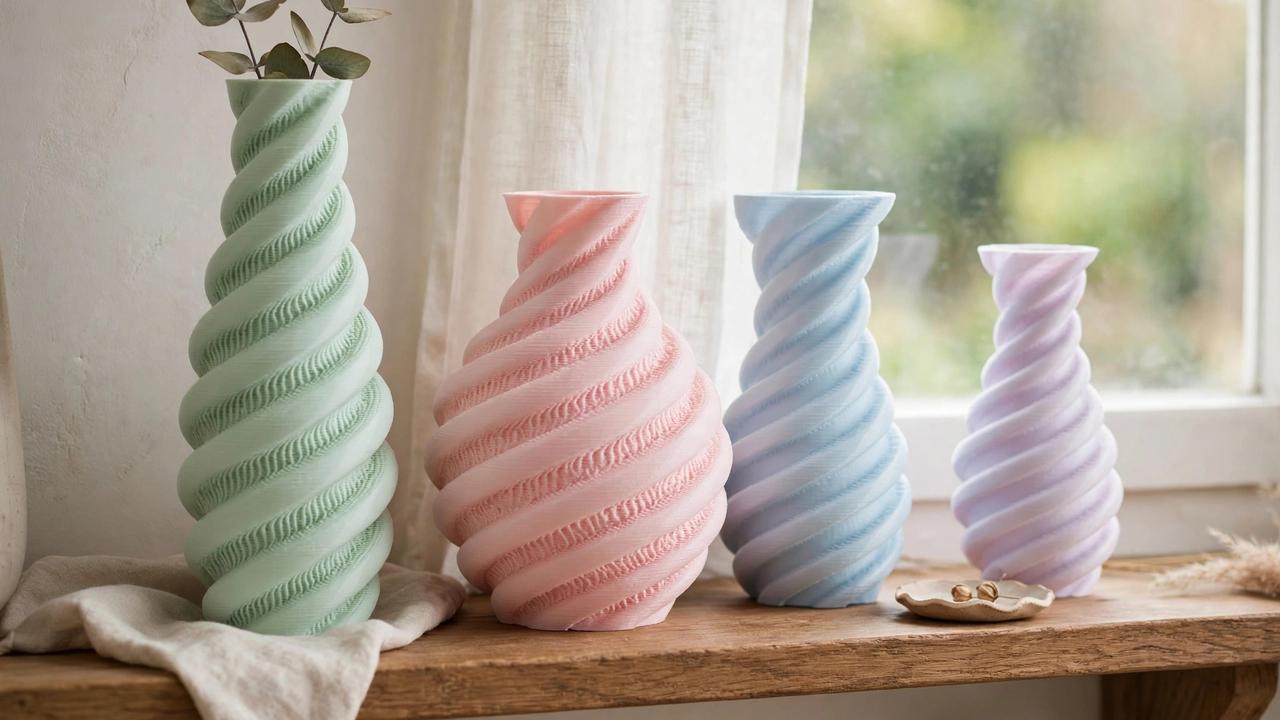
Few prints show off 3D printing like a beautiful vase — flowing curves, impossible geometries, colours no shop stocks. But 3D printed vases have a reputation for two failures: leaking like a sieve and looking rough. Both are solvable. This guide covers everything from vase mode mastery to genuinely watertight prints, the best filaments for vases, design principles, and finishing techniques that make prints look store-bought. These 3D printed vases tips come from real testing — follow them and your vases will hold water and turn heads.
Vase Mode Explained (Spiralise)
Vase mode (called “Spiralize Outer Contour” in Cura, “Spiral Vase” in PrusaSlicer) prints the entire object as one continuous spiral — the Z-axis rises smoothly while the extruder traces an unbroken path. No layer changes, no seams, no retractions.
The result is magical for vases:
- Zero Z-seam — the ugly vertical line where layers start/stop simply doesn’t exist
- Fast — single-wall prints fly; a 200mm vase can finish in 2–4 hours
- Beautiful surface — continuous extrusion gives glass-smooth walls
- Material-efficient — one wall thick means minimal filament
The tradeoff: single-wall only. Vase mode can’t do overhangs beyond ~45°, can’t print separate parts, and produces delicate prints. It’s perfect for decorative vases, less so for functional water-holding ones (more on waterproofing below).
3D Printed Vases Tips: Vase Mode Settings That Matter
- Layer height: 0.2–0.3mm. Thicker layers = stronger single wall and faster prints; the smooth spiral hides layer lines well
- Line width: bump to 0.6mm+ with a 0.4mm nozzle for a sturdier wall (or use a 0.6–0.8mm nozzle)
- Speed: 30–50 mm/s — smooth and steady wins; too fast causes wall wobble
- Cooling: moderate — you want layers bonding well, not freezing mid-spiral
- Bottom layers: 4–6 solid bottom layers for a stable base
- No retraction, no Z-hop: the slicer handles this automatically in spiral mode
When NOT to Use Vase Mode
- Vases with handles or separate features (vase mode is one continuous wall)
- Designs with steep overhangs or inverted sections
- Functional water vessels — single walls leak; use normal mode with thick walls instead
- Anything needing strength — a single-wall vase is decorative, not structural
3D Printed Vases Tips: Making Vases Watertight
The eternal question. A vase that leaks is a disappointment; here’s how to guarantee watertightness:
Method 1: Normal Mode + Thick Walls + Sealant (Most Reliable)
Print in normal (non-vase) mode with 4–6 perimeters, then seal the inside with:
- Two-part epoxy — the gold standard; brush inside, let cure
- Clear polyurethane spray — easier, multiple light coats
- Food-safe epoxy if the vase will hold drinking water (rare, but possible)
Method 2: Vase Mode + Insert
Print a gorgeous vase-mode shell, then drop in a glass or plastic tube/insert to actually hold water. Best of both worlds: stunning exterior, guaranteed waterproof interior, zero sealing fuss. This is what most experienced makers actually do.
Method 3: Optimised Vase Mode Alone
With perfect settings (slight over-extrusion, thick line width, PETG), vase-mode prints can hold water — but “can” isn’t “will.” Test with water over newspaper before trusting it near your timber furniture.
Best Filaments for Vases
- Silk PLA — the vase superstar. Shiny, colour-shifting finish that looks incredible in spiral mode. Note: silk PLA is weaker and more brittle — decorative only.
- Matte PLA — elegant, modern, hides imperfections; great for minimalist designs
- PETG — for functional/water-holding vases; tougher and more water-resistant than PLA
- Wood-fill PLA — prints with a wood-like texture; stainable for a genuinely woody look
- Marble/stone-fill PLA — convincingly stone-like; heavy, premium feel
- Translucent PETG — stunning with LED tea lights inside (use low-heat LEDs only)
Avoid: standard glossy PLA for large vases (shows every flaw); ABS (warping on tall prints without enclosure).
Design Tips for Stunning Vases
- Embrace curves: vase mode loves smooth, continuous curves. Sharp corners create weak points and visual artefacts.
- Mind the overhang angle: keep walls within ~60° from vertical for clean spirals
- Base diameter matters: a narrow base on a tall vase = tipping hazard. Design the base at least 40% of max diameter.
- Try twist and wave modifiers: most slicers and CAD tools can apply sinusoidal displacement to a basic vase profile — instant designer look, zero modelling skill
- Texture via layer height: varying layer height creates visible banding patterns — use deliberately for ribbed effects
- Scale thoughtfully: doubling height quadruples print time and wobble risk. Tall vases need slower speeds.
Where to Find Vase Models
- Parametric vases: adjustable models on Printables where you tweak height, twist, and wave before downloading
- Designer collections: MakerWorld and Printables host stunning original vase designs
- Make your own: a simple lathe/revolve in Tinkercad or Fusion 360 makes a custom vase in minutes — it’s the easiest “designed it myself” win in 3D printing
Finishing Techniques
- Silk PLA: needs nothing — the finish is the feature
- Matte PLA: light sanding (400+ grit) then matte clear coat for a ceramic look
- Spray paint: primer + metallic gold/copper transforms a $2 print into a $50-looking piece
- Interior: always seal if holding water (see waterproofing above)
Troubleshooting Common Vase Problems
- Wall gaps/separation: increase flow 2–5% or widen line width
- Wobble on tall vases: slow down, check belt tension, ensure the printer is on a solid surface
- Base lifting: clean bed, correct Z-offset, consider a brim for tall narrow vases
- Blobs at start: in normal mode, align the Z-seam to the back; in vase mode this shouldn’t occur
- Stringy silk PLA: dry the filament — silk PLA is notoriously moisture-sensitive
Verdict
Printed vases are the perfect intersection of art and engineering: vase mode gives you flawless surfaces in hours, silk and specialty filaments give you gallery looks for dollars, and a simple insert solves waterproofing forever. Design one yourself in Tinkercad this weekend — it’s easier than you think, and nothing beats the reaction when someone asks where you bought it. Keep these 3D printed vases tips handy — the difference between a leaky experiment and a gift-worthy piece is usually one setting.
Want more decorative projects? Browse our 3D printing project guides.
Advanced Vase Techniques
Fuzzy skin for texture
Most slicers offer a “fuzzy skin” option that adds micro-jitter to outer walls — on vases it creates a stunning stone-like texture that catches light beautifully. Try it on matte filaments for a ceramic feel.
Multi-material vases
With an AMS/MMU, print gradient colour transitions up the vase height, or alternate materials (silk + matte bands). Purge waste is the cost — use it for display pieces where the effect justifies it.
Light-reactive designs
Translucent PETG vases with LED tea lights inside are showstoppers. Design wall thickness around 1.2–2mm for the right glow diffusion. Safety: LED only, never real candles — and keep electronics away from water if the vase holds any.
Two-part vases
Print the decorative shell in vase mode and a functional inner vessel in normal mode with thick walls. The inner takes water; the outer takes compliments. Join with a friction fit designed with 0.3mm clearance.
Gifting and Selling Printed Vases
- Gifts: a custom-designed vase in the recipient’s favourite colour is a genuinely impressive handmade gift — total cost under $5 in filament
- Markets: printed vases sell well at craft markets if the design is original and the finish is flawless — silk and marble filaments photograph and display best
- Photography tips for listings: natural window light, neutral background, flowers or pampas grass for scale and lifestyle appeal, close-ups showing the surface quality
- Pricing: material cost is negligible; price on design originality and finish quality — $25–$60 AUD is typical for artisan-look printed vases at Australian markets
Vase Design Challenge: 5 Weekend Projects
- The twist vase: take a basic profile, apply 180° twist in your slicer’s vase settings — instant sculptural piece
- The wave vase: sinusoidal wall displacement, 3–4 waves around the circumference
- The ribbed vase: deliberate layer-height banding for a corduroy texture
- The mini collection: scale one good design to 60%, 80%, 100% — a graduated set looks intentional and designed
- The two-tone: filament swap at a specific height for a clean colour break — measure the layer where the profile changes for maximum effect
Vase Mode in Different Slicers
- Bambu Studio / OrcaSlicer: “Spiral vase” checkbox in Others/process settings — the most refined implementation, with smooth speed handling
- PrusaSlicer: “Spiral vase” under Print Settings → Layers and perimeters — solid and predictable
- Cura: “Spiralize Outer Contour” under Special Modes — works well but check the bottom layers setting carefully
- Common gotcha: all slicers disable vase mode features like infill and top layers automatically — if your model has a lid or cap section, split it into a separate print
Photographing Vases for Maximum Impact
- Light: soft window light from the side shows form best; harsh overhead light flattens curves
- Background: neutral grey or white seamless — coloured backgrounds fight the vase for attention
- Angles: shoot at the vase’s mid-height, not from above — eye-level shows the profile designers intended
- Styling: pampas grass, eucalyptus stems, or nothing at all — empty vases photograph as pure sculpture
- Detail shots: close-ups of the surface texture sell the “3D printed” story — silk layer lines and fuzzy-skin textures are features, show them off
- Scale: include a hand or familiar object in one shot — vases photograph larger than they are
7 Vase Design Mistakes Beginners Make
- Too tall, too narrow: the classic — a 300mm vase on a 60mm base that topples with flowers in it. Widen the base or accept a squat design.
- Ignoring wall angle: walls steeper than ~60° from vertical won’t spiral cleanly — the extruder can’t bridge that far in vase mode
- Zero bottom thickness: 1–2 bottom layers flex and leak; use 4–6
- Printing silk PLA too hot: silk filaments string and blob above ~210°C — print cool and dry
- Skipping the test: a 50mm-tall test version reveals wobble and wall issues in 30 minutes instead of 6 hours
- Forgetting the insert: designing a watertight-looking vase with no plan for water — decide the waterproofing strategy before printing
- Over-detailing: tiny surface details vanish at vase scale and add print time — bold, simple forms photograph and display better
Vase Care and Longevity
- Dust: silk and textured finishes attract dust — a soft brush or compressed air keeps them pristine
- Sunlight: keep display vases out of direct sun; even indoor UV fades colours over years
- Water changes: if using an insert, change water regularly — stagnant water stains any container eventually
- Temperature: don’t place PLA vases near heaters or sunny windows — softening starts around 60°C
- Repairs: cracked vase? Super glue works on PLA/PETG; for clean breaks, the repair is nearly invisible on matte filaments
One last tip: save every vase profile that works. Vase printing is deeply settings-dependent — when you nail a beautiful print, export that slicer profile with the filament name in it. Six months later, you’ll thank yourself when you want to reprint it and can’t remember the magic numbers.
Vase printing rewards experimentation more than almost any other 3D printing discipline — the feedback loop is fast, the results are beautiful, and every variable you tweak teaches you something about how your printer really behaves. Print boldly.
Your weekend challenge: design one original vase in Tinkercad — just a revolved profile, nothing fancy — and print it in the most interesting filament you own. Photograph it well. When someone asks where you bought it, enjoy the moment. That feeling is what this hobby is really about.
What is the single most important of these 3D printed vases tips?
Nail watertightness first: of all the 3D printed vases tips here, getting a leak-free print with a simple insert or sealant matters more than any design trick.
Frequently Asked Questions
What is vase mode in 3D printing?
A spiral printing mode with no layer changes or seams — fast, smooth, single-wall prints. Perfect for decorative vases.
How do you make a 3D printed vase hold water?
Seal thick-walled prints with epoxy/polyurethane, or drop a glass insert into a vase-mode shell. Vase mode alone often leaks.
What is the best filament for 3D printed vases?
Silk PLA for looks, PETG for function, matte/wood/marble fills for specialty finishes.
Why does my vase mode print have gaps?
Usually under-extrusion — raise flow 2–5% or widen line width. Dry your filament too.
Can you print a vase without vase mode?
Yes — normal mode with thick walls suits functional vases and complex designs vase mode can’t handle.
For more 3D printing techniques, see the Prusa Knowledge Base.