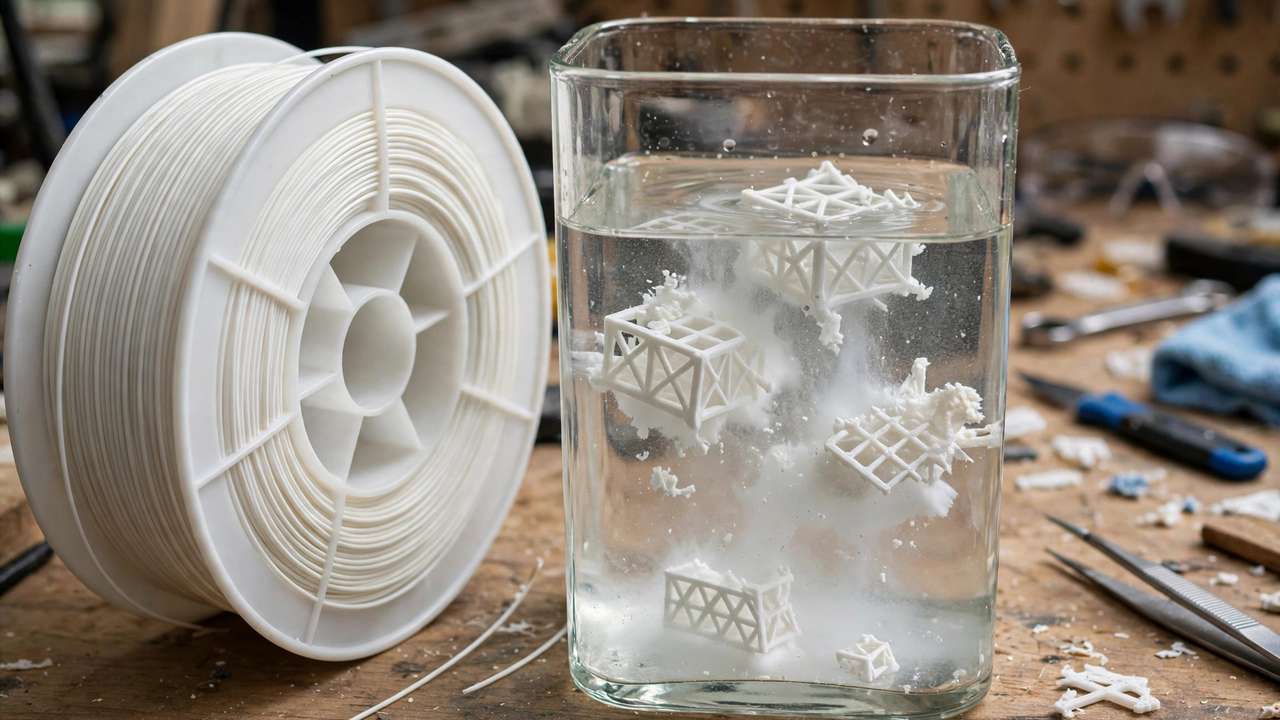
PVA support filament is the closest thing 3D printing has to magic: a support material that simply vanishes in water, leaving behind delicate overhangs and internal channels that would be impossible to clean by hand. If you’ve ever snapped a fragile model trying to rip off PLA supports, PVA will feel like a revelation.
But PVA also has a reputation — deserved — for being one of the most temperamental filaments in common use. It’s extraordinarily hygroscopic, degrades in hours rather than days, and punishes sloppy storage mercilessly. This complete guide covers everything: what PVA is, which printers can use it, exact print settings, storage and drying, the dissolving process, and how it compares to alternatives like HIPS and breakaway supports.
What Is PVA Filament?
PVA stands for polyvinyl alcohol — the same water-soluble polymer used in laundry pods and dissolvable packaging. In 3D printing, it’s extruded as a 1.75mm filament and used exclusively as a support material in dual-extrusion setups: one extruder prints your model (usually PLA), the other prints PVA wherever supports are needed.
After printing, you submerge the whole part in water. The PVA softens and dissolves away over several hours, leaving the model untouched — no pliers, no knives, no broken details. It’s the standard solution for:
- Complex overhangs and bridges that normal supports can’t reach
- Internal channels and cavities where supports can’t be removed mechanically
- Delicate models where prying off supports would break fine details
- Multi-part assemblies printed in place
Which Printers Can Use PVA?
PVA requires a printer that can print two materials in one job. Your options:
- IDEX (independent dual extruder) printers — the gold standard for PVA. Each toolhead is independent, so the PVA never sits cooking in a hot nozzle while the other material prints. Less contamination, less waste.
- Dual-extrusion printers (shared or dual heads) — work fine, but expect more purging and waste. Our best dual extruder 3D printers roundup covers the current options.
- Single-extruder with filament swapping — technically possible via manual swaps or systems like the Prusa MMU, but PVA’s moisture sensitivity makes long idle times in a hot nozzle particularly problematic. Not recommended for beginners.
- Toolchangers — the premium option; each material gets its own parked tool.
One critical compatibility note: PVA pairs with PLA, not PETG. The adhesion between PVA and PETG at the support interface isn’t reliable enough for load-bearing supports during the print. If your model material is PETG, PVA is the wrong support choice from the outset — consider breakaway supports or HIPS instead.
PVA Print Settings: The Numbers That Work
PVA is fussy, so start with these baseline settings and tune from there:
- Nozzle temperature: 190-200°C (start at 195°C)
- Bed temperature: 45-60°C — conveniently matches PLA, so no bed compromise needed
- Print speed: 20-30mm/s for PVA sections. Slow is smooth; PVA rewards patience.
- Cooling fan: Moderate — PVA prefers less fan than PLA. Around 50% is a good starting point.
- Retraction: Tune carefully to control oozing and stringing; enable a wipe/prime tower in your slicer.
- Layer height: Match your model material’s layer height exactly — mismatched layer heights between extruders cause irregular support surfaces.
- Support interface: Use a 0.1mm Z-gap at the support-model interface for clean separation.
- Support density: 30-40% with a hollow or grid pattern dissolves far faster than solid supports.
A prime/purge tower (at least 20mm) is strongly recommended — it catches the contaminated transition material so it doesn’t end up in your model or supports.
Storage and Drying: PVA’s Achilles Heel
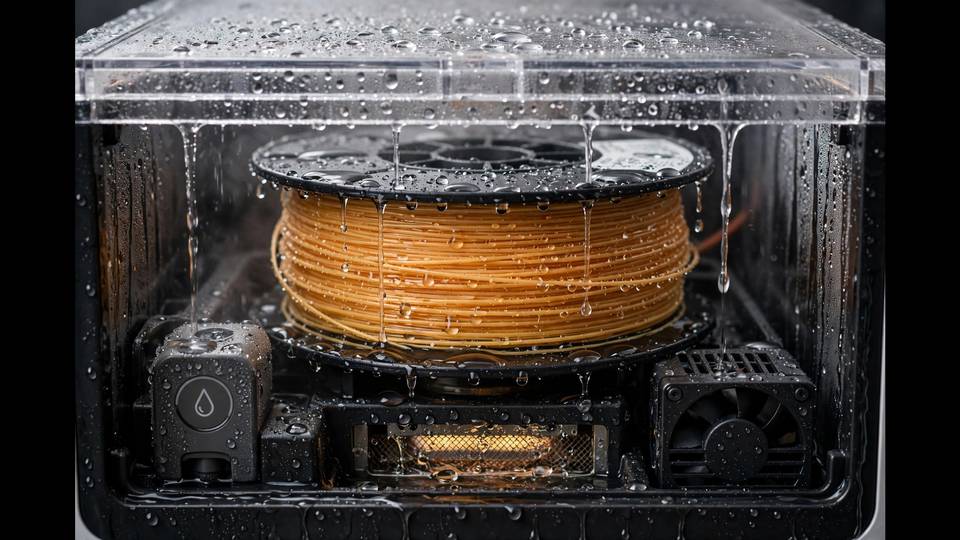
This is where most first attempts with PVA support filament fail. PVA is the most hygroscopic filament in common FDM use — it absorbs moisture from the air fast enough to ruin print quality within hours, not days. Wet PVA foams, bubbles, jams the nozzle, and produces supports that fail before the print even needs them.
Storage Rules
- Store in a sealed dry box with active desiccant at all times — before, during, AND after printing. Yes, even while printing: feed it from the dry box.
- Keep relative humidity under 20% in the storage container.
- Vacuum-sealed bags with desiccant for long-term storage.
- If the filament feels soft, looks discoloured, or extrudes with popping/bubbling, it’s wet.
Drying Wet PVA
- Temperature: 45-55°C for 6-12 hours. Keep it gentle — PVA has a low glass transition temperature and will deform on the spool if dried too aggressively.
- Use a filament dryer or a food dehydrator, not your oven (temperature control is too coarse).
- Our guide to drying wet filament covers dryer options available in Australia.
Dissolving PVA: The Payoff
Once the print finishes, the satisfying part begins:
- Submerge the print in warm water — 40-60°C is ideal. Lukewarm to moderately warm, gently stirred.
- Agitate gently or use a small aquarium pump for circulation. Moving water dissolves PVA dramatically faster than still water.
- Change the water if it becomes cloudy or saturated, especially for large support volumes.
- Be patient: depending on support volume, full dissolution takes 2-12 hours. Overnight in a still bath works fine.
- Rinse the print with clean water to remove residual PVA film, then let it dry completely.
Critical warning: do NOT use boiling water. Above ~60°C you risk warping the PLA model you’re trying to protect. Warm, not hot. Ultimaker’s own guidance suggests keeping water under 35°C when the model is PLA to be extra safe, though most makers find 40-50°C fine with monitoring.
Speed trick: soak for 10 minutes, then remove the bulk of softened support with pliers before returning the print to the bath. This can cut total dissolution time significantly.
PVA vs Alternatives
- vs HIPS (dissolves in limonene): HIPS pairs with ABS rather than PLA, and limonene is a solvent requiring ventilation and careful handling. PVA + water is simpler and safer for most users.
- vs Breakaway supports (same material): Free, no second extruder needed, but requires manual removal and can’t handle internal geometries. Fine for simple overhangs; useless for enclosed cavities.
- vs BVOH: BVOH (butenediol vinyl alcohol copolymer) is PVA’s premium cousin — dissolves faster and is slightly less moisture-sensitive, but costs significantly more. Worth it for production work; overkill for hobbyists.
Common PVA Problems and Fixes
- Foaming/bubbling during extrusion: Wet filament. Dry it (45-55°C, 6-12h) and print from a dry box.
- Nozzle jams: Often wet PVA swelling in the hotend. Also check that PVA isn’t sitting idle at temperature between tool changes — it carbonises quickly. Minimise idle time.
- Poor adhesion to PLA: Check interface settings and temperatures. A 0.1mm interface gap and matched layer heights solve most cases.
- Supports failing mid-print: Usually moisture, but also check that support density isn’t too low for the overhang load.
- Stringing and oozing: Tune retraction, lower temperature slightly, and ensure a prime tower is enabled.
- Discolouration/burning: PVA degrades if held at temperature too long. Reduce standby temperature for the inactive extruder if your firmware supports it.
Is PVA Worth It?
PVA support filament isn’t an everyday material — it’s a specialist tool. But for the jobs it’s designed for (complex internal geometry, delicate overhangs, professional-looking support removal), nothing else comes close at the hobbyist level. The keys are simple: keep it dry, print it slow, dissolve it warm. Respect those three rules and PVA will feel like magic. Ignore the first one and it’ll feel like a practical joke.
If you’re buying PVA in Australia, check our where to buy filament in Australia guide for local suppliers — buying domestically means the spool spends less time in humid shipping containers.
Slicer Setup Walkthrough for PVA Supports
Settings on paper are one thing; configuring them in your slicer is another. Here’s the practical walkthrough for the two most common slicers:
OrcaSlicer / Bambu Studio
- Enable the second extruder and assign PVA to it in the filament settings.
- Set PVA temperatures: 195°C nozzle, 55°C bed.
- Under Support settings, set support material to the PVA extruder while keeping the model on the primary extruder.
- Enable a prime tower (minimum 20mm) — this is non-negotiable with PVA.
- Set support interface layers to 2-3, with 0.1mm Z-gap.
- Reduce PVA print speed to 25mm/s in the speed settings for the support extruder.
- Set the inactive extruder standby temperature 20-30°C below printing temp to reduce PVA degradation during idle.
PrusaSlicer / SuperSlicer
- Configure both extruders in Printer Settings, assigning PVA to extruder 2.
- In Print Settings > Support material, select extruder 2 for supports and support interface.
- Enable a wipe tower with sufficient volume — PVA transitions are dirtier than PLA-to-PLA.
- Under Filament Settings for PVA: 195°C first layer, 190°C subsequent, 55°C bed, 25mm/s.
- Set “ooze prevention” temperature drop for the idle extruder.
Run a small test first — a 30mm calibration cube with an overhanging feature — before committing to a 20-hour print. Dial in the interface gap by examining how cleanly supports separate after a quick 30-minute soak.
PVA Support Filament: Brand Comparison
Not all PVA is equal. Here’s how the common options stack up:
- eSUN PVA: The community default. Reliable dissolution, reasonable price (around AU$45-55/kg), vacuum-sealed with desiccant. Slightly stringy — tune retraction.
- Polymaker PolyDissolve S1: Premium option with faster dissolution and better layer adhesion. Costs more (AU$70-90/kg) but noticeably easier to print.
- Ultimaker PVA: The professional reference standard, optimised for Ultimaker machines but works elsewhere. Expensive (AU$100+/750g) — justified for commercial work, overkill for hobbyists.
- Generic/no-name PVA: Gamble. Inconsistent diameter, unknown additives, sometimes barely dissolves. The AU$20 you save isn’t worth a failed 15-hour print.
PVA Support Filament: Cost Reality Check
PVA is expensive compared to model filament — typically 2-3x the price of PLA per kilogram. But you use far less of it: supports are usually 10-20% of total print weight. A 500g spool (around AU$30-45) lasts most hobbyists months. The real cost isn’t the filament — it’s the second extruder and the learning curve. Budget for a few failed attempts while you dial in settings; that’s normal and expected.
To minimise waste: use support blockers in your slicer to put PVA only where the interface touches the model, with cheap PLA for the bulk support structure underneath. This “PVA interface only” technique cuts PVA consumption by 70-80%.
PVA and Multi-Material: Advanced Techniques
Once you’ve mastered basic PVA supports, these techniques take it further:
- Soluble interface only: Use PVA just for the 2-3 interface layers touching the model, with cheap PLA for the bulk support below. Cuts PVA use by 70%+ with identical surface quality.
- Support painting: In Bambu Studio and OrcaSlicer, paint supports only where truly needed. Less support = less PVA = faster dissolution.
- Tree + PVA hybrid: Organic tree supports in PLA for the structure, PVA interface layers where they touch the model. Best of both worlds.
- Enclosed chambers: PVA warps less than you’d expect, but a warm chamber (35-40°C) improves inter-layer adhesion for tall support structures.
- PVA as a joining aid: Print interlocking parts with PVA as a temporary assembly jig — dissolve it to release mechanisms printed in place.
What About Printing PVA on a Single-Extruder Machine?
It’s possible via manual filament swaps at the support layers, but honestly not recommended. PVA’s moisture sensitivity means every minute it sits in a hot nozzle degrades it, and manual swaps on a 15-hour print will test anyone’s patience. If you’re serious about soluble supports, a dual-extrusion or IDEX machine is the real entry ticket. Until then, well-tuned breakaway supports handle 90% of hobby needs.
Frequently Asked Questions
What temperature should I print PVA at?
190-200°C nozzle, 45-60°C bed, 20-30mm/s print speed. Start at 195°C and tune from there.
How long does PVA take to dissolve?
2-12 hours depending on support volume, in warm (40-60°C) agitated water. Overnight soaking works fine for most prints.
Can I use PVA with PETG?
No — PVA doesn’t adhere reliably to PETG at the support interface. PVA is designed to pair with PLA. For PETG models, use breakaway supports or HIPS.
How do I store PVA filament?
In a sealed dry box with desiccant at under 20% humidity, at all times — including during printing. Dry at 45-55°C for 6-12 hours if it absorbs moisture.
Is dissolved PVA safe to pour down the drain?
PVA is biodegradable and generally drain-safe where wastewater goes to a treatment plant, but check your local regulations. Run hot tap water for 30 seconds afterwards to prevent buildup.
For a deeper technical reference on PVA behaviour and settings, 3DBite’s PVA guide is one of the most thorough write-ups available.