If you’ve ever watched a PLA print sag in the Australian sun or seen ABS turn brittle and yellow after a summer outdoors, you already understand the problem ASA filament 3D printing was designed to solve. ASA (Acrylonitrile Styrene Acrylate) is essentially ABS’s tougher, weatherproof sibling — same mechanical strength and heat resistance, but with genuine UV stability that lets prints survive years outdoors instead of months. For car parts, garden fixtures, drone components, and anything that lives outside, it’s the filament serious makers reach for.
The catch: ASA is one of the more demanding filaments to print well. It warps like ABS, needs an enclosure, and produces fumes you shouldn’t breathe. This guide covers everything — what ASA is, when to choose it over the alternatives, the exact settings that work, and the safety setup you need before your first spool.
ASA Filament 3D Printing Basics: What Is ASA, Exactly?
ASA is a thermoplastic in the styrene family, closely related to ABS. The key chemical difference: where ABS uses butadiene rubber for impact resistance, ASA uses an acrylic ester rubber. That substitution is what gives ASA its standout property — the acrylic component is inherently UV-stable, while butadiene degrades under ultraviolet light.
In practical terms:
- UV resistance: ASA retains its colour and mechanical properties after prolonged sun exposure. ABS yellows, chalks, and becomes brittle. This is the headline difference and the reason ASA exists.
- Mechanical strength: comparable to ABS — tough, impact-resistant, good layer adhesion when printed correctly. Stronger than PLA and PETG in most measures except layer-line strength under certain conditions.
- Heat resistance: glass transition around 100–105°C (vs ~60°C for PLA, ~80°C for PETG). ASA parts survive hot cars and sun-baked surfaces that destroy PLA.
- Chemical resistance: good resistance to many chemicals, though not as broad as nylon or polycarbonate.
- Printability: similar difficulty to ABS — significant warping, needs an enclosure, benefits from a heated chamber.
Think of it this way: if ABS is the indoor engineering filament, ASA is the outdoor engineering filament. Same family, same strengths, but ASA goes outside.
ASA vs ABS vs PETG: When to Choose What
The three-way comparison makers actually need:
- Choose ASA for: anything outdoors or in direct sun (car exterior parts, garden fixtures, outdoor enclosures, drone frames), parts needing both toughness and UV stability, ASA is also slightly less prone to warping than ABS in many formulations.
- Choose ABS for: indoor functional parts where UV doesn’t matter and you want the cheapest engineering filament. ABS is typically $5–10/kg cheaper than ASA. If it never sees sunlight, ABS does the same job for less.
- Choose PETG for: easy outdoor-ish prints where maximum toughness isn’t critical. PETG handles moderate UV and heat far better than PLA, prints without an enclosure, and is much more forgiving. For a garden bracket that doesn’t bear serious load, PETG is the pragmatic choice.
The decision tree: outdoors + structural = ASA. Outdoors + non-structural = PETG is probably fine. Indoors + structural = ABS (cheaper) or ASA (if you already stock it). Our filament comparison guide covers the full material landscape.
What You Need Before ASA Filament 3D Printing
An Enclosure (Non-Negotiable)
ASA warps aggressively without a stable, warm ambient temperature. An enclosure that holds 40–50°C around the print is the difference between success and a curled-up mess. This doesn’t have to be fancy — many makers start with a simple tent-style enclosure — but it does have to exist. Printing ASA in open air, especially in an air-conditioned room, is an exercise in frustration.
Our enclosure guide covers options from budget tents to purpose-built chambers. If you’re printing ABS already, your existing enclosure works for ASA.
Ventilation or Filtration
ASA, like ABS, releases styrene and other volatile compounds when printed. Styrene is a recognised irritant and possible carcinogen with chronic exposure — this isn’t fear-mongering, it’s chemistry. You need one of:
- Vent the enclosure outside via a duct and inline fan. The gold standard.
- Recirculating filtration with activated carbon + HEPA. Good commercial options exist; DIY carbon filter boxes are popular.
- Print in a ventilated space you don’t occupy — garage with the door cracked, shed, etc. The minimum viable approach.
What you should not do: print ASA in your bedroom with the door closed. The smell is the least of the problem — it’s what you can’t smell that matters. Our printer safety guide covers the broader safety picture.
The Right Build Surface
ASA needs a hot bed (90–110°C) and a surface it grips. Textured PEI at 100°C+ works well. Glass with ABS slurry or specialist adhesive (Magigoo’s ABS/ASA formula) is the traditional approach. A brim (8–10mm) is cheap insurance on anything with corners — ASA loves to lift at sharp corners as it cools.
ASA Print Settings That Work
Start with these baselines, then tune for your specific filament brand:
- Nozzle temperature: 240–260°C. Start at 250°C. ASA needs heat for good layer adhesion — under-extruded, cool ASA is brittle.
- Bed temperature: 90–110°C. Start at 100°C on PEI.
- Chamber/enclosure: as warm as you can get it, 40°C+ minimum. Every degree helps with warping.
- Print speed: 40–60mm/s for functional parts. ASA rewards patience — fast printing increases warping risk.
- Cooling fan: 0–30%. Minimal cooling is key; the fan is the enemy of layer adhesion in ASA. Many profiles run 0% fan for the first several layers, then 10–20% max.
- First layer: slow (20mm/s), slightly over-extruded, with a brim on anything angular.
- Retraction: similar to ABS — 4–6mm at 40mm/s for Bowden, 0.5–1.5mm for direct drive. Tune with a retraction tower.
Two ASA-specific tips: dry your filament — ASA absorbs moisture, and wet ASA prints with rough surfaces and weak layers. Dry at 60–65°C for 4–6 hours before important prints. And avoid drafts ruthlessly — even with an enclosure, don’t open it mid-print unless necessary. Temperature stability is everything. Master the enclosure and the drying routine, and ASA filament 3D printing rewards you with parts that outlast ABS outdoors by years.
Common ASA Failures and Fixes
- Corner lifting/warping: enclosure too cool, bed too cool, or no brim. Add brim, raise bed 5°C, check enclosure temperature. Mouse ears (small circular brims on corners only) are an elegant targeted fix.
- Layer delamination (splitting): printing too cool or too fast, or too much fan. Raise nozzle 5–10°C, slow down, reduce fan. Delamination means the layers aren’t fusing — more heat and less cooling.
- Rough, matte surface: usually wet filament. Dry it. ASA should print with a slight sheen; a rough, almost fuzzy surface is the classic wet-filament tell.
- Stringing: retraction tuning, plus check filament dryness. Wet ASA strings badly.
- Cracking days after printing: internal stresses from uneven cooling. Annealing (see below) can help; otherwise, warmer enclosure and slower cooling.
Annealing ASA: Stronger Parts
ASA responds well to annealing — heating the finished print to just below its glass transition temperature to relieve internal stresses and improve layer bonding. The process: place the print in an oven at 90–100°C for 30–60 minutes, then let it cool slowly with the oven door closed.
Benefits: measurably stronger layer adhesion, reduced internal stress (less long-term cracking), slightly improved heat resistance. Costs: minor dimensional shrinkage (0.5–2%, so design slightly oversize for critical fits), and you need an oven you trust at low temperatures — verify with an oven thermometer, as many ovens overshoot.
Don’t anneal in the oven you cook food in unless you ventilate thoroughly afterwards. A cheap secondhand toaster oven dedicated to the workshop is the maker solution.
Where to Buy ASA in Australia
ASA filament 3D printing supplies are well-stocked by Australian sellers. Expect to pay $35–55/kg for quality ASA — more than PLA ($25–35) but reasonable for an engineering material. Brands with good reputations in the AU maker community include Polymaker (ASA), eSun (ASA), and various local resellers’ house brands. Check our Australian filament sellers guide for current stockists.
Colour choice matters more with ASA than PLA: darker colours absorb more heat in the sun (fine — ASA handles it), but for outdoor parts, consider that black ASA in direct sun can still reach 70°C+ surface temperatures. It’s designed for that, but mating parts and tolerances should account for thermal expansion.
ASA Brands Worth Buying
Not all ASA is created equal. The formulation differences between manufacturers affect warping tendency, layer adhesion, and UV stability — the very properties you’re buying ASA for. Brands with strong reputations in the maker community:
- Polymaker ASA: widely regarded as the easiest-printing ASA, with good warp resistance and consistent quality. The default recommendation if you’re unsure. Typically $45–55/kg in Australia.
- eSun ASA: solid mid-range option, good colour selection, reliable. Often $35–45/kg — the value pick.
- Fillamentum ASA: premium European ASA with excellent UV stability data. Pricier ($55–65/kg) but the choice when longevity really matters.
- Local AU house brands: several Australian resellers offer house-brand ASA that’s well-regarded. The advantage: fresh stock (less warehouse time absorbing moisture) and local support.
Whatever brand you choose, buy from a seller with high turnover. ASA sitting in a warehouse for a year arrives pre-moistened, and you’ll spend your first day drying it. Fresh stock matters more with ASA than with PLA.
ASA vs Polycarbonate: The Step Up
Makers who outgrow ASA sometimes eye polycarbonate (PC) — even tougher, even more heat-resistant (glass transition ~150°C). The honest comparison:
- Strength: PC wins on raw impact strength and heat resistance. ASA wins on printability and UV stability (PC yellows outdoors).
- Difficulty: PC is significantly harder — needs 270–310°C nozzle, 100°C+ bed, and a genuinely hot chamber (60°C+). Many desktop printers can’t do it well.
- Use case split: ASA for outdoor + tough. PC for extreme heat + extreme impact, indoors. For 95% of makers, ASA is the practical ceiling — PC is for when you have a specific application that demands it.
Don’t skip ASA to go straight to PC. Master ASA first; the enclosure discipline, drying habits, and warp management you learn transfer directly, and you’ll know whether you actually need PC’s extra performance.
Real-World ASA Applications
To make this concrete, here’s what makers actually print in ASA:
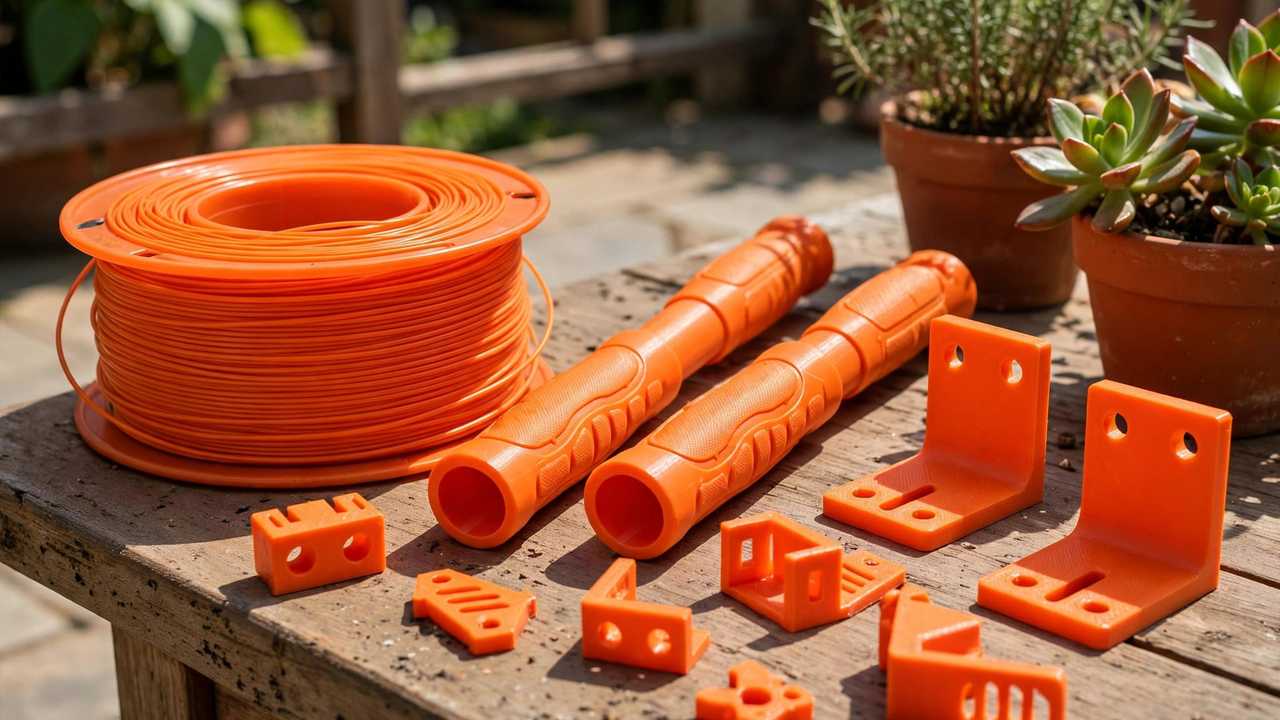
- Automotive: mirror caps, trim clips, licence plate frames, interior brackets, sensor mounts. The UV stability means they don’t degrade in the Aussie sun like ABS would.
- Outdoor fixtures: garden light housings, irrigation fittings, mailbox components, outdoor camera mounts, pool equipment parts.
- Drones and RC: frames, canopies, landing gear — anywhere that toughness plus sun exposure matters.
- Tooling and jigs: workshop fixtures that live in hot sheds. ASA’s heat resistance keeps them dimensionally stable where PLA would soften.
- Marine: boat fittings, kayak accessories, tackle box components. The UV and moisture resistance combination is ideal — though for constant submersion, consider PETG or nylon instead.
The pattern: ASA earns its keep wherever sun plus stress coincide. If only one of those applies, a simpler filament probably suffices.
One final consideration: ASA’s slight texture and matte finish (compared to PLA’s sometimes glossy look) actually suits outdoor and functional parts — it reads as “engineered” rather than “hobby.” If you’re making parts for others — clients, friends, market stalls — ASA’s professional appearance is a quiet selling point that photographs well and feels substantial in the hand.
Frequently Asked Questions
Is ASA better than ABS for outdoor use?
Yes, significantly. ASA’s acrylic rubber component is UV-stable, so it retains colour and strength after years in sunlight. ABS yellows, chalks, and becomes brittle with UV exposure. For any outdoor application, ASA is the clear choice.
Can I print ASA without an enclosure?
Technically possible for very small parts, but not recommended. ASA warps aggressively without a warm, stable ambient temperature. An enclosure holding 40°C+ is effectively mandatory for reliable results on anything bigger than a calibration cube.
Is ASA toxic to print?
ASA releases styrene and other VOCs when printed, like ABS. Print in a ventilated space or vent/filter your enclosure — don’t print ASA in an occupied bedroom. With proper ventilation, it’s a standard workshop material.
What temperature should I print ASA at?
Start at 250°C nozzle, 100°C bed, with minimal part cooling (0–20%). Enclosure as warm as possible (40°C+). Tune from there for your specific filament brand — different manufacturers’ ASA can vary by 10°C.
Can I smooth ASA like ABS with acetone?
Yes — ASA responds to acetone vapour smoothing similarly to ABS, giving glossy, watertight surfaces. Same safety caveats apply: acetone fumes are flammable and harmful, so do it outdoors or with proper ventilation, away from ignition sources.
What do I need to start ASA filament 3D printing at home?
An enclosed printer (or add-on enclosure holding 40°C+), a way to vent or filter fumes, a PEI build surface, and dry filament. That setup handles ASA reliably — the filament itself is only half the equation.