You printed a beautiful model, held it up to the light — and there they are: faint ripples echoing every sharp corner and text detail, like a shadow of the geometry trailing across the surface. That’s ghosting (also called ringing), one of the most common print quality issues in 3D printing. The good news? If you want to fix ghosting and ringing in your 3D prints, the causes are well understood and the fixes range from a simple slicer tweak to a weekend frame upgrade. If you’re here to fix ghosting ringing 3D prints leave on corners and text, start with the nine proven fixes below.
What Is Ghosting (Ringing) in 3D Printing?
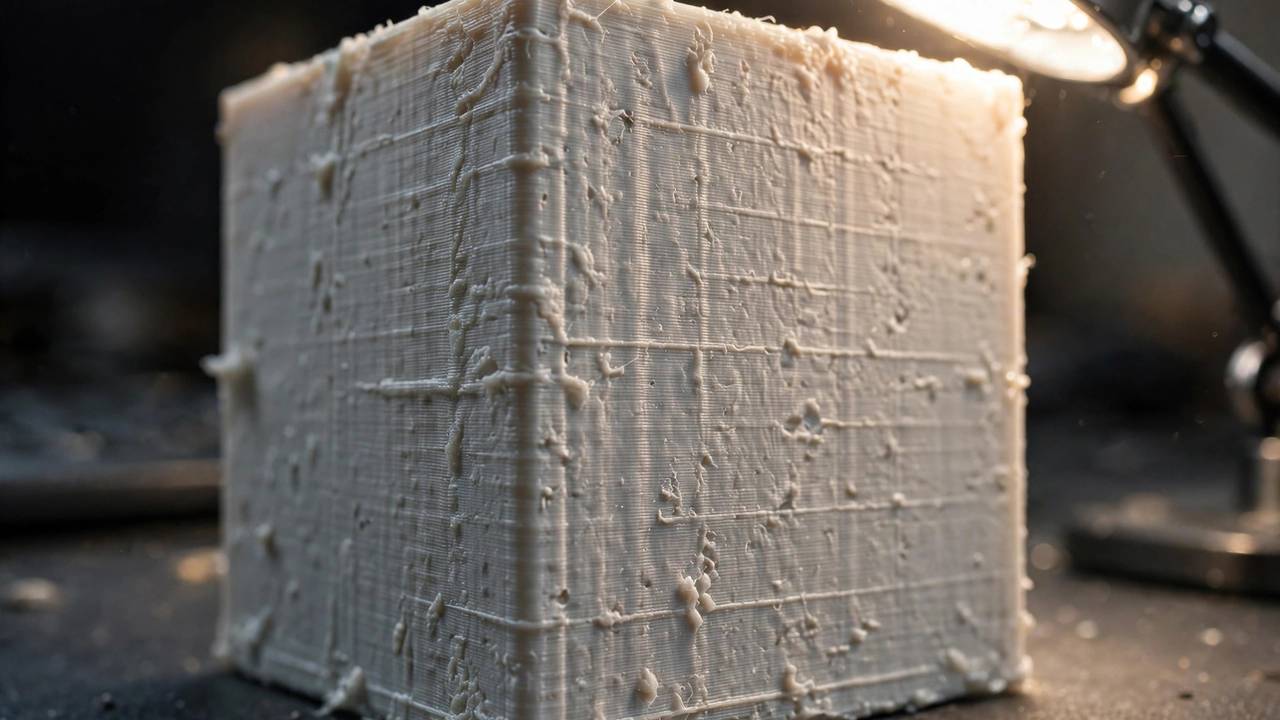
Ghosting appears as repeating ripples or “echoes” on flat print surfaces, most visible next to sharp features like corners, embossed text, or holes. The ripples fade with distance from the feature — like ripples from a stone thrown in a pond.
It happens because your printer’s motion system has resonance. When the print head changes direction suddenly (say, whipping around a corner at speed), the belts, frame, and gantry vibrate like a guitar string. The nozzle keeps oscillating for a fraction of a second after the direction change, and those tiny oscillations get printed into the plastic as visible waves.
Key insight: ghosting is a mechanical vibration problem, not a filament problem. Changing filament brands won’t fix it — but calming the vibrations will.
How to Confirm It’s Actually Ghosting
Before you start fixing, make sure you’re diagnosing the right defect. Ghosting is often confused with:
- Layer shifting — sudden, permanent offsets in the print (usually loose belts or pulley issues, not vibration)
- Z-banding — horizontal lines repeating at regular height intervals (lead screw or temperature issues)
- Salmon skin — fine diagonal texture from stepper driver artefacts (mostly an older-printer issue)
The ghosting test: print a small cube with embossed text (like an “X” or your initial) on one face. If you see ripples trailing away from the text that fade with distance, that’s ghosting. If the defect is uniform across the whole print regardless of features, look elsewhere.
Fix 1: Slow Down (The 5-Minute Fix)
The single biggest lever on ghosting is speed. Vibration energy scales with the square of velocity — halve your speed and you quarter the vibration energy. That is why the fastest way to fix ghosting ringing 3D prints produce is to slow the outer walls first, before touching anything else.
- Outer wall speed: Drop it to 40–60 mm/s. Outer walls are what you see, so this one setting has the biggest visual impact.
- Acceleration: Reduce outer-wall acceleration to 500–1000 mm/s² if your slicer exposes it.
- Jerk/junction deviation: Lower values = gentler direction changes = less ringing.
Yes, prints take longer. But a slow beautiful print beats a fast ugly one, and this fix costs nothing and takes 30 seconds in your slicer.
Fix 2: Enable Input Shaping
Input shaping is the modern miracle cure for ghosting. Instead of fighting vibrations mechanically, the firmware cancels them: it shapes the motor commands so that the vibrations from one move are cancelled by counter-vibrations from the next. The result is dramatically reduced ringing with almost no speed penalty.
- Bambu Lab printers: Input shaping (vibration compensation) runs automatically during calibration. If you moved the printer, re-run calibration.
- Klipper firmware: Run the resonance test with an accelerometer (or the manual ringing-tower method) and apply the recommended shaper settings.
- Marlin 2.1+: Input shaping is available but requires manual tuning via test prints.
If your printer supports input shaping and you haven’t enabled it, do this before anything else — it’s the highest-impact fix available on modern machines.
Fix 3: Tighten Your Belts (Properly)
Loose belts are a classic ghosting amplifier. The belt should be taut like a guitar string — pluck it and you should hear a low musical twang, not a floppy thud. But don’t overtighten: excessively tight belts strain stepper motors and can cause their own artefacts.
Check both X and Y belts, and while you’re there, verify that:
- Belt teeth are clean and undamaged
- Pulleys and idlers spin freely without wobble
- Grub screws on motor pulleys are tight (a loose grub screw causes layer shifts too)
Fix 4: Stabilise the Printer’s Footing
Your printer is only as rigid as what it sits on. A wobbly IKEA desk turns every direction change into a furniture vibration that feeds back into the print.
- Move the printer to the sturdiest surface available — a solid bench beats a hollow desk every time.
- Use vibration-dampening feet (squash-ball feet are a popular printable upgrade).
- Keep the filament spool off the printer frame if possible — a heavy spool bouncing on top adds moving mass exactly where you don’t want it.
- Don’t put two printers on the same flimsy table — they’ll excite each other’s resonances.
Fix 5: Reduce Moving Mass
Less mass on the moving gantry = less momentum = less vibration. Practical steps:
- Switch to a lighter hotend setup if you’ve added heavy mods
- Use shorter, lighter Bowden tubes
- Remove unnecessary accessories bolted to the toolhead (heavy cameras, big fans shrouds)
- On bed-slingers, remember the bed itself is moving mass — a heavy glass bed rings more than a light spring-steel PEI sheet
Fix 6: Stiffen the Frame
For printers with extrusion frames (Ender-style), frame flex is a real contributor. Affordable stiffening mods:
- Corner brackets on all frame joints
- Z-axis stabilisers (top-mounted braces that tie the uprights together)
- Ensure every frame bolt is actually tight — vibration loosens them over time, so do a quarterly “bolt check”
Fix 7: Tune Acceleration Per Feature
Modern slicers (OrcaSlicer, Bambu Studio, PrusaSlicer) let you set different speeds and accelerations for different feature types. The winning combo:
- Outer walls: slow (40–60 mm/s), low acceleration
- Inner walls/infill: fast — nobody sees these, so let the printer rip
- Small perimeters: moderate — text and details benefit from gentler moves
This gives you 90% of the quality benefit of “slow everything down” with maybe 20% of the time penalty.
Fix 8: Check for Mechanical Wear
If ghosting appeared suddenly on a printer that used to print cleanly, something wore out or loosened:
- Worn V-wheels (flat spots or cracks) — replace them
- Loose eccentric nuts on the gantry
- A bent lead screw or misaligned Z-axis
- Debris in the belt path
Sudden-onset ghosting is almost always mechanical. Gradual-onset ghosting is usually “you started printing faster.”
Fix 9: The Ringing Tower Calibration
For the tuning-minded, print a ringing tower — a test model where acceleration (or speed) increases in steps up the tower. Examine which step shows the least ghosting, and apply those settings to your profiles. It’s the empirical way to find your specific printer’s sweet spot rather than guessing.
OrcaSlicer’s built-in calibration tools include exactly this test, which makes the process nearly painless.
What NOT to Do
- Don’t just crank up belt tension to maximum. Over-tight belts cause binding and stepper skipping.
- Don’t assume it’s the filament. Ghosting is mechanical; premium filament won’t fix it.
- Don’t ignore it on functional parts. Mild ghosting is cosmetic, but severe ringing indicates violent vibrations that also hurt dimensional accuracy and layer adhesion.
Fix Ghosting Ringing 3D Prints: The 80/20 Verdict
If you do just three things, you’ll fix 80% of ghosting cases: enable input shaping, slow down outer walls, and put the printer on something solid. Work the list top to bottom and you will fix ghosting ringing 3D prints show in a single afternoon — most readers never need the advanced section. Everything else is optimisation on top. Happy printing — and enjoy those ripple-free surfaces.
For more print-quality troubleshooting, see our 3D printing guides covering stringing, warping, and first-layer issues.
Advanced: Accelerometer-Based Tuning (Klipper)
For Klipper users with an ADXL345 accelerometer, ghosting tuning becomes a science rather than guesswork. The process:
- Mount the accelerometer to the toolhead and run
MEASURE_AXES_NOISEto establish a baseline - Run the resonance test (
TEST_RESONANCES AXIS=Xthen Y) — the printer sweeps through frequencies while the accelerometer records vibrations - Use the generated graphs to pick the right shaper type (MZV is the usual recommendation for the best speed/quality balance, ZV for maximum vibration suppression)
- Apply the suggested
shaper_freq_x/shaper_freq_yvalues and re-test with a ringing tower to verify
The graphs also reveal which axis rings worse — extremely useful diagnostic info. If your X-axis resonance is dramatically worse than Y, look at X-specific mechanics (belt tension, gantry wheels, toolhead mass) rather than applying global fixes.
One caution: input shaping slightly rounds sharp corners (that’s literally how it cancels vibration). The effect is tiny with proper tuning, but if you’re printing parts with critical sharp internal corners, verify dimensional accuracy after enabling it.
Ghosting on Different Printer Architectures
The fixes above apply universally, but each motion architecture has its quirks:
- Bed-slingers (Ender 3 style): The heavy Y-bed is the main ringing source. A lighter spring-steel PEI sheet instead of glass helps enormously. Y-axis belt tension is critical — it’s the longest belt and stretches most.
- CoreXY (Voron, Bambu P/X series): Both motors contribute to every move, so belt tension balance matters as much as absolute tension. Uneven belts cause skewed ghosting patterns.
- Delta printers: Ringing shows as circular artefacts rather than linear ripples. The usual culprits are loose rod ends and excessive effector mass.
- Enclosed printers: Don’t overlook panels — a rattling acrylic door panel resonates sympathetically and prints its vibration into your parts. Foam tape on panel edges is a cheap fix.
When Ghosting Isn’t Worth Chasing
A dose of perspective: mild ghosting visible only under raking light on close inspection is normal for FDM printing. Chasing absolute zero ringing has diminishing returns — the last 10% of improvement can cost 50% of your print speed.
Ask yourself what the part is for. A functional bracket inside an enclosure? Invisible ghosting doesn’t matter. A display piece or a gift? Worth the tuning effort. Calibrate your perfectionism to the part’s purpose, and you’ll enjoy the hobby far more.
Fix Ghosting Ringing 3D Prints: Tools That Help
- ADXL345 accelerometer (~$15–$25 AUD): the key to science-based input shaping on Klipper — the single best-value tuning purchase
- Genuine Gates belts: cheap belts stretch under load, adding a springiness that amplifies ringing; quality belts are ~$15 per axis
- Squash-ball feet: printable vibration dampers that isolate the printer from the desk — a classic free upgrade
- Concrete paver: the old-school trick — sit the printer on a heavy concrete paver on foam. Mass absorbs vibration brilliantly. Ugly, effective, cheap.
- Frame bracing kits: printed or aluminium corner braces stiffen extrusion frames measurably
Total cost of the full anti-ghosting toolkit: under $60. Compare that to the price of reprinting failed display pieces, and it pays for itself fast.
Quick Diagnostic Checklist
Run through this in order next time ghosting appears — most cases resolve in the first three steps:
- Did you change speed or slicer recently? If yes, revert and compare. New profiles are the #1 ghosting trigger.
- Is input shaping enabled and calibrated for the printer’s current location? Moved printers need recalibration.
- Are belts tensioned like guitar strings? Check X and Y, plus pulley grub screws.
- Is the printer on a solid surface? Move it off the wobbly desk as a test — if ghosting vanishes, you’ve found it.
- Did it start suddenly? Inspect for wear: V-wheels, eccentric nuts, debris in belt paths.
- Print a ringing tower to find your optimal acceleration empirically.
Work the list top to bottom and you’ll solve 95% of ghosting cases without spending a cent.
Frequently Asked Questions
What causes ghosting in 3D prints?
Mechanical resonance — when the print head changes direction quickly, belts and frame vibrate, and those vibrations print as ripples trailing away from sharp features.
What is input shaping and does it fix ringing?
Input shaping cancels vibrations via shaped motor commands. It’s the most effective modern fix — Bambu Lab printers run it automatically; Klipper and Marlin 2.1+ support it with tuning.
Will slowing down fix ghosting?
Yes — dropping outer wall speed to 40–60 mm/s is the fastest free fix. Slow outer walls specifically rather than the whole print for the best time/quality tradeoff.
Can loose belts cause ringing?
Yes. Loose belts amplify ghosting vibrations. Belts should be taut like a guitar string — but don’t overtighten, which causes its own problems.
How do I test for ghosting?
Print a cube with embossed text; ripples trailing away from the text confirm ghosting. A ringing tower then finds your optimal acceleration settings.
For printer safety guidance, see Product Safety Australia.