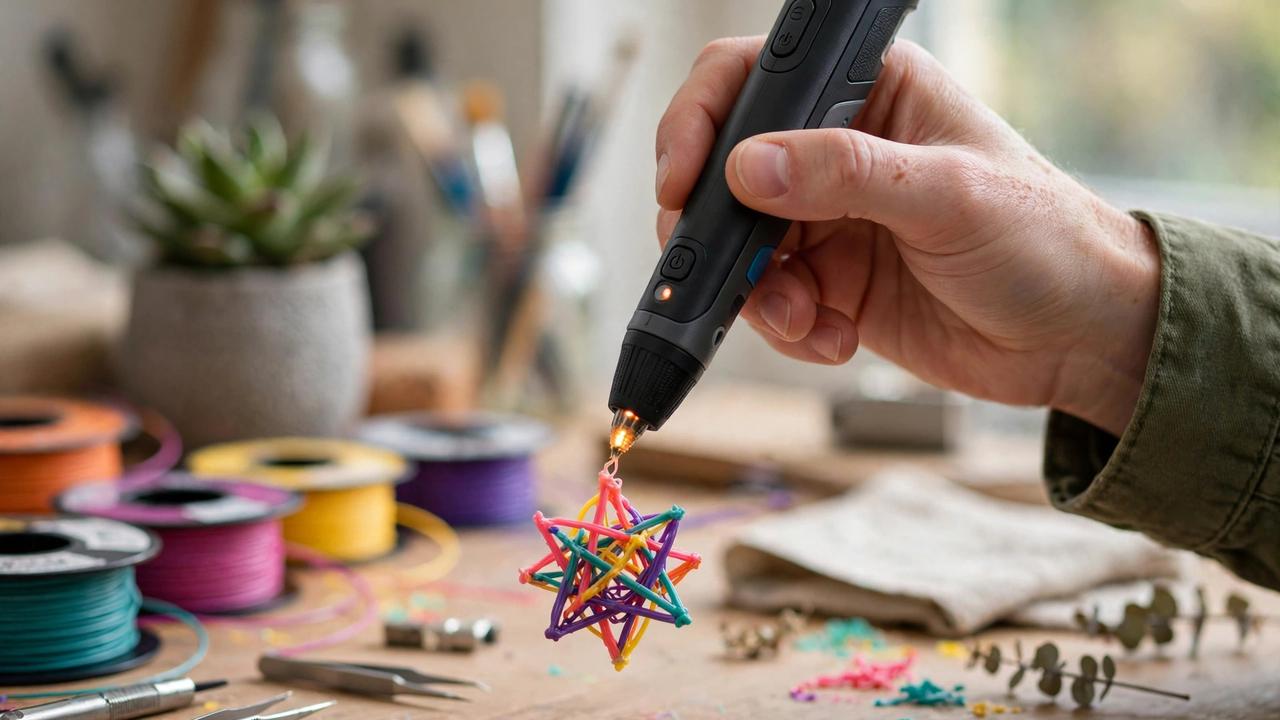
A 3D pen is exactly what it sounds like — a handheld device that extrudes melted plastic filament, letting you “draw” in three dimensions. It’s the most accessible entry point into 3D creation: no printer, no slicer, no CAD software. Just load filament, wait for it to heat, and start drawing in mid-air. Learning how to use 3D pen takes an afternoon; getting good takes a few weeks of playful practice. This guide covers everything a beginner needs, from choosing a pen to your first successful freehand sculpture.
Who are 3D pens actually for? Kids (with supervision — the tip gets hot), crafters, educators, and anyone curious about 3D creation without committing to a printer. They’re also genuinely useful tools for 3D printer owners — for welding broken prints, adding details, and fixing mistakes. Think of the pen as a complement to printing, not a replacement.
Choosing Your First 3D Pen
The market splits into two types:
- Filament pens (FDM-style): use standard 1.75mm PLA/ABS filament, have temperature control, and work like a miniature 3D printer extruder. Better for detailed work, compatible with the filament you might already own. The better choice for most beginners.
- PCL pens (low-temp): use special low-melting-point plastic refills, stay cool enough for young kids to use safely. Simpler and safer, but the plastic is softer, less precise, and the refills cost more. Best for children under 10.
For a beginner filament pen, look for: adjustable temperature (essential — different filaments need different heat), adjustable extrusion speed, a comfortable grip (you’ll hold it like a pen for extended periods), and USB-C or standard power (avoid obscure chargers). Reputable starter pens run $40–80 AUD. Below $30, you get inconsistent heating and jam-prone extruders that will frustrate you into quitting. Whichever type you pick, the steps below on how to use 3D pen apply to both.
Our 3D printing education guide covers classroom use, where 3D pens shine as teaching tools.
For official techniques, check the 3Doodler learning resources. The MYNT3D guides cover advanced pen techniques.
how to use 3D pen: Setup in Your First 15 Minutes
- Load filament: straighten the end of your PLA filament (cut it clean with flush cutters — a bent or burred tip jams). Insert it into the loading port while the pen is heating.
- Set temperature: for PLA, 180–200°C. Start at 190°C. Too cool and the filament won’t flow; too hot and it’s runny and hard to control.
- Wait for heat-up: most pens take 1–3 minutes. Don’t force filament through before the ready indicator — this is the #1 cause of first-use jams.
- Prime: press the extrude button and let a small blob form, then wipe it on a silicone mat or scrap paper. You’re now ready.
- Set speed: start SLOW. The slowest extrusion speed gives you maximum control while learning. Speed is for later.
Your workspace: a silicone mat (filament peels off easily), good lighting, and ventilation — PLA fumes are mild, but any melted plastic deserves airflow. Keep a pair of tweezers handy for pulling strings and a small fan for cooling finished sections faster.
how to use 3D pen: The Core Techniques
2D Drawing (Start Here)
Everyone starts flat. Draw on paper or a silicone mat, tracing printed templates (stencils are widely available free online — search “3D pen templates”). The technique: move slowly and steadily, letting the filament lay down in a continuous line. Lift the pen slightly at the end of each stroke to break the strand cleanly.
Key insight: speed consistency matters more than speed. A slow, even hand produces clean lines; rushing produces thin, broken strands. Practice basic shapes — circles, squares, stars — until your lines are uniform. This boring practice pays off enormously when you go 3D.
Building Up (2D to 3D)
The bridge technique: draw a flat shape, then draw the same shape slightly offset on top, building layers. This is how you make raised designs, thick letters, and simple 3D objects from 2D drawings. Each layer bonds to the one below while still warm.
Freehand 3D (The Real Skill)
Drawing in mid-air: extrude a strand and hold the pen still for 2–3 seconds while the plastic cools and stiffens, then move to the next point. You’re essentially building with tiny plastic struts. The technique:
- Extrude, pause, let it set — don’t try to draw continuous lines in the air like on paper.
- Build a framework first (the “skeleton”), then fill in surfaces.
- Work from the base upward — gravity is not your friend.
- Use your free hand (carefully — the tip is hot) to support cooling strands.
Welding and Repair
For 3D printer owners, this is the killer app: use the pen to weld broken prints back together, fill gaps, add mounting points, or attach parts. Extrude matching filament along the break, smooth with the pen tip, and you’ve got a bond stronger than superglue on PLA. This alone justifies owning a pen.
Beginner Projects (Easiest First)
- Flat ornaments and keychains: trace a template, fill it in, add a jump ring. Instant gratification, genuinely useful.
- Phone stand: draw two flat triangles and a crossbar, weld together. Functional on day one.
- Glasses frames / decorative glasses: trace, build up, wear. Silly and fun — perfect for learning.
- Small sculptures: a simple bird, flower, or geometric shape using the strut technique.
- Eiffel Tower: the classic 3D pen rite of passage. Four legs, cross-bracing, a top — it teaches every core skill in one project.
- Repair jobs: fix that broken print, reattach that snapped bracket. Practical and satisfying.
Each project teaches something: flat work teaches line control, the phone stand teaches welding, the tower teaches 3D structure. Don’t skip ahead — the skills compound.
Troubleshooting Common Problems
- Filament won’t load / jamming: tip not hot enough, filament end not cut clean, or old filament stuck inside. Heat to max temp, manually push through, then retract. If chronic, the extruder gears may need cleaning.
- Stringy, wispy output: temperature too high. Drop 5–10°C.
- Blobby, uncontrolled flow: temperature too high or speed too high. Slow down first, then adjust temp.
- Filament curling up instead of laying flat: normal for the first moment of extrusion — the strand follows the hot tip. Guide it down with the pen angle, or let it cool a second before positioning.
- Weak bonds between layers: working too slowly — the previous layer cooled too much before the next went on. Work a bit faster, or briefly reheat the joint area.
- Burning smell: temperature way too high for PLA, or the pen’s been on too long. Let it cool, check settings. Persistent burning smell from a new pen = return it.
Filament for 3D Pens
Standard 1.75mm PLA works in most filament pens — and if you own a 3D printer, you already have a filament stash. PLA is the beginner default: low temperature, minimal smell, easy to work with.
As you progress: silk PLA for decorative pieces (gorgeous finish), flexible TPU for wearable items (needs a pen that handles it — check compatibility), and wood-fill or glow-in-the-dark for novelty projects. Avoid ABS in a pen unless you have excellent ventilation — the fumes in close proximity to your face are not worth it.
Cut your filament into short lengths (15–20cm) for pen use — full spools are unwieldy, and short pieces give you better control. Store them in a dry box; pen filament absorbs moisture just like printer filament. Our beginner design guide pairs well once you’re ready to design templates yourself.
Safety (Especially for Kids)
- The tip reaches 200°C. That’s a burn hazard, full stop. Adult supervision for under-14s, and teach the “hot end” rule from minute one: never touch the metal tip, never point it at people.
- Ventilation: PLA is low-emission, but “low” isn’t “zero.” Crack a window or use a small fan. Never use ABS in an unventilated room.
- Unplug when done: pens left on overheat and degrade. Make it a habit — finish, retract filament, unplug.
- For young kids (under 10): consider a PCL low-temp pen instead. The plastic melts at ~60°C — warm, not burning. Less precise, but safe.
3D Pen vs 3D Printer: Honest Comparison
People often ask whether a pen can replace a printer. The honest answer: they’re different tools for different jobs.
- Precision: printer wins by miles. A pen can’t match 0.1mm layer consistency — freehand work is charmingly irregular, which is fine for art and terrible for functional parts.
- Speed for objects: printer wins for anything bigger than a keychain. What takes a pen an hour takes a printer 20 minutes unattended.
- Spontaneity: pen wins. No slicing, no waiting, no bed levelling — pick up and create. For kids’ attention spans, this matters enormously.
- Repairs and details: pen wins. You can’t easily add a blob of plastic to a print with a printer; a pen does it in seconds.
- Learning design thinking: pen wins for spatial intuition (you feel the 3D structure as you build it); printer + CAD wins for precision design.
- Cost: pen ($40–80) vs printer ($200–300+). The pen is the cheaper experiment.
The ideal: own both. The printer makes the precise parts; the pen customises, repairs, and decorates them. Together they’re more capable than either alone.
Advanced Techniques (Once Basics Are Solid)
- Multi-colour blending: switch filament colours mid-strand for gradient effects. Start the new colour before the old runs out — they blend in the melt zone for a few centimetres of transition.
- Texture work: vary your stroke pattern — crosshatching, stippling, spirals — to create surface textures that catch light differently. This is where pen art starts looking intentional rather than accidental.
- Armature building: for larger sculptures, build a wire armature first (florist wire works), then “draw” the surface over it. This is how the impressive large pen sculptures are actually made.
- Stencils and moulds: draw flat pieces on printed templates, then assemble into 3D objects — essentially manual “slicing.” Complex geometries become manageable as flat patterns.
- Mixed media: combine pen work with other crafts — pen details on wooden boxes, plastic embellishments on fabric, structural elements for dioramas. The pen is a craft tool, not just a 3D printing accessory.
Maintaining Your 3D Pen
- Retract filament after use: don’t leave filament in a cooling pen — it solidifies in the extruder and causes next-session jams. Retract while still hot.
- Clean the nozzle: a quick wipe with a brass brush (while hot) removes carbonised residue. Don’t use steel tools on a brass nozzle.
- Don’t force it: if filament won’t feed, something’s wrong — forcing it packs the jam tighter. Heat, retract, clear, reload.
- Store properly: unplugged, with no filament loaded, in a case or drawer. The tip is delicate; drops damage the heating element.
- Replace nozzles: they’re consumables. If output becomes consistently inconsistent despite cleaning, swap the nozzle ($5–10).
The bottom line on 3D pens: they’re the most fun you can have in 3D creation for under $80, the best tool for repairing prints, and a genuinely good way to develop the spatial thinking that makes you better at every other aspect of making. They won’t replace your printer, but once you know how to use 3D pen confidently, it earns its place next to it.
Frequently Asked Questions
How long does it take to learn how to use 3D pen?
Basic 2D drawing: an afternoon. Competent freehand 3D: 2–3 weeks of regular practice. The learning curve is much gentler than 3D printing — there’s no slicer, no calibration, just hand skill that improves with practice.
What filament do 3D pens use?
Most use standard 1.75mm PLA filament — the same as FDM 3D printers. Start with PLA; avoid ABS unless you have good ventilation. Cut filament into 15–20cm lengths for easier handling.
Are 3D pens safe for kids?
Filament pens reach ~200°C at the tip and need adult supervision for under-14s. For younger children (under 10), low-temp PCL pens are the safer choice — the plastic melts at around 60°C.
Can a 3D pen fix broken 3D prints?
Yes — this is one of the best uses. Extrude matching filament along the break to weld pieces back together. The bond is often stronger than superglue on PLA, and you can fill gaps and add reinforcement.
How much does a good beginner 3D pen cost?
$40–80 AUD for a decent filament pen with temperature control. Below $30, inconsistent heating and jamming will frustrate you. It’s a small investment for a tool that’s genuinely useful alongside a 3D printer.