You’ve printed the perfect model. The layers are clean, the details are crisp — and now it looks like grey plastic. Paint transforms prints, and nothing lays down smooth, even coats like an airbrush. But pro airbrush setups cost hundreds. The good news: the best budget airbrush 3D prints finishers can buy costs less than two spools of filament, and it’ll elevate every model you finish from here on out.
This guide covers what actually matters in a budget airbrush, the picks worth buying in Australia in 2026, what to avoid, and how to set up for 3D print finishing specifically. Every budget airbrush 3D prints recommendation below has been checked for Australian availability in 2026.
Why Airbrush (Instead of Spray Cans or Brushes)?
Spray cans are fine for priming, but they’re expensive per millilitre, come in limited colours, and can’t do subtle work. Brushes leave strokes. An airbrush gives you:
- Glass-smooth base coats with zero brush marks
- Gradients and shading — zenithal highlights, object-source lighting, fading
- Cheap paint: a $8 bottle of airbrush-ready acrylic lasts dozens of models vs $15+ per spray can
- Control: dial paint flow from hairline detail to broad coverage
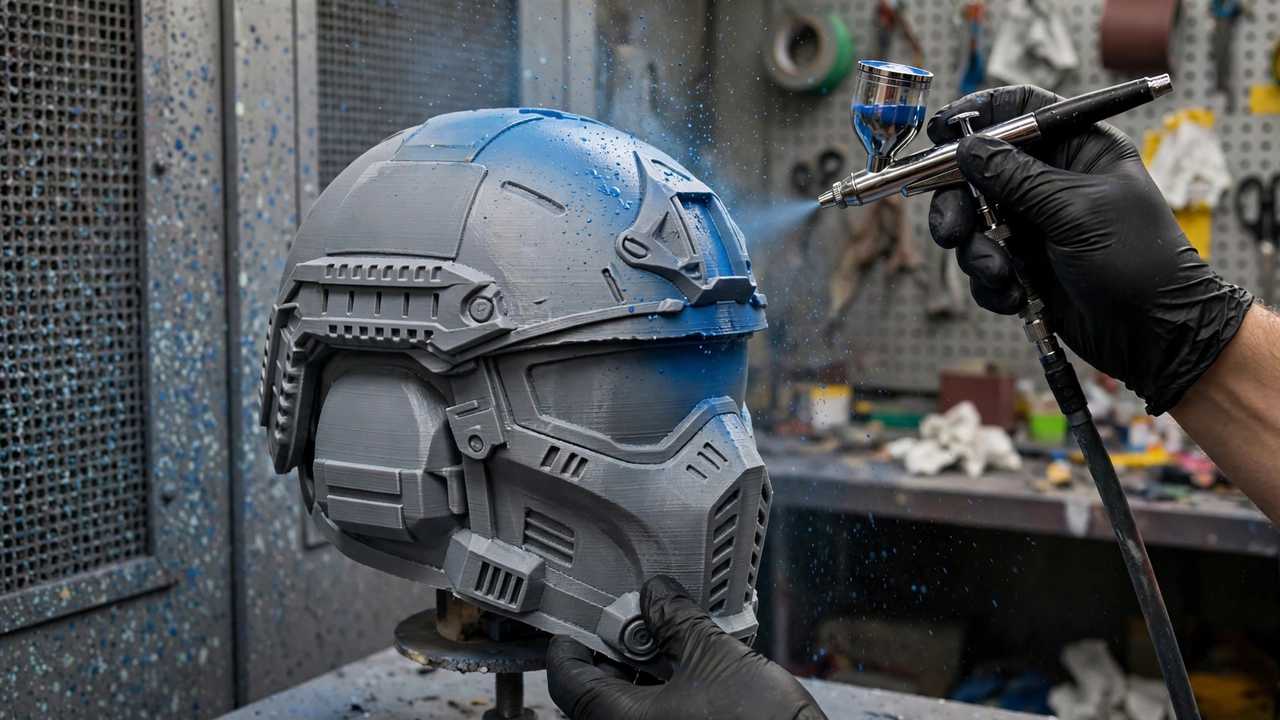
For 3D prints specifically, airbrushing excels at priming (filler primer through an airbrush fills layer lines beautifully) and base coating large smooth areas that would show every brush stroke. Once you own one, a budget airbrush 3D prints in every scale — from tiny miniatures to full cosplay helmets.
What to Look for in a Budget Airbrush 3D Prints Buying Guide
Dual-action, gravity feed
Non-negotiable for 3D print work. Dual-action means the trigger controls both air (push down) and paint (pull back) — essential for fine control. Gravity feed (cup on top) needs less air pressure, wastes less paint, and cleans easier than siphon-feed. Every pick below is dual-action gravity feed.
Needle size: 0.3mm is the sweet spot
For 3D prints, 0.3mm handles primers, base coats, and moderate detail. Smaller (0.2mm) clogs constantly with primer; larger (0.5mm) is great for priming big prints but crude for detail. If you can only have one airbrush, get 0.3mm. Some kits include multiple needle sets — a genuine bonus.
What to avoid
Ultra-cheap no-name airbrushes under ~$25 AUD (the blue-foam-box specials flooding eBay and Amazon). They look like real airbrushes but have loose tolerances, rough needles, and seals that dissolve in cleaner. You’ll spend more time unclogging than painting, conclude “airbrushing is too hard,” and quit. A slightly better brush changes the entire experience. The honest minimum for a usable airbrush is around $40–50 AUD.
The Picks: Best Budget Airbrush 3D Prints Options in Australia
Best overall budget: Gaahleri GHAD-39
The Gaahleri GHAD-39 has become the default recommendation for budget-conscious makers. Dual-action gravity feed with two needle sets (0.35mm and 0.5mm), a self-centering nozzle design that makes cleaning dramatically easier, and solid copper construction that feels far more expensive than it is. The quick-disassembly nozzle is the standout feature — beginners’ number one frustration is cleaning, and Gaahleri attacked it directly. Expect to pay around $60–80 AUD. It needs a compressor (sold separately), but works with any standard setup.
Best ultra-budget that actually works: Master Airbrush G233
At roughly $40–60 AUD, the Master G233 is the cheapest airbrush worth owning. Gravity feed, dual-action, 0.3mm needle. Build quality is visibly a step down — looser trigger, less refined machining — but it sprays, it learns, and it lets you confirm the hobby is for you before spending more. Treat it as a stepping stone: perfect for priming and base coats, and if you upgrade later, keep it as a dedicated primer brush (so your good brush never sees gritty primer).
Best “buy once” budget: Iwata NEO CN
Around $110–140 AUD in Australia, the Iwata NEO CN is the top of the budget category and the bottom of the “serious tool” category. 0.35mm needle, dual-action gravity feed, two cup sizes (2ml and 9ml), and Iwata’s 5-year warranty. The machining tolerances are visibly better than anything cheaper — smoother trigger, better atomization, less clogging. If you can stretch the budget, this is the one experienced painters recommend as a first and long-term brush.
Best for miniatures detail (stretch pick): Badger Patriot 105
Just over $150 AUD, the Badger Patriot 105 is the beloved workhorse of the miniature painting world. The stock 0.5mm needle is better for priming and base coats than fine detail, but it’s famously resistant to clogging and nearly indestructible. If your 3D printing leans toward wargaming terrain and miniatures, the Patriot is worth the stretch.
Don’t Forget the Compressor
An airbrush without a compressor is a paperweight. Budget options:
- Tankless mini compressors ($50–80 AUD): Small, quiet-ish, no tank. They pulse slightly and run hot during long sessions, but they’re fine for learning and short paint jobs.
- Tank compressors ($120–180 AUD): A small tank (3L) gives pulse-free air and lets the motor rest. Worth it if you’ll paint regularly. The AS-186 style compressors are the standard recommendation worldwide.
- Complete kits ($80–130 AUD): Airbrush + compressor bundles. Quality varies — the compressors are usually decent, the included airbrushes are usually the ultra-cheap kind. A viable path: buy the kit, use the compressor, replace the brush with a Gaahleri or NEO.
Whatever you get, add a moisture trap ($10–15) — Australian humidity puts water in airlines, and water in paint causes splattering. Non-negotiable in Queensland summers.
Paint for 3D Prints: What to Spray
- Primer: Vallejo Surface Primer or Badger Stynylrez, shot straight from the bottle. Two thin coats. This is the step that makes layer lines disappear.
- Base coats: Vallejo Model Air, Tamiya (thinned), or craft acrylics thinned to skim-milk consistency. Craft paints are 1/5th the price and fine for terrain and large prints.
- Thinning: When in doubt, thin more. Paint should flow like milk. Dedicated airbrush thinner beats water — it has flow improvers that prevent tip-dry.
- Cleaning between colours: Spray cleaner through until clear, 10 seconds. Deep clean (full disassembly) every few sessions, not every colour change.
Setup Tips for 3D Print Finishing
- Pressure: 20–25 PSI for primer and base coats, 12–18 PSI for detail. Higher pressure = more overspray; lower = more clogging. Find your brush’s happy zone.
- Distance: 15–20cm for broad coverage, 5–10cm for detail. Keep the brush moving — hovering in one spot causes runs.
- Trigger discipline: Start air before paint, stop paint before air. Push down (air), then pull back (paint). Reverse to stop. This one habit prevents 90% of splatter.
- Ventilation: Spray in a ventilated area or spray booth. A $60 portable spray booth from eBay with a bathroom exhaust fan is a massive quality-of-life upgrade — and keeps paint dust off your printer.
- Practice: Ten minutes on cardboard practicing dots, lines, and fades teaches more than any video. Do this before touching a 20-hour print.
Cleaning and Maintenance: The Unsexy Skill That Matters Most
Airbrush problems are 95% cleaning problems. The routine:
- Between colours: Spray cleaner through until clear (10 seconds), wipe the cup with a cotton bud. Don’t disassemble.
- End of session: Run cleaner through, remove the needle, wipe it clean, wipe the nozzle with a cleaner-dampened bud, reassemble with a drop of airbrush lubricant on the needle.
- Monthly deep clean: Full disassembly, soak metal parts (not rubber seals) in cleaner, inspect the nozzle for damage under magnification, replace worn seals.
- Never: Use wire brushes on the nozzle, soak rubber O-rings in solvent, or force a bent needle back into shape (replace it — $8–12).
Tip dry — paint drying on the needle tip mid-session — is the most common mid-paint annoyance. A quick wipe with a cleaner-dampened cotton bud every few minutes prevents it. Dedicated airbrush cleaner with flow improver reduces tip dry versus plain water.
Common Beginner Mistakes
- Too much air pressure for detail work. Turn it down. 15 PSI with thin paint beats 30 PSI with thick paint for control.
- Paint too thick. If it won’t spray smoothly, thin it. Then thin it a bit more. Beginners almost always under-thin.
- Stopping the airbrush over the model. Keep it moving. Park the spray off the model, never on it.
- Skipping primer. Paint doesn’t stick well to bare PLA. Two thin primer coats are the foundation everything else builds on.
- Buying the cheapest brush first. As covered above — a $40 brush teaches; a $20 brush tortures. The price gap is one spool of filament.
Spray Booth Setup for Australian Makers
Spraying indoors without ventilation coats everything in fine paint dust — including your 3D printer’s fans and electronics. A spray booth solves it:
- Budget option ($50–80 AUD): A portable hobby spray booth from eBay — folding tent with a built-in fan and filter. Adequate for airbrush work (not spray cans).
- DIY option ($30–50): A large plastic storage tub on its side, a 100mm bathroom exhaust fan ($25 from Bunnings) venting through a window, and a furnace filter over the intake. Ugly, effective.
- Placement: Near a window for exhaust. The booth captures overspray; the fan carries fumes outside. In apartments, a window-mounted setup avoids landlord issues.
- Lighting: Add an LED strip inside the booth. Good lighting is the difference between seeing what you’re doing and guessing.
Respirator note: even with a booth, wear a half-face respirator with P2/organic vapour cartridges ($40–50 from Bunnings) when spraying primers and cleaners. Acrylic paint dust isn’t something you want in your lungs, and isopropyl-based cleaners are genuinely unpleasant to breathe.
Upgrading Later: The Natural Path
Start with the Gaahleri or NEO, and when you’re ready for more, the upgrade path is clear:
- Second brush for detail: Keep the first brush for priming/base coats, add a 0.2mm detail brush (Harder & Steenbeck Ultra, ~$180 AUD) for fine work. Two brushes beats one expensive brush — you stop cleaning between primer and detail.
- Better compressor: A quiet tank compressor with regulator transforms long sessions. The cheap tankless mini that got you started becomes the travel/portable unit.
- Quality paints: Move from craft acrylics to dedicated miniature paints (Vallejo, Pro Acryl, AK) as your skills grow. The pigment density difference is immediately visible.
None of this is needed to start. That budget airbrush 3D prints setup — a $70 brush, a $60 compressor, and a $15 respirator — will finish models beautifully for years. Upgrade when a specific limitation frustrates you, not before.
The bottom line: airbrushing looks intimidating from the outside, but the learning curve is gentler than 3D printing itself was. A $70 brush, a basic compressor, and an afternoon of practice on cardboard will have you laying down base coats that make your prints look twice the price. The makers whose finished pieces you admire on Reddit almost all started exactly where you are now — with a budget brush and more enthusiasm than skill. The skill comes fast.
A word on expectations: your first airbrushed model won’t look like the YouTube tutorials. Their creators have hundreds of hours of practice. But the gap between “first attempt” and “genuinely good” is about ten models, not a hundred — airbrushing rewards practice faster than almost any other finishing skill. Photograph each finished piece; the progression will surprise you.
Frequently Asked Questions
How much does a good budget airbrush cost in Australia?
Expect $60–80 AUD for a solid budget brush like the Gaahleri GHAD-39, $40–60 for an ultra-budget Master G233, and $110–140 for an Iwata NEO CN. Add $50–180 for a compressor and $10–15 for a moisture trap.
Can I use a cheap $25 airbrush for 3D prints?
Technically yes, practically no. Ultra-cheap airbrushes have poor tolerances that cause constant clogging and frustration. The minimum for a usable experience is around $40–50 AUD.
What needle size is best for 3D print finishing?
0.3mm is the sweet spot — handles primer, base coats, and moderate detail. Kits with interchangeable 0.3/0.5mm needles give you the most versatility.
Do I need a special compressor?
Any airbrush compressor works. Tankless minis ($50–80) are fine for learning; tank compressors ($120–180) give smoother air for regular use. Always add a moisture trap in Australia’s humidity.
What paint should I use on 3D prints?
Vallejo Surface Primer or Stynylrez for priming, then airbrush-ready acrylics (Vallejo Model Air) or thinned craft acrylics for colour. Thin to skim-milk consistency.
Finishing cosplay pieces? Our cosplay printing guide pairs well with airbrush techniques, and printed gifts look 10× better with a proper paint job.