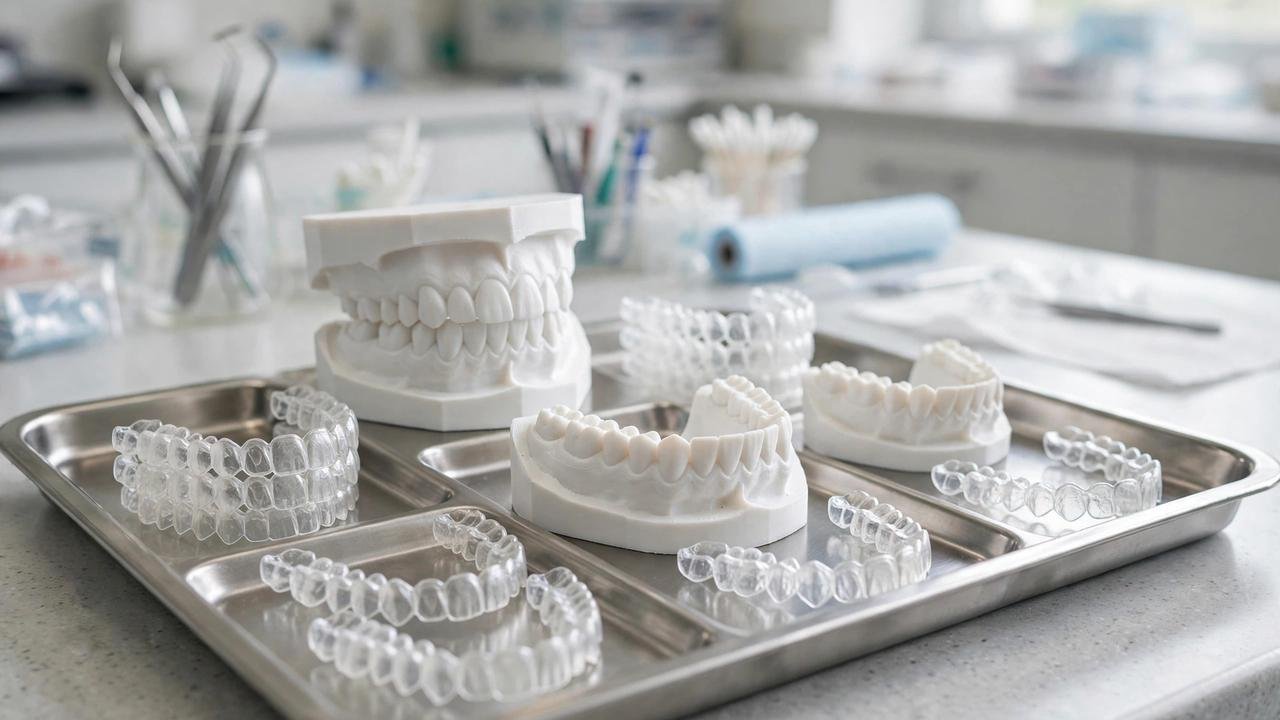
Choosing the best 3D printer for dental models is a decision where accuracy isn’t a nice-to-have — it’s the entire point. A crown model that’s off by 100 microns is a crown that doesn’t fit, and in a clinical or lab workflow, that means remakes, wasted chair time, and unhappy patients. Whether you’re a dental lab technician, an orthodontist bringing model production in-house, or a maker exploring dental applications, this guide breaks down what actually matters.
We’ll cover the accuracy requirements that separate dental printers from hobby machines, the best printers at three budget tiers available to Australian buyers, the resins that make dental models work, and the workflow considerations — washing, curing, calibration — that determine whether your models are clinically useful or expensive paperweights.
What Makes a Printer Suitable for Dental Models?
Dental models demand more than a standard hobby printer delivers. Here’s what to look for:
- XY resolution of 50 microns or below. This is the hard requirement. Coarser resolution visibly steps on margin lines and occlusal anatomy.
- Dimensional accuracy and stability. The model must match the intraoral scan within tight tolerances, and stay that way — some resins continue to shrink or warp after curing.
- Consistent light source. Even UV exposure across the build plate prevents some models printing accurately while others distort.
- 385nm vs 405nm light source: 385nm (shorter wavelength, higher energy) delivers sharper detail and is preferred for high-precision dental and jewellery work. 405nm is the affordable consumer standard with broader resin compatibility. Professional dental printers increasingly use 385nm.
- Resin ecosystem: The printer is only half the system. You need access to proper dental model resins — not just generic grey resin.
- Build volume vs throughput: A full-arch model is small; the question is how many you print per day. Labs need batch capacity.
If you’re new to resin printing generally, start with our resin vs FDM comparison and the best budget resin printers in Australia before diving into dental-specific machines.
Budget Tier: Capable Hobby Printers for Learning
Elegoo Mars 4 Ultra
The Mars 4 Ultra is the go-to recommendation when detail matters on a budget. Its 8K monochrome LCD delivers ultra-sharp prints, it cures fast, and the sturdy metal construction keeps it reliable. For studying dental anatomy, practising model workflows, or producing non-clinical demonstration models, it’s genuinely capable. Limitations: 405nm light source, smaller build volume, and you’ll be using third-party dental resins rather than a validated ecosystem. Think of it as the training ground, not the clinic workhorse.
Prosumer Tier: Serious Accuracy Without Lab Prices
Anycubic Photon P1
Anycubic’s 14K Photon P1 pushes consumer resolution into territory that was professional-only a few years ago — 13,312 x 5,120 pixels on a 10.1-inch screen. It handles resins up to 8,000 cps viscosity (most desktop printers top out around 2,000), which matters because many dental-grade materials are thick. Wave Release technology reduces peel forces, and AI monitoring catches failures before they waste expensive resin. For a serious prosumer or small lab testing digital workflows, it’s a compelling bridge between hobby and professional.
Professional Tier: Lab-Ready Systems
HeyGears UltraCraft Reflex 2
HeyGears has become the name to know in professional desktop resin printing. The Reflex 2 uses a 385nm light source — the wavelength preferred for dental precision — with factory calibration across tens of thousands of zones. It’s compatible with the full HeyGears resin ecosystem, which includes validated dental materials. If your budget stretches to professional equipment, this is where the smart money goes: the combination of 385nm precision, calibration, and material validation is what separates “looks accurate” from “is accurate.”
Formlabs Form 4B / Dental Ecosystem
Formlabs remains the clinical standard in many labs, and for good reason: the ecosystem is the product. Validated resins for every indication (models, surgical guides, splints, dentures), pre-programmed print settings, and biocompatibility certifications that matter the moment a print goes near a patient. You’ll pay for it — printer, resins at $150-250 per litre, and ongoing material costs — but for a working dental lab, the cost of a remake exceeds the cost of the resin.
Dental Resins: The Other Half of the Equation
The printer gets the glory, but resin choice determines clinical utility:
- Model resins (e.g., Formlabs Model Resin, NextDent Model 2.0): High precision, excellent dimensional stability, natural tooth colour with matte finish for easy detail visualisation. The workhorse for crown, bridge, and aligner models.
- Draft/fast resins: For quick study models and initial assessments where speed matters more than ultimate precision.
- Specialty resins: Surgical guide resins (biocompatible, sterilisable), splint resins, denture resins, and gingiva-masking flexible resins each serve specific indications. Never substitute a model resin where a biocompatible resin is required.
- What to avoid: Generic hobby resins for anything clinical. They lack dimensional stability data, biocompatibility testing, and consistent batch quality.
A good overview of current dental resin options is available at Acciyo’s dental resin roundup, which compares the leading model resins on accuracy and handling.
The Workflow Nobody Talks About
Buying the printer is step one of about ten. A clinical resin workflow requires:
- Wash station: Uncured resin must be thoroughly washed in IPA or manufacturer-recommended solvent. Inadequate washing leaves a tacky, dimensionally unstable surface.
- Cure station: Proper post-curing at the specified wavelength, time, and temperature. Under-cured models continue to change dimensions; over-cured models turn brittle.
- Calibration: Regular dimensional verification — print a calibration object, measure with calipers, and adjust exposure compensation. Resins drift between batches.
- Ventilation and PPE: Uncured resin is a sensitiser. Nitrile gloves, ventilation, and no skin contact — every session.
- Record-keeping: For lab work, document resin lots, exposure settings, and calibration checks. If a model is ever questioned, you need the paper trail.
What About FDM for Dental?
Short answer: FDM has very limited dental applications. Layer lines at even 0.05mm are coarse compared to resin’s capabilities, and no FDM material matches the dimensional stability of dental model resins. FDM is fine for surgical planning mockups, patient education models, and lab fixtures — but not for anything requiring clinical accuracy. If someone tells you their FDM printer does dental models, ask what tolerance they’re actually holding. If you’re shopping for a 3D printer for dental models, resin is the only sensible starting point.
Costs: The Honest Maths for Australian Buyers
- Budget setup: Mars 4 Ultra (~AU$400-500) + wash/cure station (~AU$200) + resins = under AU$1,000 to start learning.
- Prosumer setup: Photon P1 class (~AU$1,000-1,500) + proper wash/cure + dental resins = AU$2,000-3,000.
- Professional setup: HeyGears or Formlabs ($5,000-10,000+) + validated resins at $150-250/L + wash/cure = serious capital, justified by lab throughput.
- Ongoing: Resin, IPA, replacement tanks/FEP films, and gloves. Budget 20-30% of your resin spend on consumables.
Factor in that a single outsourced printed model from a dental lab costs AU$30-80. At even modest volumes, in-house printing pays for itself within months — which is exactly why so many practices are bringing it in-house.
3D Printer for Dental Models: Getting Started Checklist
If you’re setting up dental model printing from scratch, work through this list in order:
- Define your use case: Study models and learning? In-house lab production? Chairside surgical guides? The answer determines your budget tier.
- Choose the printer tier that matches — don’t buy a Formlabs for weekend learning, and don’t try clinical production on a budget printer.
- Budget the full workflow: Printer + wash station + cure station + first resin order + PPE + ventilation. The printer is typically only 50-60% of the total setup cost.
- Set up the workspace: Ventilated area, chemical-resistant work surface, nitrile gloves, IPA storage away from ignition sources, UV-safe resin storage.
- Select your resins and verify compatibility with your printer’s wavelength (385nm vs 405nm).
- Calibrate: Print dimensional test objects, measure with digital calipers, dial in exposure compensation.
- Validate: Print a known case, compare against the intraoral scan or a traditionally produced model. Don’t go clinical until validation passes.
- Document everything: Resin lots, settings, calibration dates. Start the paper trail from day one.
Beginner Mistakes That Ruin Dental Models
- Skipping the wash: Even slightly under-washed models feel tacky and continue dimensional change. When in doubt, wash longer.
- Wrong cure protocol: Every resin has a specified cure time, wavelength, and temperature. “Close enough” curing is the top cause of brittle or warping models.
- Ignoring resin expiry: Old resin prints differently. Check dates and don’t stockpile more than you’ll use in 6 months.
- No calibration routine: Resins vary between batches. Monthly calibration prints catch drift before it ruins a case.
- Mixing resin types in one tank: Even “compatible” resins have different exposure requirements. One resin per tank, labelled clearly.
- Touching prints barehanded pre-cure: Uncured resin is a sensitiser — repeated skin contact can trigger permanent allergies. Gloves, always.
Buying a 3D Printer for Dental Models in Australia
- Printers: Bilby3D, 3D Printer Superstore, and Thinglab stock Elegoo and Anycubic resin machines locally. Formlabs has Australian distribution with local support — important for a clinical machine.
- Resins: Dental-specific resins (NextDent, Formlabs Dental) are available through dental supply companies like Henry Schein Australia. Budget resins come from the usual 3D printing retailers.
- Wash/cure: Elegoo and Anycubic wash-cure stations are widely stocked locally (~AU$150-250). Formlabs’ Wash and Cure units are pricier but matched to their resins.
- Calibration tools: Digital calipers (AU$30-50, Mitutoyo if you’re serious), a UV meter for cure station verification.
Shipping resin internationally is restricted (it’s classified as hazardous), so buying from Australian stock is not just convenient — it’s often the only practical option.
Dental 3D Printing Workflow: Scan to Model
Understanding where the printer sits in the digital dentistry pipeline helps you buy right:
- Intraoral scan: The dentist captures the patient’s dentition with an intraoral scanner (3Shape Trios, Medit i700, etc.). Accuracy starts here — a bad scan can’t be fixed downstream.
- CAD design: The lab designs the restoration or appliance in dental CAD (3Shape Dental System, exocad). The model is the physical reference for the design.
- Print: The model prints in dental model resin — typically hollowed to save resin, with drainage holes.
- Wash: Thorough IPA wash removes uncured resin from all surfaces, including internal channels.
- Cure: Post-cure per the resin manufacturer’s protocol — wavelength, time, and temperature all specified.
- Verify: Check critical dimensions against the digital design. Many labs keep a reference gauge for quick checks.
- Use: The model serves as the physical reference for fabricating the final restoration.
The printer is one link in this chain. A AU$10,000 printer with sloppy scanning and curing produces worse models than a AU$1,000 printer in a disciplined workflow. Budget for the whole pipeline, not just the machine.
Hollowing Models to Save Resin
Dental models are almost always printed hollow — a solid full-arch model wastes enormous amounts of expensive resin. Hollow to 2-3mm wall thickness, add drainage holes at the lowest points, and orient the model so resin drains during the print. This single technique can cut resin consumption by 60-70%.
Key Takeaway: Match the Machine to the Mission
The dental 3D printing market in 2026 offers a clear ladder: learn on an affordable 8K printer, earn on a prosumer 14K machine, and scale on a professional 385nm system with validated resins. The most expensive mistake isn’t buying too much printer — it’s buying a hobby printer for clinical work and discovering the accuracy gap after you’ve promised a dentist delivery dates. Be honest about your use case, budget the full workflow (not just the printer), and validate before you go live. Match the machine to the mission and your 3D printer for dental models will pay for itself in remakes avoided. Your models — and your reputation — depend on it.
Frequently Asked Questions
Can I use a regular resin printer for dental models?
For study models and learning, yes — an 8K printer like the Mars 4 Ultra produces impressively detailed models. For clinical work, you need validated resins and ideally a 385nm professional system.
What resolution do I need for dental models?
Look for XY resolution of 50 microns or below. Finer is better for margin detail, but the resin’s dimensional stability matters as much as the pixel size.
385nm vs 405nm — does it matter?
Yes for professional work. 385nm delivers sharper detail and is preferred for dental and jewellery applications. 405nm is the consumer standard with broader, cheaper resin compatibility.
How much does dental 3D printing cost to start?
Under AU$1,000 for a learning setup (budget printer + wash/cure + resins), AU$2,000-3,000 for prosumer, and $5,000+ for professional lab-grade systems.
Is resin printing safe for dental use?
Cured model resins are safe for extraoral models. Anything going in or near the mouth requires specifically biocompatible-certified resins — never substitute standard resins for clinical applications.