3D Printing Prosthetics in Australia: What Home Printers Can (and Can’t) Do
A prosthetic hand that costs about a dollar to print sounds like a story that can’t be true. In Melbourne, it is true. Engineer Mat Bowtell started making 3D printed hands and fingers for children in his own home, and gives them away free. A traditional prosthetic can cost upwards of $30,000 and take months to make; his printed hands cost around $1 in material and can be ready in about a day. The cheap print is real. So are its limits.
This guide covers 3D printing prosthetics Australia as it actually stands in 2026: what a home printer can usefully make, what still belongs in a clinic, what it costs, and how to start without putting anyone at risk. If you or someone in your family has a hand difference, or you are a maker who wants to help, the honest picture is more useful than the hype.
The Melbourne Story That Started It
Mat Bowtell, a former automotive engineer from Melbourne, began with about $5,000 of his own money: two small 3D printers, a basic scanner, software and materials. He designed a kinetic finger — a working finger for partial amputees — and put his designs online free under a Creative Commons licence, so anyone can download them but not sell them. One recipient in Japan returned to playing the piano after ten years without a finger. He has made hands for children in New South Wales, Queensland and Auckland, and a full arm for a teenager in Iraq — all free, postage included.
The numbers explain why people pay attention. Bowtell has said a traditional prosthetic can take months and cost more than $15,000, while his printed finger costs about 90 cents to make. Children are the clearest case for printing: a child outgrows a prosthesis quickly, and a printed hand can simply be reprinted in the next size.
None of this makes the home printer a replacement for a prosthetist. Bowtell’s hands are body-powered, strap-on devices — they grip, hold and help with everyday tasks. They are not myoelectric hands, they are not fitted to a residual limb by a clinician, and they are not load-bearing legs. Knowing which side of that line your project sits on is the whole job.
What a Home Printer Can Make
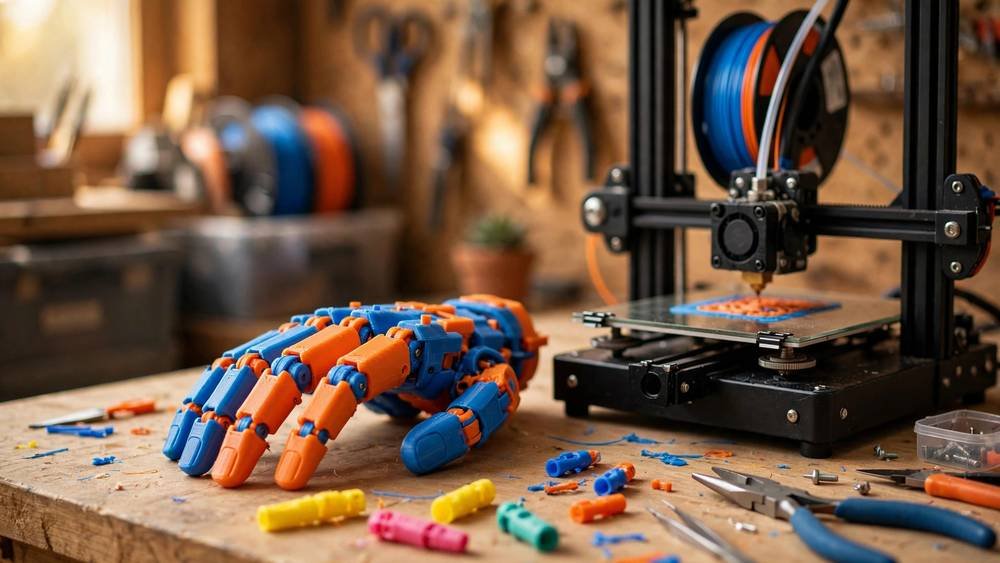
For hands and fingers, home printing is genuinely useful today. The designs that work best are open-source community designs — the e-NABLE community’s Phoenix Hand is the best-known — plus Bowtell’s own kinetic finger and hand designs, which are free to download. These are mechanical hands: wrist movement drives the fingers through cords, so the wearer can grip a cup or pick up a ball. The Aussie Hands Foundation notes that a 3D printed hand can be printed overnight and cost less than $20 to make, against a conventional prosthesis that can cost many thousands and take months to produce.
Assistive devices are the other place home printing shines, and they are often more useful than a full hand. Bowtell also designs gadgets that help children take part in activities: an adaptor for holding a skipping rope, a grip for playing an instrument, a holder shaped for one particular task. These small prints solve one problem well, cost almost nothing, and can be remade in a different colour or size in an evening. If you are new to this, a single-purpose gadget is a better first project than a hand.
Lower-limb printing is further behind. Researchers at Swinburne University of Technology built a 3D printable prosthetic foot with an energy-storing design, producing prototypes for around AUD $8 to $15 in material. That is a research prototype, not a device you print at home and walk on. Legs carry full body weight, need a socket fitted to the limb, and fail dangerously if they break. A walking leg belongs with a prosthetist.
What Still Needs a Clinic
A prosthesis is a medical device, and the fitting is the medicine. In Australia, orthotist/prosthetists — represented by the Australian Orthotic Prosthetic Association — are the trained professionals who prescribe, design, fit and monitor prostheses. A socket that does not fit causes pressure sores and pain, and a device that loads the limb wrongly can do real harm over weeks. No print setting fixes a bad fit.
The rule to keep is simple: a home-printed hand or gadget is something to discuss with the person’s prosthetist, occupational therapist or hand therapist before it is worn for real use — especially for a child, or if there is any skin sensitivity, a recent amputation or an existing fitted device. A printed hand can sit alongside clinical care very well; it should not quietly replace it.
There is also a durability limit to be honest about. The same foundation notes that 3D printed hands have a limited lifespan and may need repairs when something breaks. PLA is brittle and a child’s hand gets knocked around, so budget for reprints, keep the files, and treat the first version as a prototype.
The Real Costs of 3D Printing Prosthetics Australia
| Option | Typical cost in Australia | Time to receive |
|---|---|---|
| Traditional prosthetic hand or finger | Many thousands; $15,000–$30,000+ for a full device | Weeks to months, with fitting appointments |
| Myoelectric / microprocessor device | Tens of thousands; high-end legs $80,000+ | Months, with programming and rehab |
| 3D printed hand (home printer) | Under $20 in filament and parts | Printed overnight; fitting and finishing extra |
| 3D printed finger (Bowtell design) | About $1 in material | A day or so |
| 3D printed assistive gadget | A few dollars at most | An evening |
The traditional-device figures come from Australian reporting and clinics: Bowtell has put a traditional limb at more than $15,000, Daily Mail Australia reported upwards of $30,000 for a prosthetic hand, and Australian clinics place microprocessor legs at tens of thousands, with high-end configurations at $80,000 or more. The printed figures are the makers’ own numbers. The comparison is not quite like-for-like — a printed hand does less than a myoelectric one — but for a growing child who needs a functional hand right now, the printed option wins on speed and cost by an enormous margin.
Funding is the other half of the cost question. The NDIS can fund prosthetics for eligible participants, but prosthetics are treated as high-cost assistive technology — anything over $15,000 — and funding needs assessment, evidence and a quote before approval. A home-printed hand costs almost nothing, so it sits outside that process entirely. If an NDIS-funded device is the main prosthesis, the printed hand is a spare or backup — a useful second device, not a way around the assessment.
Materials and Printers That Work
Most of the 3D printing prosthetics Australia makers produce is made on ordinary FDM printers in PLA or PETG. PLA is easy to print and stiff, which suits fingers and palm parts, but it is brittle and softens in a hot car. PETG is tougher and handles heat better, and is a better default for anything a child will actually wear daily. TPU, a flexible filament, is useful for grips, straps and soft contact points. Resin gives finer detail for small finger parts, but it needs washing and curing, and uncured resin irritates skin — keep it away from skin contact until fully cured and washed.
Strength comes from print settings more than from the filament brand. Print hand parts with enough walls and infill to take real use — thin draft prints will crack at the layer lines the first time a child grips something hard. Orient parts so layer lines do not run across the direction of force. Finish the parts: smooth the surfaces, sand sharp edges, check every surface that touches skin, and wash a new print before it is worn.
How to Start Safely
Start with a conversation, not a download. Talk to the person’s prosthetist or occupational therapist about what the printed device is for — a spare hand for play, a grip for one activity, a finger for a specific task — and ask what to watch for: pressure points, skin checks, and when to stop wearing it.
Then measure properly. A hand that does not match the wearer’s hand will not be worn. Community designs come with measuring guides — follow them, and print a test fit before the full hand. Children grow, so expect to re-measure every few months; that is normal and cheap, and the main advantage of printing. Let the wearer choose the colour — a hand a child is proud of gets used far more than a beige one.
Test it gently and keep checking. First wear should be short, with skin checked afterwards for redness or pressure marks. Check cords, joints and straps weekly — a frayed cord or cracked finger is a repair job, not a failure. Keep the design files and slicer settings, so a replacement is a reprint. If anything hurts or feels wrong, stop and ask the clinician.
Assistive Devices Beyond Prosthetics
The same printer that makes a hand can make dozens of smaller things that change a day: a thickened grip for a toothbrush or a pen, a holder that lets someone with one hand open a jar, a cuff that holds a phone or a fork, a replacement knob for a cooker printed to fit the hand that turns it. These are not prosthetics, they are assistive devices — one problem, one print, immediate feedback.
This is also where a home printer beats a clinic on speed: a therapist can describe a problem in the morning and have a test version by the evening. Our guide to 3D printing business ideas in Australia covers printing for other people, and our guide to pricing 3D printed products works for assistive prints too.
Frequently Asked Questions
Can I 3D print a prosthetic hand at home in Australia?
Yes, for a mechanical hand or finger — open-source designs like the e-NABLE Phoenix Hand and Mat Bowtell’s kinetic finger are free to download, and a print costs under $20 in material. It is body-powered, not myoelectric, and you should discuss it with the wearer’s prosthetist or occupational therapist before daily use, especially for a child.
How much does a 3D printed prosthetic cost?
Very little in material: a printed hand costs under $20, and Mat Bowtell’s printed finger costs about $1. A traditional prosthetic hand can cost $15,000 to $30,000 or more and take months to make. That gap is what makes 3D printing prosthetics Australia’s cheapest route into a working hand — though the printed device does less than a clinical myoelectric hand, and for a growing child it can be reprinted in the next size for almost nothing.
Does the NDIS fund 3D printed prosthetics?
The NDIS can fund prosthetics for eligible participants, but prosthetics are treated as high-cost assistive technology and need assessment, evidence and a quote before approval. A home-printed hand costs almost nothing, so it sits outside that process — it works best as a spare, sports or backup hand alongside an NDIS-funded device, not as a way around assessment.
Are 3D printed prosthetics safe?
They are safe when they fit well, are made from skin-safe finished materials, and are checked regularly — and unsafe when they fit badly, rub, or are worn without any clinical input. PLA and PETG are the usual materials; resin parts must be fully cured and washed before skin contact. Check skin after first wear, and stop and ask a prosthetist if anything hurts or marks.
Where can I get a 3D printed hand in Australia?
Mat Bowtell makes free 3D printed hands and fingers for children and adults in Australia and overseas, and his designs are free to download. The Aussie Hands Foundation supports Australians with hand differences and liaises with Bowtell, and can connect families with hand therapists and makers. Your prosthetist or occupational therapist is the right first contact.