This ender 3 v3 se setup guide walks you through every step. Unboxing your first 3D printer is equal parts exciting and nerve-wracking. If you’ve just bought a Creality Ender 3 V3 SE, you’ve picked one of the friendliest beginner machines on the market — and this ender 3 v3 se setup guide takes you from sealed box to finished first print without the guesswork: unboxing, assembly, the all-important voltage switch (don’t skip this one, Australia), auto bed levelling, loading filament, your first test print, and the slicer settings that give clean results from day one.
What You’re Getting: Key Specs
Before you start pulling parts out of foam, here’s what the V3 SE is: a big step up from the original Ender 3 — a “Sprite” direct-drive extruder, CR Touch auto bed levelling with a strain sensor for automatic Z-offset, dual Z-axis lead screws, and up to 250 mm/s top speed (180 mm/s is the realistic everyday figure). Build volume is 220 × 220 × 250 mm — plenty for household parts and multi-part projects.
- Build volume: 220 × 220 × 250 mm
- Extruder: Sprite direct drive, 0.4 mm nozzle, up to 260 °C
- Bed: heated to 100 °C max, flexible PC spring-steel plate
- Levelling: CR Touch auto levelling + strain sensor auto Z-offset
- Speed: up to 250 mm/s, 2500 mm/s² acceleration
- Filaments: PLA, PETG, TPU (95A) in 1.75 mm
- Screen: 3.2-inch colour display with knob
- Extras: 32-bit silent mainboard, power-loss recovery, one-tap filament load/unload
- File transfer: microSD card (included)
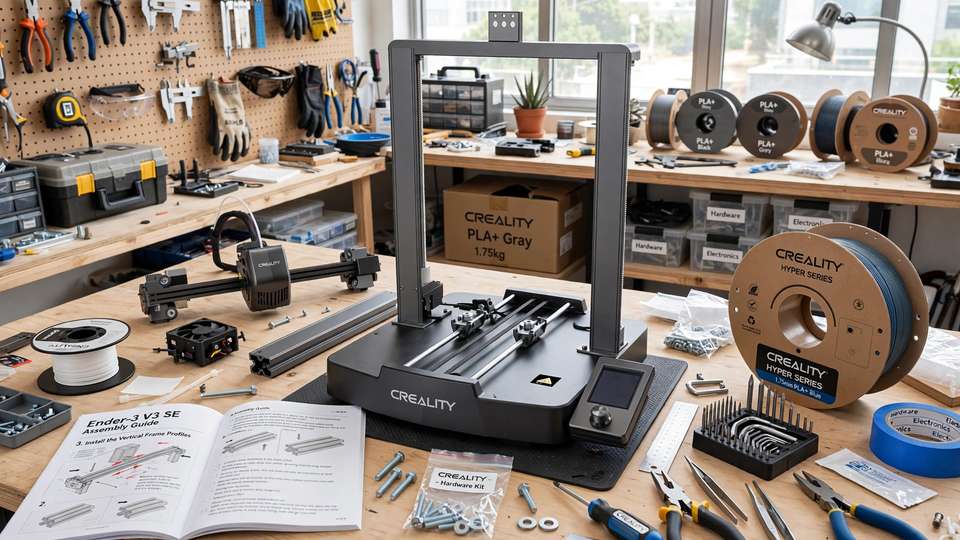
In the box: pre-assembled base and gantry, display unit, spool holder, tool kit with the Allen keys and spanners you’ll need, power cable, a small sample coil of white PLA, and a quick-start manual. Assembly takes most people about 20 minutes — Creality ships the V3 SE roughly 90% assembled.
Before You Start: Bench, Tools and the Voltage Switch
Pick a sturdy, level bench or table away from windows and draughts — the printer vibrates while it works, and a wobbly desk shows up as ripples in your prints. You’ll use the included Allen keys and spanner, so keep the tool kit handy rather than buried in the box.
Now the critical bit for Australian buyers: check the voltage switch on the back of the power supply before you plug anything in. Australia runs on 230 V mains, and powering the printer on at the wrong setting can damage the power supply. Flip it to 230 V, double-check it reads 230, and only then connect the power cable. This thirty-second check is the single most important step in this whole ender 3 v3 se setup guide.
Step 1: Unbox and Check Everything
Clear a good amount of bench space and lift the components out carefully — the gantry is the heaviest piece. Check everything against the packing list: base unit with bed fitted, gantry with X-axis and extruder attached, display screen and bracket, spool holder, power cable, tool kit, sample PLA, microSD card, and the manual.
Look for shipping damage: cracked screen, bent lead screws, or a visibly warped build plate. It’s rare, but catching it now saves a painful troubleshooting session later. Peel the protective film off the screen while you’re at it.
Step 2: Mount the Gantry
This is the main assembly step. Stand the base unit on your bench, then carefully lower the gantry into the slots on the base so the two Z lead screws drop into place. Keep it square as you go — don’t force it.
Secure it from underneath with the M3×14 screws, then from the side with the M3×8 screws. Snug them firmly but don’t reef on them — over-tightening can strip the threads in the aluminium extrusion. Give the gantry a gentle wiggle when you’re done; it should feel completely solid.
Step 3: Attach the Display
Fit the display bracket to the right-hand side of the base and fasten it with the M4×10 screws. Plug in the display’s ribbon cable — it only fits one way — then slide the screen into the bracket until it clicks.
Step 4: Fit the Spool Holder
The spool holder mounts on top of the gantry. Line up the holes, fasten it with the M5×8 screws, and slide the spool arm on. Don’t load filament yet — that comes after power-on and levelling.
Step 5: Connect the Cables
Plug the main wiring harness into the extruder adapter board on the print head and secure it with the clip. Then connect the X-axis and Z-axis motor cables, following the labels. The connectors are keyed — if a plug resists, check the orientation rather than pushing harder. Tuck the cables into the fixing clips as marked so nothing snags on the moving gantry mid-print.
Step 6: First Power-On
With the voltage switch confirmed at 230 V, plug in the power cable and flip the switch on the back. The screen should light up and show the Creality interface. The printer may run a brief self-check — watch for any error messages, though on a new machine you should see none.
Take a moment to scroll through the menus with the knob: Level for bed levelling, Prepare / Extrude for filament loading, Print for starting jobs from the SD card, and Control for temperatures and settings. You’ll be living in these four menus.
Run Auto Bed Levelling (CR Touch)
Here’s where the V3 SE earns its beginner-friendly reputation: the CR Touch probe maps the bed automatically, and the strain sensor sets the Z-offset — no fiddling with paper and knobs the way older Enders demanded.
From the main menu, select Level. The printer heats the nozzle, wipes it, then probes a grid of points across the bed, showing the measured values on screen. Let it finish uninterrupted — it takes a couple of minutes — then confirm to save the mesh.
Re-run levelling any time you move the printer, change the build plate, or notice the first layer looking inconsistent. Give the spring-steel sheet a wipe with isopropyl alcohol before you level for the best results.
Load Filament
Mount your spool on the holder with the filament feeding from the top toward the extruder. Snip the end at a clean angle — a squashed tip will jam in the feed path. On the screen, go to Prepare and select Extrude (the one-tap auto load). The Sprite extruder heats up and pulls the filament in; push gently until you feel the gears grab, then let it do the work.
Watch the nozzle: when a clean strand extrudes smoothly, you’re loaded. Switching colours or materials? Run extrude until the old colour is fully purged. To unload, select Retract and pull the filament free once the extruder reverses it out.
Start with the included sample of white PLA, or any fresh 1.75 mm PLA. It’s the most forgiving filament to learn on — sticks well, barely warps, moderate temperatures. Save PETG and TPU for once you’ve got a few successful prints under your belt.
Your First Test Print
The included microSD card ships with sample files ready to print. Insert the card, select Print, choose a sample file, and confirm.
Watch the first layer like a hawk. The extruded lines should look slightly squished and merge together with no gaps. Lines that are round and separate mean the nozzle is a touch too far from the bed; if the nozzle ploughs through the plastic or nothing sticks, stop the print, re-check levelling, and start again. Five minutes of attention here saves hours of failed prints.
Let the sample finish, then let the bed cool for a few minutes. The flexible spring-steel plate releases parts easily once cool — flex it gently and the print should pop off. If corners lift on bigger prints down the track, our 3D print warping fix guide walks through every solution from brims to filament drying.
Ender 3 V3 SE Setup Guide: Recommended Slicer Settings
The sample files get you started, but real printing means slicing your own models. Creality Print and UltiMaker Cura both include ready-made Ender 3 V3 SE profiles — install either, select the V3 SE profile, and you’re working from sane defaults. OrcaSlicer also supports the machine for those who want finer control.
Starting points for the two materials you’ll use most:
- PLA: nozzle 200–210 °C, bed 60 °C, 0.2 mm layers, 100–150 mm/s to start (learn at moderate speeds before pushing faster), fan 100% after the first few layers, retraction ~0.8 mm at 40 mm/s.
- PETG: nozzle 230–240 °C, bed 75–80 °C, 0.2 mm layers, 60–80 mm/s, fan 40–60%, retraction ~1 mm. PETG strings more than PLA — dry filament and sensible retraction keep it clean.
Resist the urge to print at the full 250 mm/s on day one. Speed magnifies every setup flaw; get clean, reliable prints at moderate speeds first, then push faster once your profiles are dialled in. And always slice with a brim on parts with small footprints or sharp corners — it’s free insurance.
Ender 3 V3 SE Setup Guide: Common First-Print Mistakes
- Skipping the voltage check. Worth repeating: 230 V for Australia, confirmed before first power-on.
- Printing on a dirty bed. Fingerprints kill adhesion. Wipe the plate with isopropyl alcohol before important prints.
- Walking away during the first layer. Stay for the first 10–15 minutes. Nearly every failed print announces itself early.
- Wrong filament choice for the job. PLA for learning and display pieces; PETG for functional parts that need toughness; TPU only once you’re comfortable. Our PLA vs PETG vs ABS comparison helps you pick.
- Maxing out the speed immediately. The 250 mm/s headline is real, but clean prints at 120 mm/s beat spaghetti at 250.
- Ignoring filament storage. In Australia’s humidity, an open spool of PETG goes soggy in weeks. Resealable bags with desiccant are cheap; failed prints aren’t.
- Overtightening screws. Firm is enough — stripped extrusion threads are forever.
Where to Buy in Australia and What It Costs
The Ender 3 V3 SE sits firmly in budget-printer territory. In Australia it typically sells for around A$280–A$380 depending on the retailer and whether there’s a sale on — check current prices before buying, as 3D printer pricing moves around a lot. At that price it undercuts most of its feature rivals while including auto levelling and a direct-drive extruder that used to be premium upgrades.
For local stock with Australian warranty support, check specialist 3D printing retailers such as 3D Printer Superstore, Cubic Factory and 3D Fillies, plus the usual marketplaces. Buying locally matters for a first printer: if something arrives damaged or a part fails in the first months, dealing with an Australian seller beats shipping a printer back overseas. A 1 kg spool of decent PLA from an AU seller runs about A$30–A$45 — grab two or three colours with the printer so you’re not stuck when the sample coil runs out mid-print.
For the full official specifications, Creality’s own Ender 3 V3 SE product page lists the complete spec sheet.
Frequently Asked Questions
How long does the Ender 3 V3 SE take to assemble?
About 20 minutes for most people. The printer arrives roughly 90% pre-assembled — you’re mounting the gantry to the base, attaching the display and spool holder, and connecting a few labelled cables. If it’s your first printer, give yourself 30–40 unhurried minutes.
Do I need to manually level the bed on the Ender 3 V3 SE?
No. The CR Touch probe auto-levels the bed and the strain sensor sets the Z-offset automatically — there are no manual levelling knobs to adjust. Just run the Level routine from the menu and visually check the first layer of your first print.
What voltage setting should I use in Australia?
230 V. Check the red voltage selector switch on the back of the power supply before first power-on and make sure it reads 230. Running it on the wrong setting can damage the power supply.
What slicer should I use with the Ender 3 V3 SE?
Creality Print or UltiMaker Cura both include ready-made V3 SE profiles and are the easiest starting points. OrcaSlicer also supports the printer and gives you more advanced control once you’re comfortable with the basics.
Can the Ender 3 V3 SE print PETG and TPU?
Yes. The Sprite direct-drive extruder handles PETG well and manages flexible TPU (95A) far better than the Bowden setups on older Enders. Start with PLA while you learn, then move to PETG for tougher functional parts.
Why did my first print not stick to the bed?
The usual suspects in order: a dirty build plate (wipe it with isopropyl alcohol), a Z-offset that’s slightly too high, or wet filament. Clean the plate, re-run auto levelling, watch the first layer go down, and add a brim in the slicer for parts with small footprints.