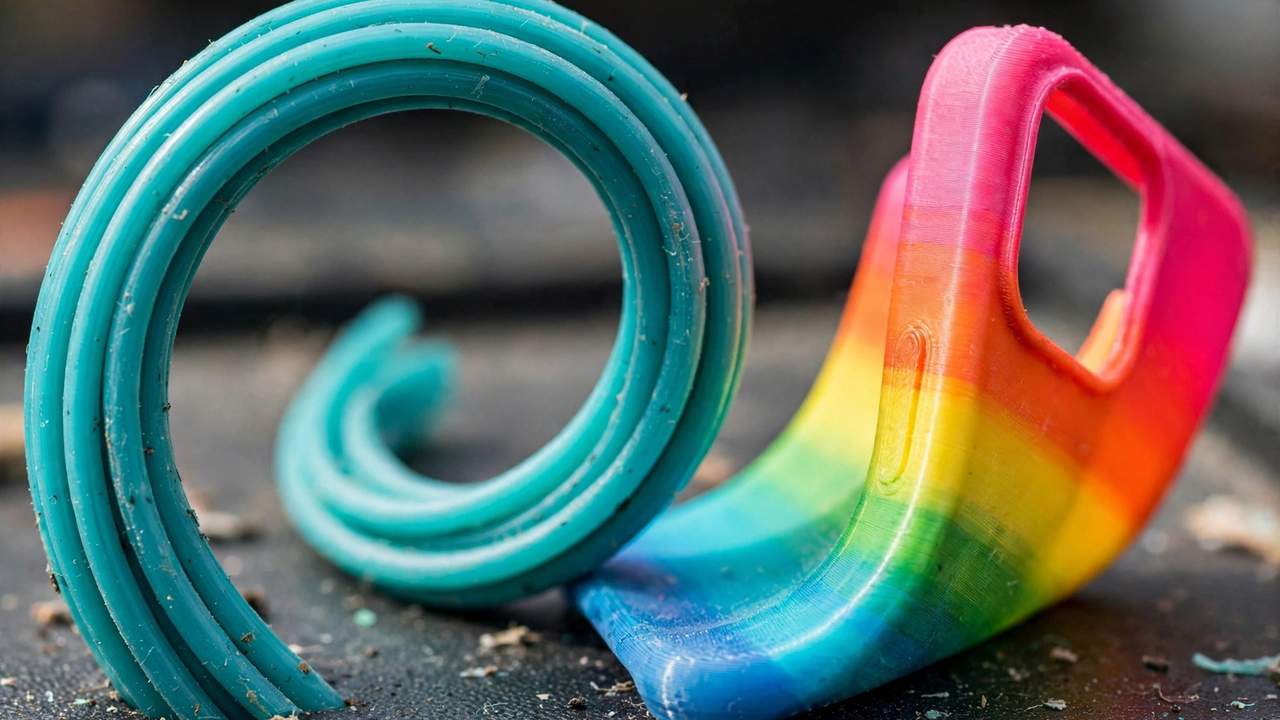
TPU — thermoplastic polyurethane — is the filament that turns your 3D printer into a rubber factory. Phone cases, gaskets, watch straps, shoe soles, vibration dampeners: if it needs to bend, stretch, or absorb impact, TPU is your material. But it also has a reputation as one of the trickiest filaments to print, and that reputation is earned. This TPU filament printing guide gives you the settings and techniques that actually work, so you can skip the weeks of failed prints most makers go through.
The core challenge is simple: TPU is flexible, which means it doesn’t behave like rigid filament in the extruder. Push it too fast and it buckles instead of feeding. Retract it too aggressively and it jams. But get the settings right and TPU prints beautifully — let’s dial it in.
TPU Filament Printing Guide: Understanding Shore Hardness
Not all TPU is equally flexible. Hardness is measured on the Shore scale, and the number tells you what you’re dealing with:
- 85A and softer: very soft and rubbery — think phone case bumpers and squishy toys. Hardest to print; demands slow speeds (15–20mm/s) and a direct-drive extruder.
- 95A (the standard): the sweet spot most spools you’ll buy. Flexible but manageable — bends without flopping. This is where beginners should start.
- 98A / 64D and firmer: semi-flexible — more like a tough plastic with give. Easiest to print; some firmer grades even work on Bowden setups.
If you’re new to flexibles, buy 95A. It’s the most forgiving grade, the most widely available, and it handles the majority of practical applications. Save the ultra-soft stuff for after you’ve got the basics down.
TPU Filament Printing Guide: The Golden Rule — Print Slow
Speed is the number one cause of TPU failure, full stop. Unlike rigid filament, TPU compresses and buckles when the extruder tries to push it faster than it can melt and flow. The filament folds up in the extruder path instead of advancing into the nozzle, creating a tangle above the drive gear that’s miserable to clear.
Recommended speeds:
- First prints: 15–20mm/s. Yes, really that slow. Get a successful print first, then speed up.
- 95A general printing: 20–30mm/s once dialled in; some well-tuned direct-drive setups manage 40mm/s.
- 85A and softer: 15–20mm/s, and don’t push it.
- Firmer grades (98A+): 30–80mm/s is achievable.
Increase speed in 5mm/s increments only after confirming reliable extrusion at each step. The temptation to crank it up is strong — resist it. A slow successful print beats a fast failed one every time, and TPU punishes impatience more than any other common filament.
This TPU filament printing guide focuses on settings proven on real machines, not just in theory.
Temperature Settings That Work
TPU needs enough heat to flow freely — its viscosity is higher than PLA’s, and under-heating causes under-extrusion that looks like a partial clog.
- Nozzle temperature: 210–250°C. Start at 230°C for 95A. If you see excessive stringing, drop 5°C at a time. Softer grades (85A) often like the higher end (220–235°C); firmer grades print fine cooler.
- Bed temperature: 30–60°C. TPU sticks aggressively to most surfaces — sometimes too well. On PEI or glass, keep the bed on the cooler side or use a release agent (glue stick), or you’ll tear the print — or the bed coating — trying to remove it.
- First layer: print it slower (15–20mm/s) and slightly hotter (+5°C on the nozzle) for reliable adhesion.
Run a temperature tower for your specific spool — brands vary, and the 10 minutes it takes will save you hours of guessing. Manufacturer guidance like Raise3D’s TPU material page confirms these ranges across their tested profiles.
Retraction: Less Is More
Here’s where TPU breaks the habits you learned with PLA. Aggressive retraction — the standard fix for stringing — causes flexible filament to jam or deform inside the extruder. With TPU, retraction is the enemy as often as it’s the solution.
- Retraction distance: 0–2mm for direct drive (start at 0.5–1mm)
- Retraction speed: 15–30mm/s — slow and gentle
- Consider disabling retraction entirely for your first test prints, then add the minimum that controls stringing
Some stringing with TPU is normal and acceptable — it’s far easier to clean up fine hairs with a quick heat-gun pass than to clear a jammed extruder. Don’t chase zero stringing at the cost of reliability.
Drying your spool first is the most overlooked step in any TPU filament printing guide.
Direct Drive vs Bowden: What You Need
This is non-negotiable for soft TPU: you need a direct-drive extruder, where the motor sits right above the hotend with minimal filament path. The short, constrained path is what prevents buckling.
Bowden setups — where the extruder motor sits remotely and pushes filament through a long PTFE tube — only work reliably with the firmest TPU grades, and even then only with a short tube (under 400mm), tight fittings with no gaps, and speeds under 30mm/s. Attempting soft TPU on a Bowden printer is the most common beginner mistake in flexible printing.
Good news: many modern printers ship with direct drive standard (Bambu Lab machines, Creality’s Sprite extruder models, Prusa MK4). If you’re on an older Bowden machine like a stock Ender 5 Plus, a direct-drive conversion is the upgrade that unlocks TPU — our Ender 5 Plus upgrades guide covers exactly that mod.
One Bambu-specific note: the AMS (Automatic Material System) is not compatible with flexible TPU — the filament path is too long and constrained. Load TPU on the external spool holder only.
Drying TPU: Non-Negotiable
TPU is among the more moisture-sensitive filaments — not as bad as nylon, but it absorbs humidity far faster than PLA or PETG. Wet TPU sizzles at the nozzle, prints with a fuzzy surface, and strings horribly.
Dry TPU at 55–70°C for 4–8 hours before printing, and seriously consider printing directly from a dry box or dryer. Even 12 hours in a humid room can degrade print quality noticeably. In Australian coastal humidity, “I’ll dry it tomorrow” means “I’ll re-dry it tomorrow.” Our filament drying guide has the full temperature chart and storage methods.
Cooling, Flow Rate, and Fine Tuning
A few more settings that matter:
- Cooling fan: 40–100% after the first layer (keep it at 0% for layer one to ensure bed adhesion). Higher fan improves detail and reduces stringing; too much can weaken layer bonding on large parts.
- Flow rate: TPU often wants slightly less flow than rigid filaments — try 93–96% extrusion multiplier and calibrate with a test cube.
- Layer height: 0.15–0.25mm is the sweet spot. Very fine layers with TPU increase print time dramatically without much benefit.
- Combing / avoid crossing perimeters: enable in your slicer to reduce stringing without touching retraction.
- Slow down for overhangs: TPU’s flexibility makes overhangs droopier than PLA. Extra cooling and reduced speed on overhang layers help enormously.
What to Print First: Beginner-Friendly TPU Projects
Don’t start with a phone case — thin walls and tight tolerances are advanced. Build up:
- A simple gasket or washer — flat, forgiving, immediately useful
- Cable clips or cord organisers — flexible is a feature here, and tolerances are loose
- A watch strap — introduces curves and holes without tight fits
- RC car tyres — fun, functional, and TPU’s grip is perfect for it
- Then the phone case — by now you know your settings and your printer
Each step teaches you something about how TPU behaves. By the time you attempt the phone case, you’ll have the confidence — and the dialled-in profile — to nail it.
Troubleshooting Common TPU Problems
Filament buckling/jamming in the extruder: you’re printing too fast, retraction is too aggressive, or the extruder path has too much play. Slow down, reduce retraction, check for gaps in the filament path.
Excessive stringing: usually temperature too high or filament too wet. Drop nozzle temp 5°C, dry the spool, and accept that some fine stringing is normal with TPU.
Under-extrusion: temperature too low, speed too high, or a partial clog from earlier heat damage. Increase temp slightly, slow down, cold-pull the nozzle.
Print welded to the bed: bed too hot or no release agent. Lower bed temp, use glue stick as a release layer on PEI/glass, and remove prints while the bed is still slightly warm.
Layers separating: under-extrusion or too much cooling. Check flow rate, reduce fan slightly, ensure the filament is dry.
TPU Brands Worth Trying in Australia
Not all TPU spools are equal. Inconsistent diameter or poor winding turns an already challenging material into a nightmare. Brands with a solid reputation among Australian makers include eSUN, Overture, and Polymaker — all readily available from local resellers, typically AUD $35–$50 per kilo. Ninjatek (the original flexible filament brand) is excellent but pricier.
When trying a new brand, print a temperature tower first — don’t assume your old profile transfers. Diameter consistency matters more with TPU than PLA because the flexible filament amplifies any variation into visible extrusion issues. And buy from AU stock where possible: TPU that spent weeks in a shipping container may arrive pre-moistened, so a fresh local spool plus an initial dry is the safest start.
Avoid no-name ultra-cheap TPU. The savings vanish the first time a badly wound spool tangles mid-print and ruins six hours of work. This is one material where brand reputation genuinely correlates with print success.
Storing TPU Long-Term
TPU’s moisture appetite means storage discipline matters more than with PLA. The rules:
- Vacuum-seal between uses. Don’t leave TPU on the printer “for tomorrow” — tomorrow becomes next week, and the spool is damp. Bag it with fresh desiccant every time.
- Desiccant is mandatory, not optional. Standard silica gel works, but rechargeable indicating beads (orange-to-green) let you see when they’re spent.
- Consider a dry box as permanent housing. Many serious TPU users store the spool in the dry box it prints from — the spool never sees ambient air at all.
- Re-dry on a schedule. If a TPU spool has been open for more than a week in humid conditions, assume it needs drying before the next important print. A quick 4-hour refresh cycle is cheap insurance.
Beyond Basics: What TPU Unlocks
Once you’ve mastered standard TPU printing, the material opens doors that rigid filaments can’t:
- Functional prototypes: gaskets, seals, bumpers, and vibration mounts that actually behave like their real-world counterparts.
- Wearables: watch straps, VR headset padding, shoe insoles — TPU’s skin-friendliness and flexibility make it ideal.
- RC and robotics: tyres, treads, grippers, and suspension components where grip and shock absorption matter.
- Composite prints: combining rigid PLA structural parts with TPU flexible joints in multi-part assemblies (printed separately and joined) creates mechanisms no single material can achieve.
- Food-adjacent applications: TPU’s chemical resistance suits it to seals and gaskets in non-critical applications — though always verify food-safety for your specific use case rather than assuming.
TPU rewards patience like no other filament. The makers who push through the learning curve end up with a capability — true flexible, functional parts — that sets their work apart from everyone printing rigid trinkets. Stick with it, keep your speeds low, and enjoy the deeply satisfying moment your first perfect flexible print comes off the bed.
Frequently Asked Questions
What temperature should I print TPU at?
Start at 230°C nozzle and 40–50°C bed for standard 95A TPU. Adjust in 5°C steps based on stringing and layer adhesion. Softer grades (85A) often need 220–235°C.
Can I print TPU on a Bowden printer?
Only the firmest grades (98A+), with a short Bowden tube under 400mm and speeds below 30mm/s. For 85A–95A TPU, a direct-drive extruder is effectively required.
Why does my TPU keep jamming?
Almost always speed or retraction: print slower (15–30mm/s), reduce retraction to 0–2mm, and check for play in the extruder filament path. Wet filament also jams more readily — dry the spool.
Can I use TPU in the Bambu Lab AMS?
No. The AMS filament path is too long and constrained for flexible filament. Load TPU on the external spool holder instead.
How do I stop TPU stringing?
Dry the filament, drop nozzle temperature 5°C at a time, enable combing in your slicer, and accept minor stringing — a quick heat-gun pass cleans it up. Don’t increase retraction aggressively; it causes jams.