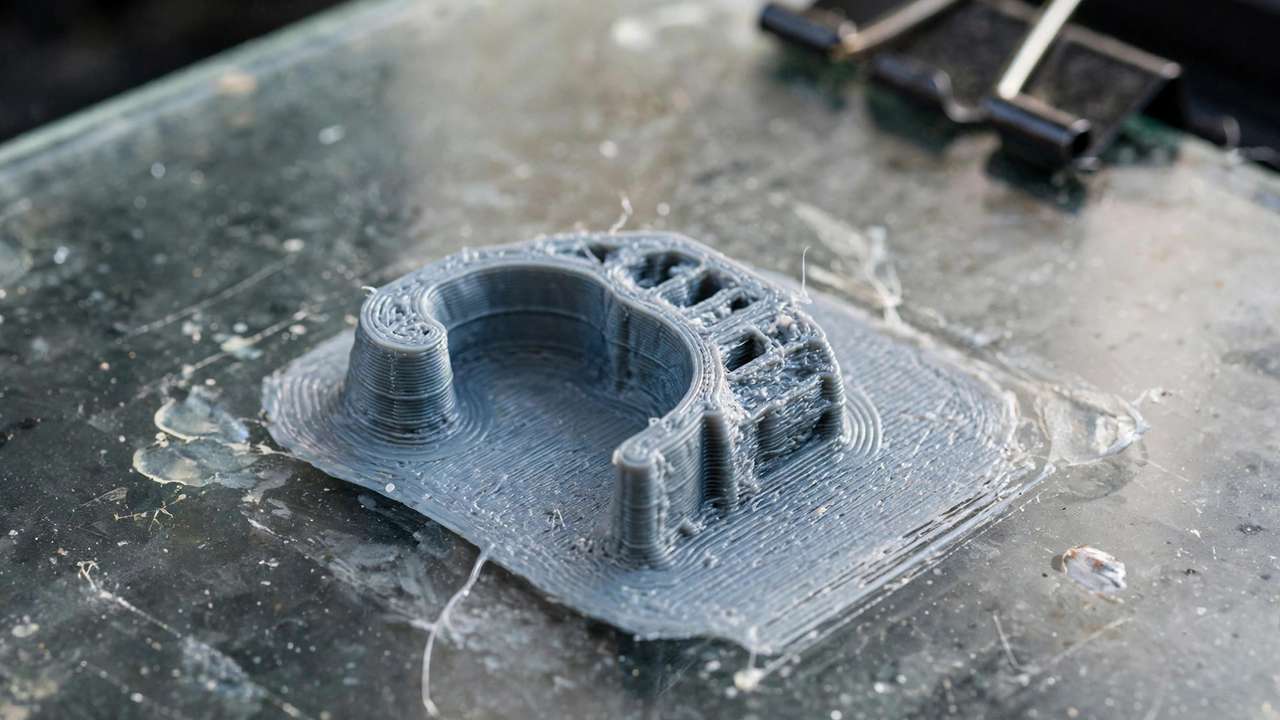
Nothing kills a print — and a mood — like coming back to find your model detached from the bed, dragged around by the nozzle, or curled up at the corners like a potato chip. Bed adhesion problems are the single most common failure in 3D printing, and the frustrating part is they have a dozen possible causes. This guide works through every one of them, in the order you should check, so you can fix bed adhesion 3D printing problems systematically instead of changing five settings at once and hoping.
The golden rule of troubleshooting adhesion: change one thing at a time, and always start with the mechanical basics before touching slicer settings. Ninety percent of adhesion failures are bed levelling, bed cleanliness, or temperature — not exotic slicer parameters.
Step 1: Level the Bed (Yes, Even With Auto-Levelling)
Auto bed levelling compensates for an uneven bed — it doesn’t fix a bed that’s wildly out of tram. If your printer has manual levelling knobs plus a probe (like many Enders), do a rough manual tram first: heat the bed to printing temperature, home the printer, then adjust the knobs so a piece of paper drags slightly under the nozzle at all four corners and the centre.
For printers with fully automatic levelling (Bambu, Kobra 2 series, Neptune 4), run the auto-levelling routine with the bed and nozzle at printing temperature — metal expands when hot, and levelling cold gives you a mesh that doesn’t match reality. If your printer lets you view the bed mesh, look at it: variations under 0.2mm are fine; anything bigger means the bed itself may be warped and need shimming or replacement.
After any levelling, always set your Z-offset correctly. Too high and the filament won’t squish into the bed (poor adhesion); too low and you’ll gouge the build surface. The perfect first layer looks slightly flattened — round strands sitting on the bed mean the nozzle is too high. Our calibration guide covers Z-offset tuning in detail.
Step 2: Clean the Bed (Fix Bed Adhesion 3D Printing Problems the Easy Way)
Fingerprints are the silent killer of bed adhesion. The oils from your skin create invisible patches where filament simply won’t stick, and the maddening part is the print sticks everywhere except where you touched it. If your adhesion problems started suddenly after handling the bed, this is almost certainly the cause. The simplest way to fix bed adhesion 3D printing newcomers can try is right here: a full soap-and-water wash of the build surface.
The cleaning protocol depends on your surface:
- PEI (textured or smooth): Wash with warm water and dish soap, rinse well, air dry. For stubborn residue, wipe with 90%+ isopropyl alcohol. Avoid touching the surface after cleaning — handle by the edges.
- Glass: IPA wipe is usually enough. For deep cleaning, dish soap and water. Glass benefits enormously from adhesives (see below).
- BuildTak / textured stickers: IPA wipe only — soap and abrasives damage the coating. Replace when the texture wears smooth.
- Magnetic flexible beds: Same as PEI, but never use acetone or abrasive pads.
How often? A quick IPA wipe every few prints, a full soap wash when adhesion degrades. If you’re in a humid climate — most of coastal Australia qualifies — moisture on the bed surface can also contribute, so wipe down before important prints. Our humid weather guide covers the broader moisture battle.
Step 3: Dial In Temperatures
Temperature is the second most common culprit, and it interacts with everything else. The rules:
- Bed too cold: the most common temperature failure. PLA generally wants 50–60°C on the bed; PETG wants 70–80°C; ABS/ASA need 90–110°C. If you’re at the bottom of the range, go up 5°C.
- Bed too hot: less common, but an overheated bed keeps the bottom layers soft, causing “elephant’s foot” (squished-out first layers) rather than lifting. If your prints stick too well and the base is flared, drop 5°C. Our elephant’s foot fix covers this specifically.
- Nozzle too cold: under-extruded first layers don’t bond properly. If the first layer looks thin or patchy, bump the nozzle up 5°C.
- First layer too fast: not temperature, but related — slow the first layer to 20–30mm/s. Speed and temperature trade off against each other.
One underrated trick: let the bed “heat soak” for 5 minutes after it reaches temperature before starting the print. The surface temperature lags behind the sensor reading, especially on thicker beds, and starting too soon means printing on a bed that’s cooler than you think.
Step 4: Fix Your First Layer Settings
Once the hardware is right, the slicer settings for the first layer do the rest:
- First layer height: 0.2–0.28mm for a 0.4mm nozzle. Thicker first layers are more forgiving of minor bed imperfections.
- First layer line width: 120–150% of nozzle diameter. Wider lines = more surface contact = better grip.
- First layer speed: 20–30mm/s. Slow down; this is the foundation of everything.
- First layer fan: OFF. Cooling the first layer before it bonds is sabotage. Most slicers disable the fan for the first 2–3 layers by default — make sure yours does.
- Initial layer flow: 100–105%. A tiny bit of over-extrusion on layer one helps fill microscopic gaps.
Print a first-layer test (a large single-layer square) and inspect it: lines should merge into a solid sheet with no gaps, and the sheet should be difficult to peel off when cool. If you can see through between lines, something’s still off — usually Z-offset.
Step 5: Use Adhesion Helpers (Brims, Rafts, and Glue)
Sometimes the geometry fights you — tall narrow prints, tiny contact areas, sharp corners. That’s what adhesion helpers are for:
- Brim: a flat ring of filament around the model’s base that increases bed contact area. Use 5–10mm brims for prints with small footprints. Easy to remove, minimal waste. This is the default helper — try it first.
- Raft: a full sacrificial platform under the print. Overkill for most situations, but useful for severely warped beds or printers you can’t level properly. Wastes filament and hurts bottom-layer finish — a last resort.
- Skirt: doesn’t help adhesion at all — it just primes the nozzle. Don’t confuse it with a brim.
For adhesives, the hierarchy of effectiveness:
- Glue stick (PVA): the classic. A thin, even layer on glass or smooth PEI dramatically improves PLA and PETG adhesion. Washes off with water. The purple disappearing kind lets you see coverage.
- Hairspray: the old-school choice — a light mist on glass works surprisingly well for PLA and ABS. Use unscented, and ventilate.
- Specialist bed adhesives (Magigoo, Bed Weld, etc.): engineered for specific materials. Magigoo’s original formula for PLA/PETG/ABS is excellent; they also make variants for engineering filaments. Worth it if you print a lot.
- ABS slurry: dissolved ABS in acetone, painted on the bed. Extremely effective for ABS printing, but messy and the fumes are unpleasant. Mostly superseded by PEI + enclosure these days.
One counterintuitive tip: on textured PEI, glue stick can actually act as a release agent for PETG — preventing it from bonding so aggressively it damages the coating. Adhesives aren’t always about more stick; sometimes they’re about controlled stick.
Step 6: Match the Surface to the Material
Not all bed surfaces suit all filaments:
- PLA: sticks to almost anything. Textured PEI is the sweet spot — great grip when hot, easy release when cool.
- PETG: bonds aggressively to bare glass and smooth PEI (can damage them). Use textured PEI, or glue stick as a release layer on smooth surfaces.
- TPU: sticks well to PEI but can be hard to remove. A thin glue layer helps release. Print slowly. Our TPU guide has the full settings.
- ABS/ASA: needs a hot bed (100°C+) and an enclosure. PEI works; glass + ABS slurry is the traditional combo. Without an enclosure, don’t bother — warping will defeat any adhesive.
- Nylon: notoriously difficult. Garolite (G10/FR4) beds are the enthusiast choice; glue stick on PEI is the pragmatic one. Enclosure essential.
If you’re still on the stock surface that came with a budget printer, a $25–35 textured PEI spring-steel sheet is the single best adhesion upgrade you can buy. It transforms the experience more than any slicer tweak.
Step 7: Control the Environment
Drafts are the invisible enemy. A cold air current across the bed — from an air conditioner, an open window, a ceiling fan — cools one side of the print faster than the other, and differential cooling is what causes warping and lifting. In Australian homes, the split-system aircon blasting across the room is a classic culprit.
Fixes, in order of effort:
- Move the printer away from direct airflow. Even a metre helps.
- Turn off ceiling fans in the printing room.
- For ABS/ASA/nylon: use an enclosure. Even a cardboard box over the printer (keeping electronics cool) works as a stopgap. Our enclosure guide covers proper options.
- For PLA/PETG in air-conditioned rooms: a simple draft shield (a cardboard barrier on the windy side) is often enough.
The Systematic Checklist (Print This)
When a print fails to stick, work through this in order. Stop at the step that fixes it:
- Is the bed clean? (IPA wipe or soap wash)
- Is the bed level and Z-offset correct? (First-layer test)
- Are bed and nozzle at the right temperatures? (Check against filament specs)
- Is the first layer slow enough? (20–30mm/s)
- Is the part cooling fan off for the first layers?
- Does the model need a brim? (Small footprint, tall, or sharp corners → yes)
- Would an adhesive help? (Glue stick is the safe default)
- Is there a draft? (AC, fan, open window)
- Is the filament dry? (Wet filament adheres poorly — listen for popping)
- Is the bed surface worn out? (Smooth PEI, scratched glass → replace)
Work the list methodically and most makers fix bed adhesion 3D printing headaches within an afternoon — it solves 99% of adhesion failures. The remaining 1% is usually a genuinely warped bed or a dying thermistor lying about temperatures — both hardware problems with hardware solutions.
When to Replace Your Build Surface
Build surfaces wear out, and a worn surface causes adhesion failures that no amount of cleaning or levelling will fix. Signs it’s time:
- PEI: the texture looks smooth and shiny in the centre where most prints sit, prints that used to stick now release mid-print, or visible scratches and gouges from nozzle crashes. Textured PEI typically lasts 6–18 months of regular use.
- Glass: chips at the edges, visible scratches, or a surface that’s become mysteriously non-stick despite cleaning. Glass lasts longer than PEI but eventually the micro-texture wears.
- BuildTak / stickers: bubbling, peeling edges, or a surface that’s gone completely smooth. These are consumables — expect 3–6 months.
- Magnetic beds: loss of magnetism (prints shift during printing) or a warped steel sheet that no longer sits flat.
Replacement is cheap — $25–40 AUD for a quality PEI spring-steel sheet — and it’s one of those maintenance items that’s easy to postpone past the point of usefulness. If you’ve worked through the entire checklist above and adhesion is still unreliable, the surface is the prime suspect. Don’t spend weeks fighting slicer settings when a $30 sheet solves it.
Fix Bed Adhesion 3D Printing Failures in Tricky Situations
- Tall, narrow prints (vases, towers): these act as levers — any wobble multiplies at the base. Wide brim (10–15mm), slow speeds, and consider printing with a raft for the most precarious ones. Some makers add custom “support wings” in the slicer — thin fins around the base that get cut off after.
- Large flat prints: maximum warp risk. Heated bed at the top of the material’s range, enclosure or draft-free room, brim, and patience. For very large PLA prints, some makers reduce bed temp slightly after the first few layers to reduce differential stress.
- Small, detailed prints: tiny contact area means minimal grip. Slow right down (15–20mm/s first layer), use a brim even if it seems excessive, and make sure the bed is scrupulously clean — a fingerprint under a 10mm footprint is catastrophic.
- Multi-part assemblies: when parts must fit together, inconsistent first layers (elephant’s foot) ruin tolerances. Get the first layer dialled before printing interlocking parts — a flared base on a peg means it won’t fit the hole.
Frequently Asked Questions
Why do my 3D prints keep coming off the bed halfway through?
Mid-print detachment is usually warping (corners lifting from differential cooling) or a draft. Add a brim, check for airflow from air conditioning, and make sure the bed temperature is high enough for your filament. For ABS/ASA, an enclosure is essentially mandatory.
Should I use glue stick on a PEI bed?
For PLA, usually unnecessary on a clean textured PEI bed. For PETG, a thin glue layer acts as a release agent to prevent damage to the coating. For tricky prints in any material, glue stick is a safe adhesion booster.
What bed temperature is best for PLA adhesion?
50–60°C works for most PLA on PEI. If you’re getting lifting at 50°C, try 60°C. Going above 65°C for PLA risks elephant’s foot without improving adhesion further.
Why does my first layer look good but the print still warps?
Good first layer + later warping points to environmental causes: drafts, uneven cooling, or insufficient bed temperature for the material. It’s rarely a levelling issue if layer one was perfect. Check airflow and consider an enclosure or draft shield.
How do I know if my bed is warped?
Run auto bed levelling and inspect the mesh visualisation — variations over 0.2mm indicate warping. Physically, lay a steel ruler across the bed and look for gaps. Minor warping is compensated by mesh levelling; severe warping needs shimming with aluminium foil or bed replacement.
What’s the quickest way to fix bed adhesion 3D printing newcomers should try first?
Wash the build plate with warm water and dish soap, rinse, and air dry. Fingerprint oils are the most common cause of sudden adhesion loss, and a proper wash fixes it in minutes — no settings changes needed.